 Roughing and dry-brushing techniques add life to your carving without overpowering the wood
By Lora S. Irish
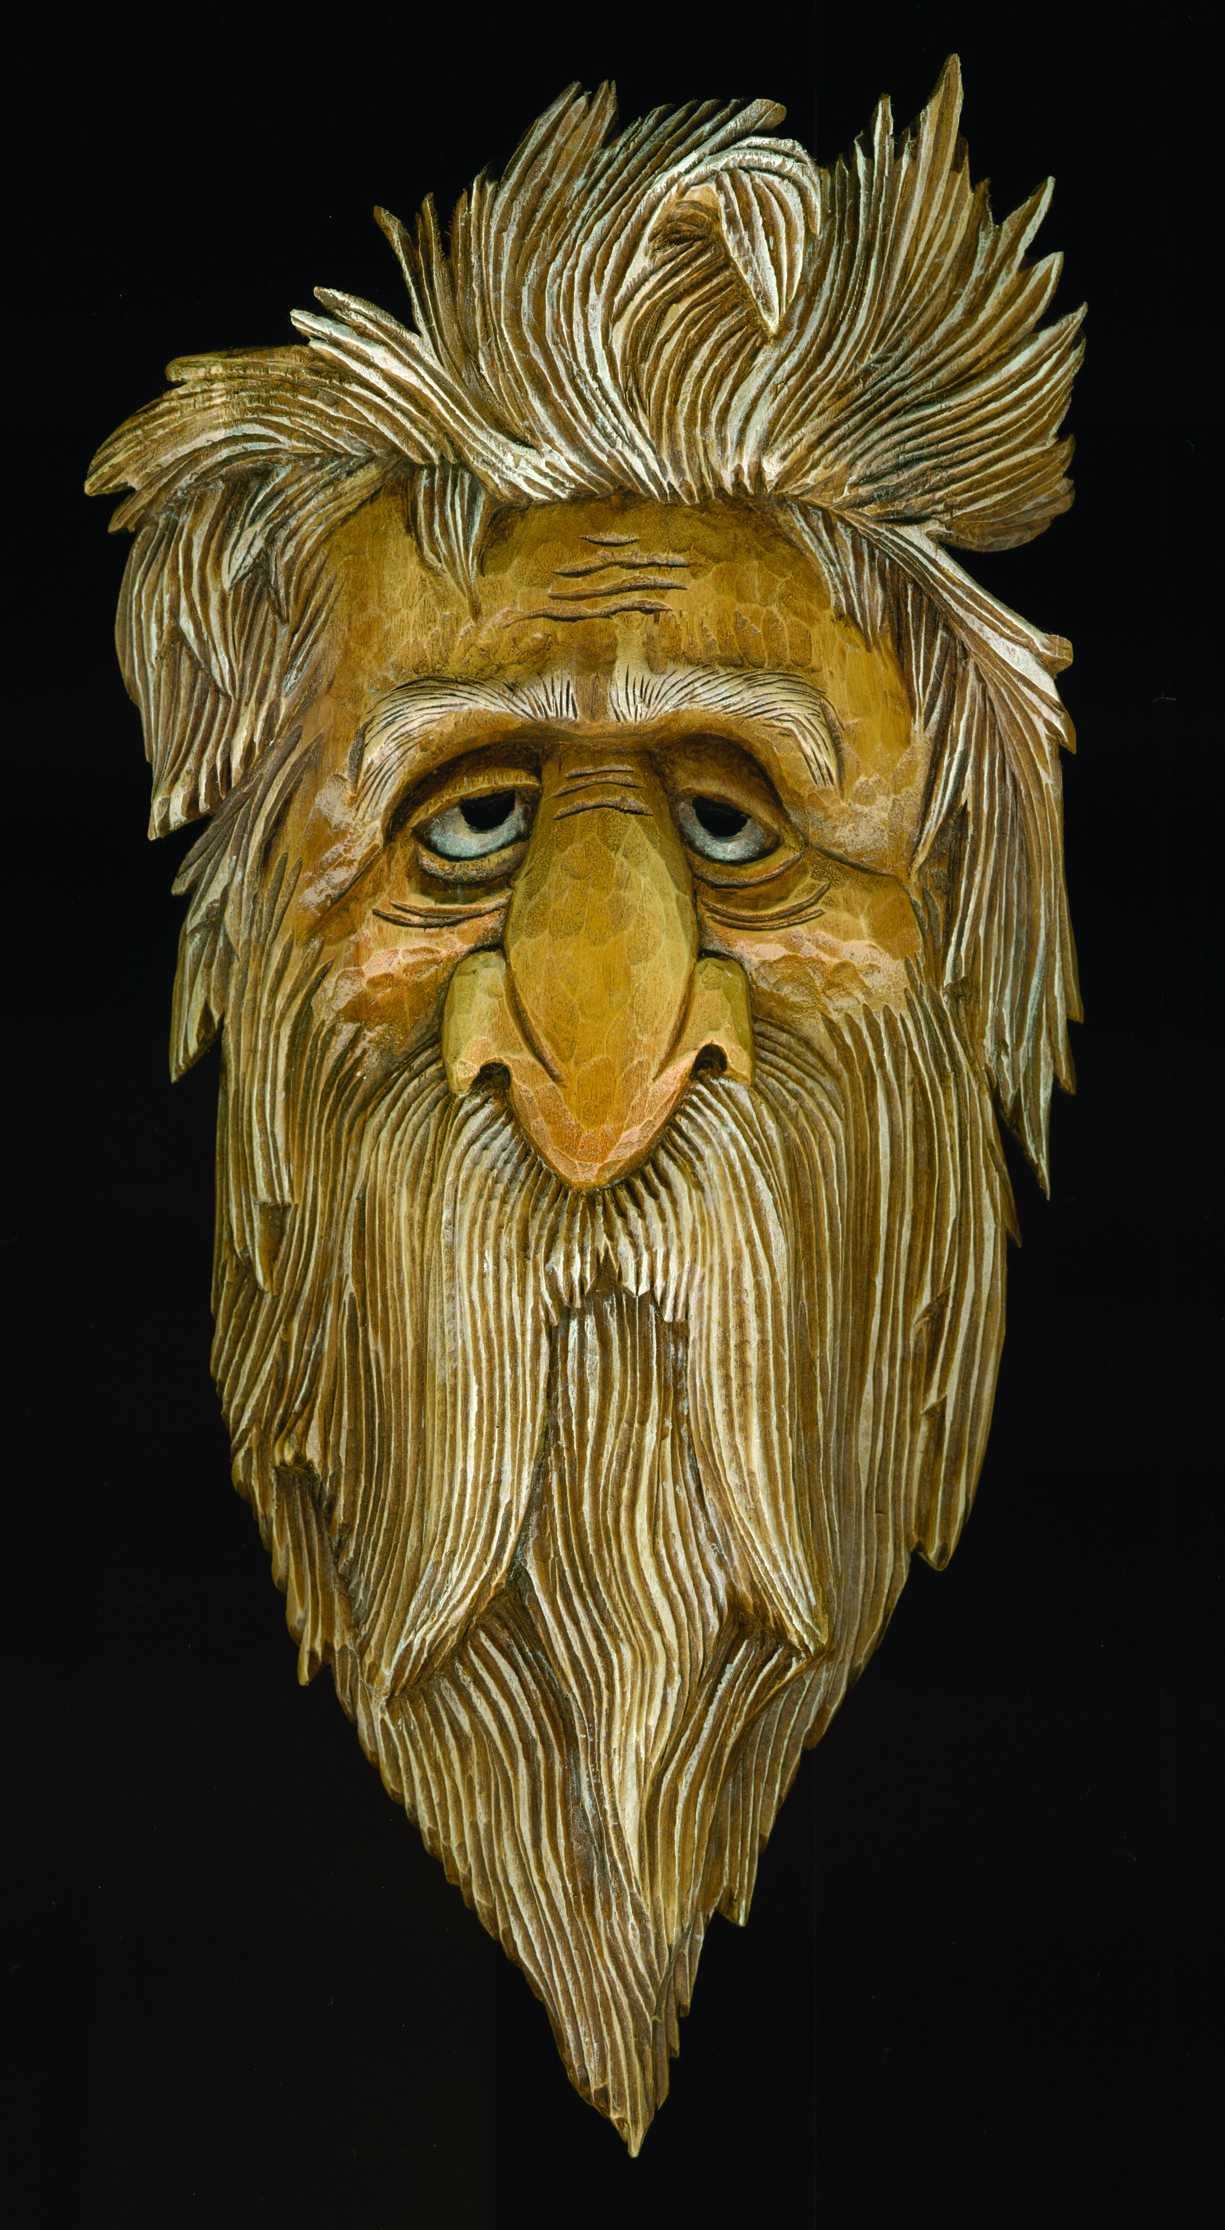
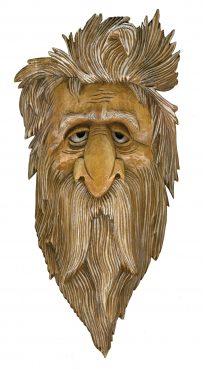
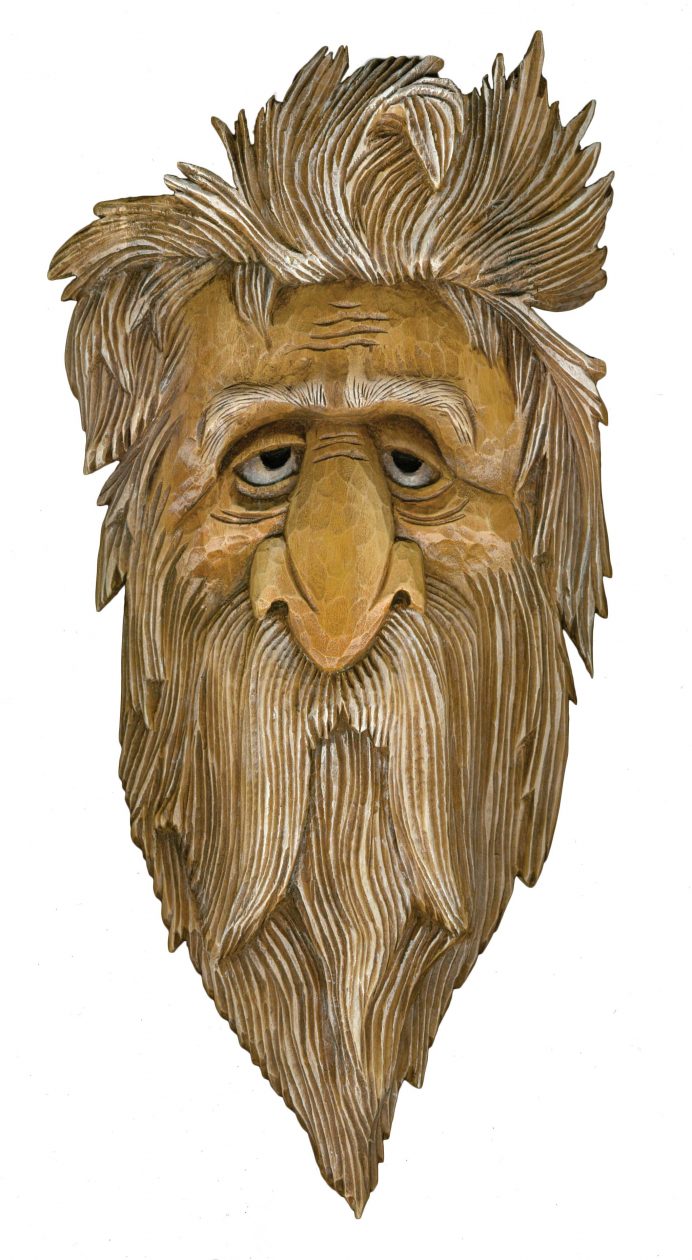
I use stain, oil paint, and acrylic paint to enhance projects without obscuring the wood grain. To demonstrate these techniques I chose this fun wood spirit, whom I call Woodie, that is carved from basswood. While basswood is great for carving, it can be a bit bland visually. After completing your carving, prepare for the finish by removing any remaining chips, fibers, or dust with a stiff brush and a lint-free cloth.
Apply a Base Coat
Create a colorful base coating on the wood spirit using acrylic paints. On your palette, mix approximately three parts titanium white with one part raw sienna. You want a mixture close to the original basswood color. Add a couple of drops of water to thin the mixture slightly so it easily fills the deep grooves and tight joint lines.
Using a large ox-hair brush, scrub one coat of the mixture onto the entire work. Allow it to dry for one-half hour.
When the first coat is dry, apply a second coat of the base mix. I turn the work upside down to get color into areas the first coat may have missed. Allow the second coat to dry well.
Add an equal part of raw sienna to the remaining base-coat mixture. Load your large ox-hair brush with the new mixture and blot off any excess color. Working vertically, pull several random streaks of color across the carving.
Repeat the streaking step, using unmixed raw sienna. Mix a small amount of burnt umber to the raw sienna and add a few more streaks. For final streaking, use titanium white.
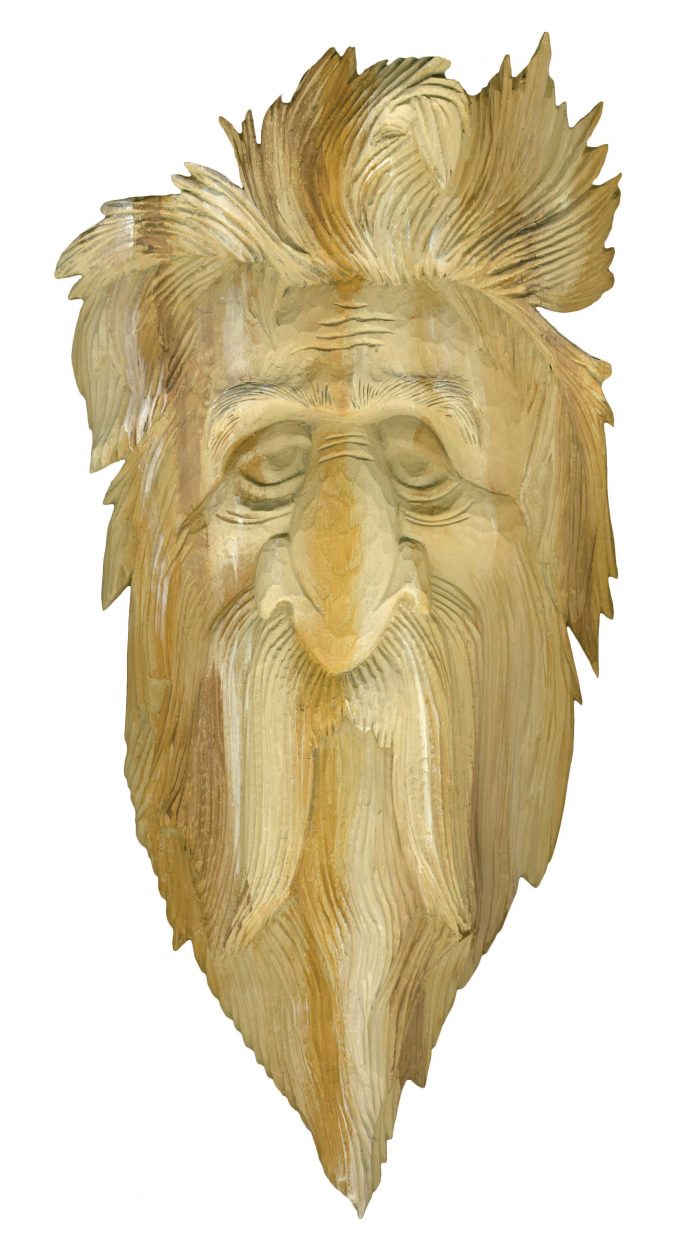
Allow the streak coating to dry well. Your carving should be colorful at this point, with changing streaks of color throughout the work.
Applying the Oil Stain
When the base coats of acrylic are dry, apply several light coats of polyurethane spray sealer to the entire work. Let each coat dry well before applying the next. Follow the directions on the spray can.
In a small pan, mix one part burnt umber oil paint with one-half part linseed oil to create a stain. The mixture should be thin, but not too runny.
Using a large soft staining brush, apply one coat of the mixture over your work. Work the oil stain into the deep crevices.
After covering the work with oil stain, wipe the piece using a lint-free cloth. As you wipe, the stain will saturate your cloth. Refold the cloth so you are using a clean area to remove the excess oil stain. Your work should have a light- to medium-brown look on the high areas with heavy staining in the deep crevices.
Slightly moisten a clean cloth with turpentine. Wrap the cloth around one finger for support and lightly rub it over the high areas of the carving to pick up the burnt umber oil stain from just the highest ridges. Allow the oil stain to dry overnight.
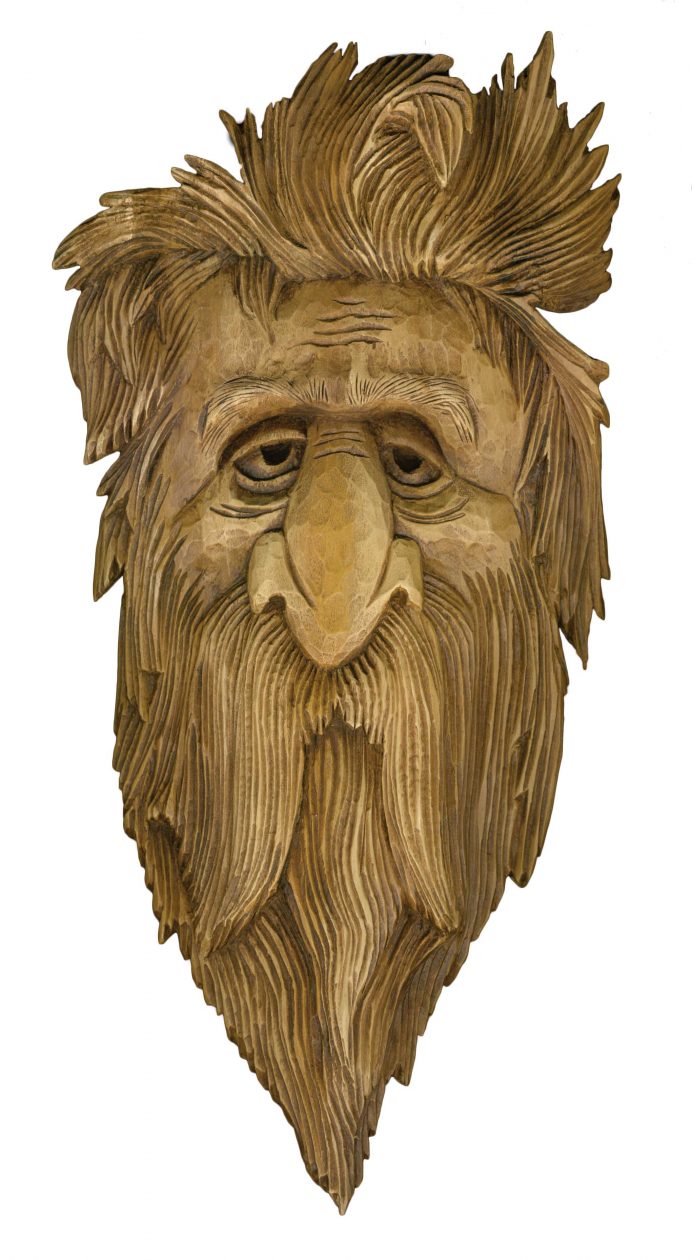
Your carving should have a wood-grain look with changing color tones that range from the base color of the wood on the highest parts to dark umber tones in the deepest crevices.
 Dry Brushing and Roughing
When the oil stain is dry, apply several light coats of polyurethane spray sealer to the entire work. Let each coat dry well before applying the next coat. Follow the directions on the spray can.
For the face coloring, place a small amount of raw sienna oil paint on a palette. Add a drop or two of linseed oil until the paint is thin, but not runny. Wrap a clean lint-free cloth around your finger and pat the cloth into the mixture. Pat most of the color off the cloth on a paper towel. Using a circular motion, rub the cloth over the skin area of your carving. A very fine coating of raw sienna will adhere to the work. You can apply several coats. Two or three coats will create a nice medium skin color.
Mix a small amount of cadmium yellow medium and cadmium red oil paints to create an orange tone. Pick some color up on a cloth-wrapped finger, blot, and then apply the color to the cheek areas and the tip of the nose. One coat may be enough, but add a second coat for a stronger blush.
Rubbing thin layers of oil paint over a stained work is called roughing. This is a great technique to use for color buildup because the color sits on top of the stain, not under it, keeping the color bright. If you need more than a few layers of color, add a layer of polyurethane spray between coats.
The hair is highlighted by dry brushing the textured surface with acrylic paints. Place a small amount of titanium white on your palette. Moisten a small soft shading brush with water and then blot the brush on a paper towel.
Pick up a small amount of titanium white on the tip of the brush. On a clean area of the palette, work the white into the brush by pulling it back and forth across the palette several times. Pull the brush across the hair area. A small amount of white will be left on the high ridges of the texture, but no white will reach the deep brown crevices. Apply one light coat of drybrushed white to all of the hair sections.
Pick a few sections of hair that you want brighter than the rest. Dry-brush a second coat of white just to these areas. I chose the mustache, eyebrows, temple hair, and his bangs. Add a third coat to just a few places and along the edges of the hair clumps. My third coat went on the eyebrows, bangs, temple hair, and on the edges of his mustache.
Painting the Eyes
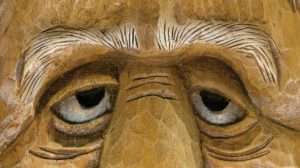 The eye area will be darkly colored from the oil stain. Apply one thin coat of titanium white on the round areas of the eyes. Add a small amount of burnt umber to the titanium white to create a medium-brown tone. Load a soft square shade brush with the mixture and blot most of the color from the brush on a paper towel. Use the lightly loaded brush to pull a shadow on the round area of the eye under the upper eyelid. This shades the eye, giving it a more natural look.
Let the paint dry thoroughly. Give your work a final coating of polyurethane.
Materials:
• Basswood: 1″ x 6″ x 10 ½” (25mm x 15.2cm x 25.4cm)
• Acrylic artist paints: titanium white, raw sienna, burnt umber
• Oil artist paints: burnt umber, raw sienna, cadmium yellow medium, cadmium red
• Polyurethane spray sealer
• Linseed oil
• Turpentine
• Paper towels
Tools:
• Band saw or scroll saw
• Straight chisel
• Round gouge
• V-tool
• Skew chisel
• Bench knife or chip carving knife
• Assorted paintbrushes of choice
• Soft lint-free cloths
• Water pans, mixing pans
• Paint palette
CLICK HERE to download the Wood Spirit Pattern.
Relief Carving Wood Spirits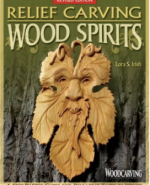 is Lora S. Irish’s definitive guide for learning relief carving. This book covers everything from transferring patterns to preparing wood and making cuts. Every element of the carving process is illustrated and clearly explained. The book is available from www.foxchapelpublishing.com for $19.99 plus S&H.
Read more great articles from  Woodcarving Illustrated Spring 2009 (Issue 46) here.