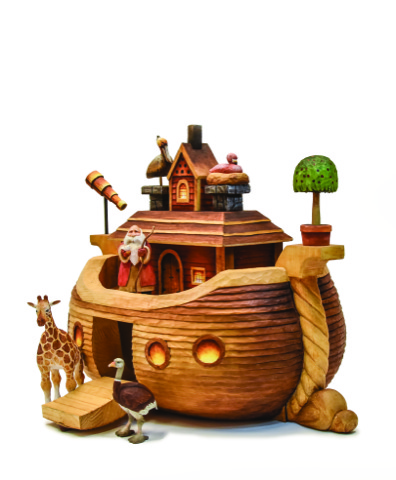
 Take your scene or play set from average to stunning by adding accessories
By Betty Padden
When you’re making any sort of carved scene, carefully planned accessories take the scene from good to great. That’s especially true for a Noah’s Ark scene. While I took some liberties with the accessories–Noah was quite the engineer and woodworker, but I don’t think he had the glass-making shaping abilities, or the iron working skills to make a telescope or a glass lantern–each accessory sets the stage, and is durable enough for children to play with.
Patterns and instructions for Noah, the giraffe, and the ostrich are available in Woodcarving Illustrated Spring/Summer 2016 (Issue 75).
CLICK HERE to download the patterns.
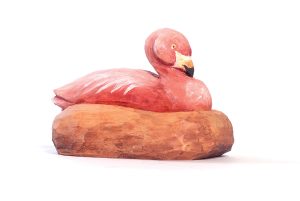 |
FlamingoCarve: Round the body and head with a 9/32″ (7mm) #11 gouge. Shape the beak by bringing the front of the head to a point. Use a 4mm #11 gouge to form and round the cheeks and neck. Cut in and round the eye area. Round the front and back of the nest. Paint: Wash the bird with a mixture of light red and white. Highlight the top of back, head, and cheeks with white; blend. Mix Alizarin crimson and light red; add shadows under cheeks and nest. Add features using thinned white and a script liner brush. Paint the beak white near the face and yellow near the tip. Blend in burnt sienna near the tip and black to the end. Apply a basecoat to the nest with thinned raw sienna. |
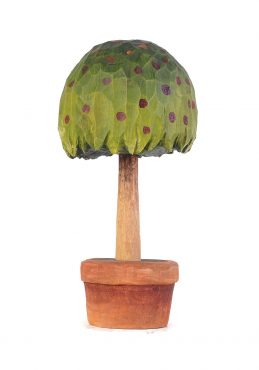 |
TreeCarve: Clamp the tree to the bench and round its top. Narrow and round the trunk. Round the outside of the pot. Draw a line to separate the rim from the pot, stop-cut along the line, and carve the pot down 1/16″ to 1/8″ (2mm to 3mm). Slant the pot slightly toward the base. Cut some grooves to simulate leafy edges. Drill a hole in the pot for the tree trunk, but do not glue the tree. Paint: Basecoat the tree trunk with thinned raw sienna. Paint the lower foliage with thinned light green (mix 1/2 part Payne’s gray and 6 parts lemon yellow). Paint the top with thinned dark green (mix 1 part lemon yellow and 2 parts Payne’s gray); blend. Mix Alizarin crimson with a tiny amount of black for the fruit. Paint the pot with thinned light red. Blend burnt umber under the rim. Paint the “dirt” black. |
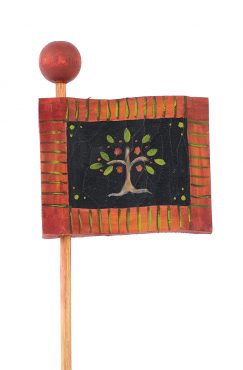 |
FlagCarve: Draw a wave pattern about 1/8″ (3mm) thick on the edge. Carve the flag to shape. Drill 9/64″ (3.5mm) holes in the top and bottom; the holes do not need to go all the way through. Add a thin dowel pole and bead finial. Paint: Use light red on the edge of the flag and the finial. Highlight the center of each edge with lemon yellow; blend. Paint the center of the flag with black acrylic. Mix raw sienna and white to form brown and paint the tree trunk. Mix light red and lemon yellow, and paint fruit. Use tree light green for the leaves and to dot the corners. Use tree dark green to paint stripes on the flag border. |
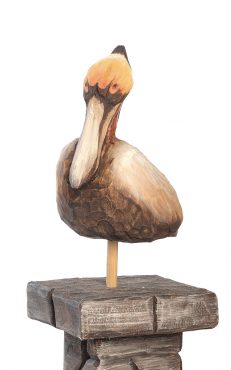 |
PelicanCarve: Thin the neck and round the body. Round the face and head, and then thin and shape the beak. Cut depressions for the eyes with a 4mm #11 gouge, and round the edges of the grooves to soften. Cut off the piece used as a handle and shape the bottom. Paint: Mix lemon yellow and burnt sienna to make golden yellow and paint the face. Blend a little white at the top of the head, and blend burnt sienna where the face meets the beak. Mix raw sienna and raw umber to make taupe and paint the body. Blend white on the shoulders and tail. Mix light taupe and paint the beak. Paint underside of body with thinned raw umber. Add dark brown to the top of the head, back of the neck, and between the beak and face. Paint the eye dark brown. Drill a hole into the bottom and mount the pelican on a slim dowel. |
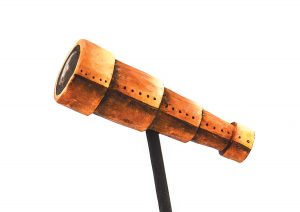 |
TelescopeCarve: Round the basswood to resemble a dowel. Draw the top rim, stop cut around it, and narrow the remaining portion. Measure 1″ (25mm) from the rim and carve the area down 1/8″ (3mm). Measure 7/8″ (22mm) from the 1″ line and measure 5/16″ (8mm) from the base. Carve down the area 1/8″ (3mm). Paint: Paint the telescope with slightly thinned lemon yellow. Add a white highlight; blend. Blend burnt sienna under the levels. Paint burnt umber along the sides of each level and blend lightly. Add “rivet” dots in burnt umber. Drill a hole into the telescope to mount it at a slant on a slim dowel. |
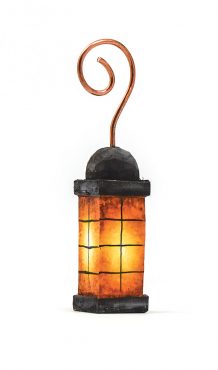 |
LanternCarve: Lower the top and center areas. Round the top portion. Paint: Paint the glass with slightly thinned lemon yellow. Add white in the lower center; stipple to blend. Blend burnt sienna at the top and bottom of the glassed area. Paint the top, bottom, and frame lines black. Add a copper wire hanger. |
Read Woodcarving Illustrated Winter/Spring 2016 (Issue 75) for more information. 