

 By Tim Jumper
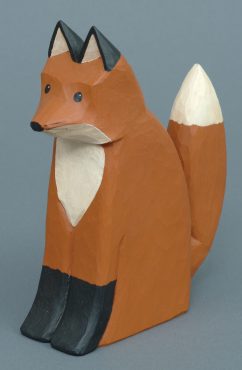
You’ll need just two knives and a couple of colors to create this folk art fox. He’s fun for Fall decorating or as a toy.
INSTRUCTIONS:
Band saw the wood for the body. Sand the bottom smooth.
Incise the leg lines on the sides and on the front. Use either a knife or a V-tool.
Chamfer the edges of the body. Use a knife. Lightly texture the surfaces with a 1″ (25mm) #2 gouge.
Cut to separate the ears. Shape the head and face.
Cut out the ear holes. Use a three-side chip cut.
Shape and texture the tail.
Drill for a 3⁄16” (5mm)-diameter dowel. Glue the tail to the body. Fill the dowel hole in the tail. When dry, smooth to match the tail surface.
Seal, paint, and finish.
MATERIALS:
Wood of choice: 2″ (51mm) x 4″ (102mm) x 7″ (178mm)
Wood of choice: 1″ (25mm) x 2″ (51mm) x 5 1⁄2” (140mm)
Dowel: 3⁄16” (5mm) x 2″ (51mm)
Elmer’s Carpenter’s Wood Filler
All-Purpose Sealer
Acrylic paints
Antiquing stain, if desired
Design Master Clear Finish
TOOLS:
Sheep’s-foot blade knife
Pen knife
#2 gouge: 1″ (25mm)
#12 V-tool: 3⁄8” (10mm) (optional)


