 Use this easy relief carving as a pin, pendant, or magnet
By Larry Spinak
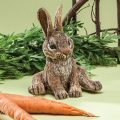
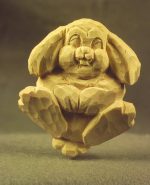
Need an Easter accessory or last minute gift? This bunny can be carved quickly and used as a pin, pendant, or magnet. Change the angles of the eyelid lines and the positions of the painted eyes to create new expressions. Unsure about carving eyes? Carve a gentle curve to show a sleeping bunny!
CLICK HERE to download the Simple Spring Bunny Pin Pattern.
Carving the Bunny Pin
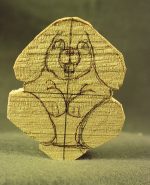 |
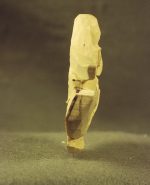
Step 1: Transfer the pattern to the wood with both the horizontal and vertical centerlines, making sure the grain runs vertically through the rabbit. Cut the perimeter with a bandsaw or scroll saw. |
 |
Step 2: On the sides, draw lines that divide the thickness of the wood in half. Mark off or highlight the waste wood to be removed behind the ears and raised feet, and in front of the tail. |
 |
Step 3: Using a carving knife, make stop cuts or notches along the sides of the rabbit’s face, under its chin, and around the ears, feet, and tail. |
 |
Step 4: Remove waste wood from behind the ears, the four feet, and in front of the tail. |
 |
Step 5: Block out the basic shapes of the head, ears, and feet. The horizontal centerlines running through the nose and front feet indicate the high areas of the carving. |
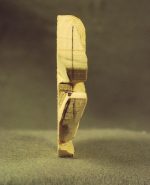 |
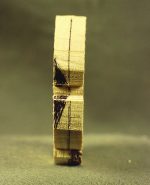
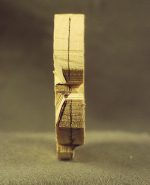
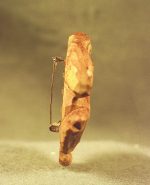
Step 6: A side view shows wood removed in the previous steps. |
 |
Step 7: Use an 8mm #3 fishtail gouge and the knife to continue blocking out the ears, eye area, muzzle, feet, and tail. |
 |
Step 8: A side view shows the results of blocking out. |
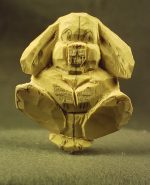 |
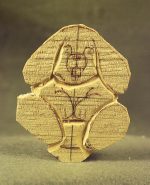
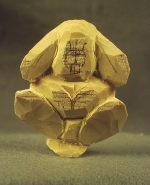
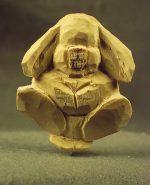
Step 9: Redraw the vertical centerline on the face and draw the details of the eyes, muzzle, feet, and tail. |
 |
Step 10: Making sure that the tip of the knife is very sharp, carve the details you drew in the previous step. Also use a 2mm #11 veiner to define the inside of the ears and around the feet, paws, and tail. |
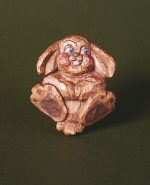 |
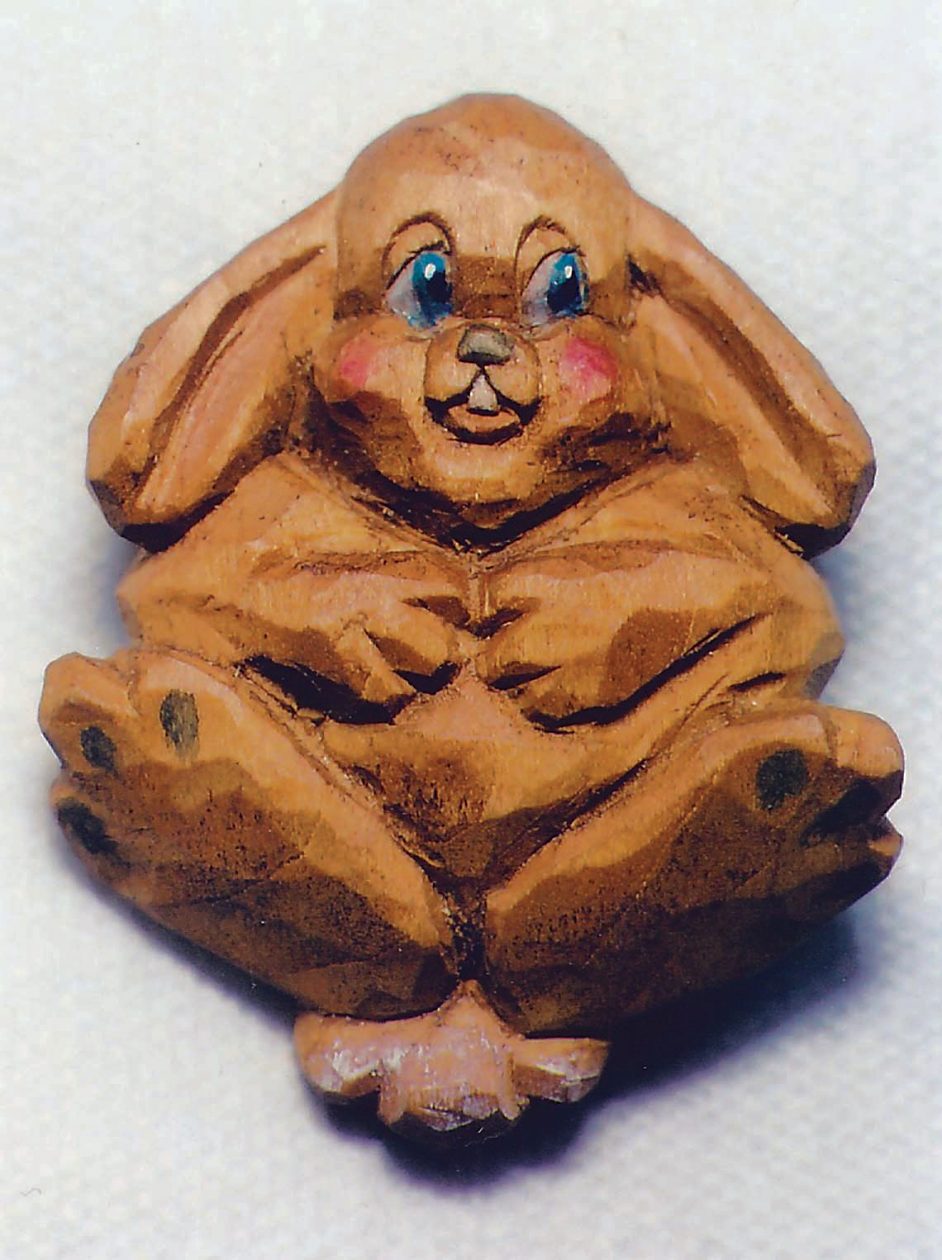
Step 11: Clean the wood (see Painting and Finishing Tips, below), seal the carving, and paint the features. The eyes are thinned white, the irises are blue, the pupils are brown, the nose is black, the tooth is white, the lip is light red, and the foot pads and toes are a black wash. Let the paint dry thoroughly. Then, wax the front and sides (not the back) of the carving. |
 |
Step 12: Use five-minute epoxy to attach the pinback. You could also epoxy a magnet to the back or insert a small screw eye into the top to use the bunny as a pendant. |
Painting and Finishing Tips
- Before painting the rabbit, I first wash the wood with warm soap and water. Scrubbing with a fingernail or vegetable brush removes dirt and oil that are transferred to the wood from the tools and hands. Scrubbing also removes “fuzzies”—small pieces of wood that develop where knife cuts come together.
- When the wood is dry, I seal it with sanding sealer to fill in the pores and keeps the paints from running up the hollow wood fibers or into adjacent colors.
- After the sealer dries, I coat the wood with water-soluble aniline dye in medium walnut. When dry, I wipe off the excess with a damp cloth. The aniline dye leaves pleasing highlights on the wood and acts as an undercoat for the artist’s watercolors I use, which I mix with the dye to tone down the colors.
- I painted this piece with the minimum. In some cases, less is more. The walnut basecoat is also the final coat. The eyes are thinned white, the irises are blue, the pupils are brown, the nose is black, the tooth is white, the lip is light red, and the foot pads and toes are a black wash.
- When the watercolors are dry, I coat the carving with paste wax (I use Briwax brand). I let the wax dry and then buff the wood with a soft cloth for a low sheen.
Materials:
- Basswood, 1/2″ (1.3cm) thick: 2 1/4″ x 3″ (5.7cm x 7.6cm)
- Sanding sealer
- Aniline dye: medium walnut
- Watercolors (artist quality) or acrylic paint: white, blue, brown, black, light red
- Paste wax, such as Briwax
- Pinback, magnet, or small screw eye
- Five-minute epoxy (optional)
Tools:
- Carving knife
- No. 3 8mm fishtail gouge
- No. 11 2mm veiner