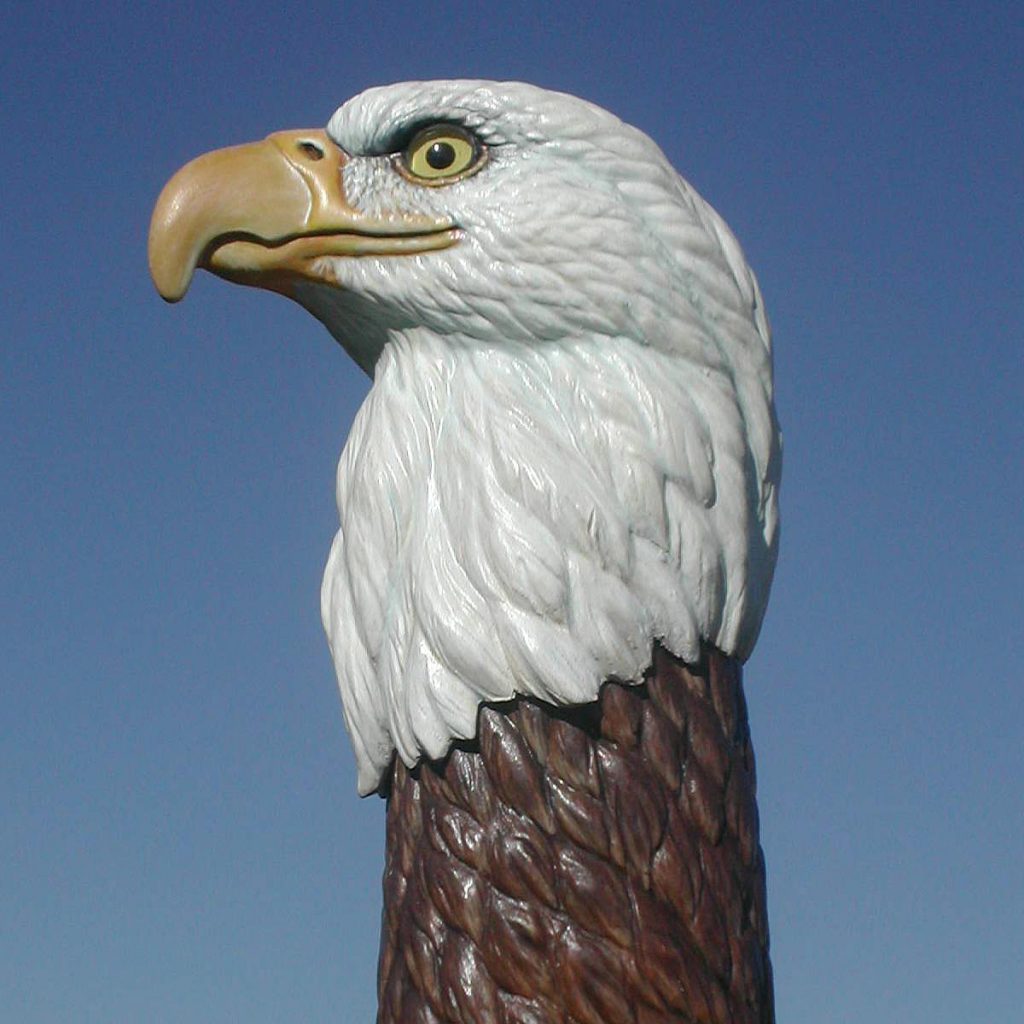
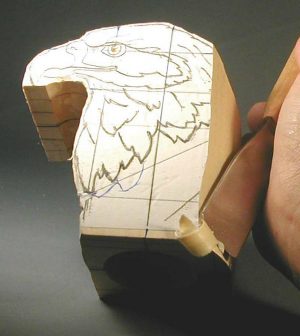
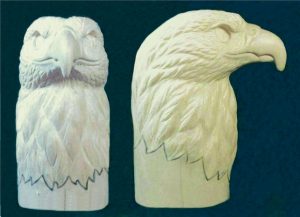
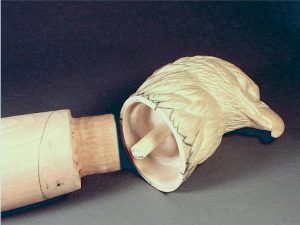
 Designed as a cane topper, this majestic eagle could easily be enlarged for a full-size carving
By Pat Mikula Moore
A cane head makes a great project for several reasons: it is small enough to hold in your hand; if you make a mistake, you haven’t ruined an entire cane; and it is a great way to practice your techniques before starting a larger project.
When trying to create a realistic-type carving, I have plenty of reference material handy. Pictures come from a variety of sources such as magazines, books, photos, and the internet. These pictures are invaluable to understanding pattern lines, shapes, and textures from a variety of angles—something no one picture or pattern can achieve.
I use three photocopies of a pattern when carving. One copy is adhered to the carving block with a spray adhesive (A tip I learned from chip carvers). The other is to be cut up and used as a working paper pattern, making line transfers during the carving process. The last copy is kept for quick reference.
Block out the main pattern lines first by holding the tools perpendicular and making straight up and down cuts square and as close to the pattern lines as possible. Do the same with all the other pattern views, one view at a time. Rounding of the edges does not begin until all major areas match the pattern and are set to the correct depths. This insures your piece will not “grow” or become distorted during carving.
Another important and necessary step is to draw and redraw the centerlines and major reference lines as they are being carved away! These lines are invaluable for balance, symmetry, and referencing as you carve.
Getting Started
Start by preparing your blank. Use the pattern to mark the centerlines for the sides, top, and bottom. Use a carpenter’s square to true these lines perpendicular to the blank’s bottom. That way, all the pattern views will line up accurately once transferred. Then align your side-view pattern to your marks, and secure it to the blank with spray adhesive—the other views will be drawn in later. Drill the center of the eyes with the 1⁄8“-diameter drill bit. Drill the whole way through the block to mark both sides. A drill press makes it easy to drill the holes perpendicular to the blank, but you can use a hand drill if you have a steady hand. This tiny hole now is a point to measure from, and it will mark the eye placement in later steps.
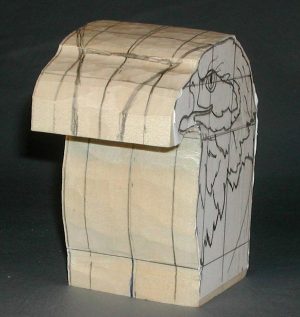 |
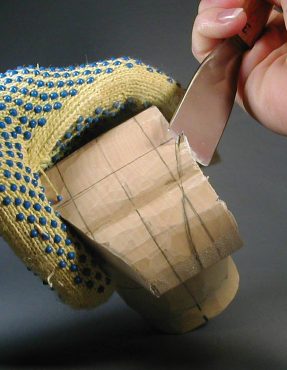
Cut out the block on the band saw. Cut outside the line on the side-view pattern—the other views will be carved by hand later. Redraw all centerlines including the bottom. Then place the top-view paper pattern on the centerline, and draw this view to your block as shown. |
 |
Rough-out the back of the eagle head. Use a large #3 gouge. Begin from the top-view pattern lines and carve straight down, keeping your lines perpendicular to the bottom. Follow the marks from the back of the neck to the base of your carving. As you carve through the paper pattern, redraw any major lines removed. |
 |
Define the chin line. I use a large V-gouge. Start from the side-view centerline and carve to the front-view centerline. Take care not to carve too deep. Use the same tool to start to define the bottom edge of the feathers that will eventually fit over the staff. |
 |
Redraw your centerlines and the details of any key areas that were carved off. |
  |
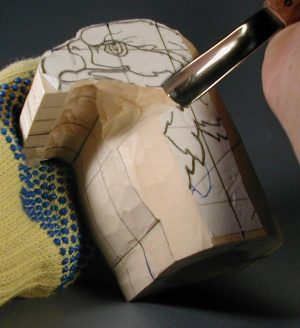
Begin to shape the beak. Use the large #3 gouge. Follow the top-view pattern lines and shape the outline of the beak and brow-ridge area. At this point, the paper pattern should be completely carved away, leaving only your transferred pencil marks. |
 |
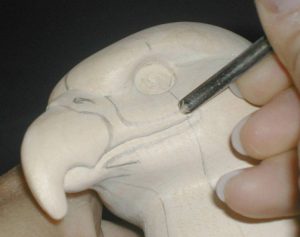
Define the underside of the eyebrow ridge. Use a large V-gouge. Note: the small drill hole is still in use as a reference. |
  |
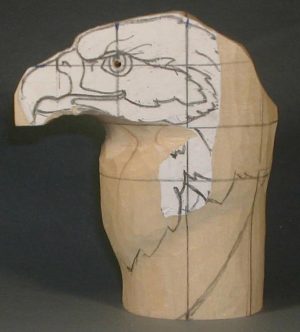
Check your progress. Your piece should still look pretty blocky with all the major lines defined and carved to the appropriate depths. |
 |
Begin shaping the eagle. This is where keeping true to the pattern lines pays off. Soften and shape the hard edges using a carving knife or large #3 gouge. Examine your piece from all angles. Using your centerlines, make sure both sides are equal, balanced, and the same thickness. Be sure “key” locations, such as the eyes and corners of the beak, line up with each other when viewed from the front and above. It is better to find misalignments now (See Tip). |
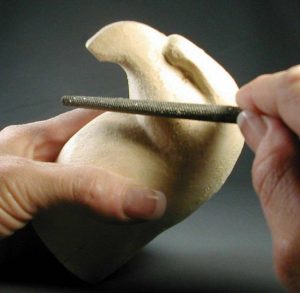 |
Continue to smooth and refine your tool marks. Begin with a coarse-grit metal or diamond file. Then move on to a medium-grit file before finishing with fine or extra-fine grits. Your carving should look smooth and flow from one area to the next without any “hard” tool marks. The goal is to get close to the overall shape in preparation for finer detailing. With the shaping done, take the side-view paper pattern, and lightly draw in the upper beak, lower beak, and eye outline locations on both sides, making sure they are even. |
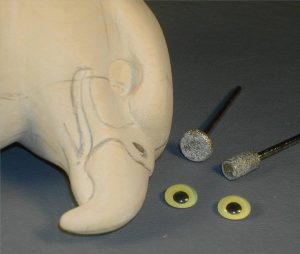 |
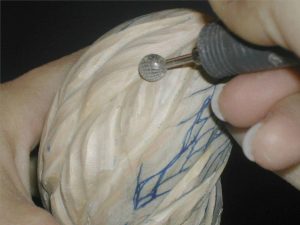
Drill the eye sockets. Double check the eye center before drilling its perm-anent position. Using a 9mm barrel or disc diamond rotary bit, drill a 1⁄4“-deep recess in each position. Test fit the glass eyes for depth and fit. The outline of the glass eye should follow the contour of the head with the pupil pointing inwards towards the beak. This allows live birds of prey to pursue prey directly in front of them without turning their heads. Check the alignment straight on and from the top-view. Remove and set aside eyes until final placement. |
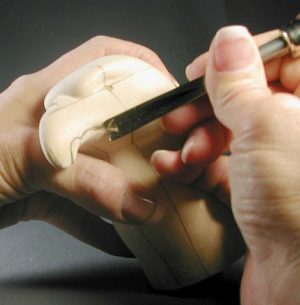 |
Separate the upper and lower beak using a medium size V-tool. The bottom beak needs to fit up under the top portion and is slightly recessed. Smooth this cut with an extra fine, curved diamond file to prevent tear-outs while carving these delicate areas further. Because this is a functional walking staff, the tip of the beak is thicker, shorter, and will have a rounded point—unlike one found on a realistic carving—to increase its strength and durability. |
 |
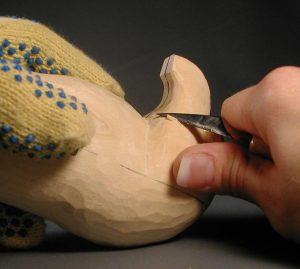
Outline the upper and lower beak. Use a sharp, 1⁄8” V-tool to set these sections apart from the face. Use a 1⁄8” gouge of your choice to carve in the cere (or fleshy-looking nostril area) to separate it from the beak. Use this same tool to define the oval nostril openings—see the pattern for positioning. |
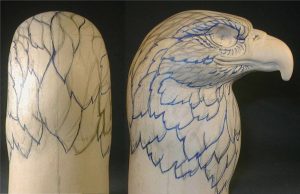 |
Draw in the different feather groups. Follow the natural feather tracts and how they flow. This is where good reference photos come in handy! Your concern is not to define each individual feather, but to concentrate on the groups of feather and how they relate to one another. |
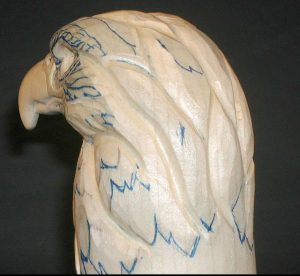  |
Carve in the major feather groups. Use a large V-gouge creating interest with slight “hills and valleys.” Next, draw in the medium size feather groups within these larger feather tracts you just carved. Use a medium V-tool or gouge to establish these feather groups. |
 |
Soften the tool marks. Use a 1⁄4“-diameter round stump burr, ruby, or diamond stone rotary bit. Follow the direction of the feather groups, flowing from one area to the next. The outcome should be subtle changes within each group. |
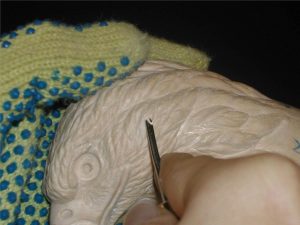 |
Add detail to the feathers. Separate some of the smaller individual feathers in the cheek area and the edges of the larger feathers throughout your carving. Use a 1⁄16” veiner. |
 |
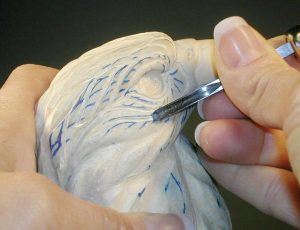
Define the very fine feather detailing around the eye. Use a 1⁄16” veiner. |
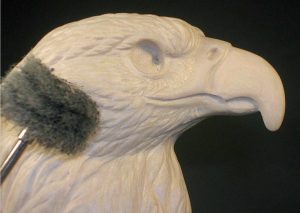 |
Defuzz the carving. I use a rotary tool with abrasive pads mounted on a screw-headed mandrel to clean my carving. Go with the direction that the feathers flow—not against—to prevent any breakage. This step helps give the carving a final finished look. |
 |
Draw an outline of the bottom most feathers. These are the feathers you want to overlap onto your staff. Remove the excess wood up to this mark with your saw of choice. |
 |
Test fit your head and staff, and make any final interior adjustments before finishing the fragile feather tips (see sidebar on page 64). Your overlapping neck feathers should be about 1⁄8” thick at the edge for this fitting. On the neck in the photo, the opening has been adjusted to reflect an oval which matches the outline of the staff used. After acheiving a proper fit, begin to carve the feather tips so they curve and taper down to your staff. Your feathers should be rounded on the top side and fit tightly, flat against the staff. When finished detailing the feathers, test fit to make sure the dimensions as well as the “look” of the two work together. |
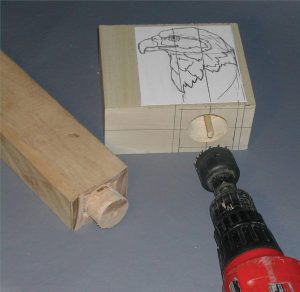 |
Tip: Making interchangeable cane headsBefore you rough out your cane and cane head, take the time to plan out the joint. As shown below, the block has been kept square, which ensures that the opening is positioned accurately. Using a 11⁄2“-diameter keyhole saw-style drill bit, place the bit on the center of the neck, and drill up into the bottom 11⁄2-2″. This forms a stop-cut when cleaned out to accept the staff. Clean out the hole with a medium-sized gouge. Then set the head aside and drill the receiving end on the staff. A slightly larger keyhole saw-style drill bit, 13⁄4“-diameter, is used. Center the drill bit on the staff, and drill about 11⁄2-2″ down from the top. Remove the excess wood on the outer edge of the staff to expose the peg portion, which will fit into the eagle’s neck. The staff is slightly larger so you can hand trim it to a tight-fitting joint. If added strength is needed, drill a 3⁄8“-diameter hole in the center of both the staff and the neck to accept a 3⁄8“-diameter dowel. This is an optional precaution. |
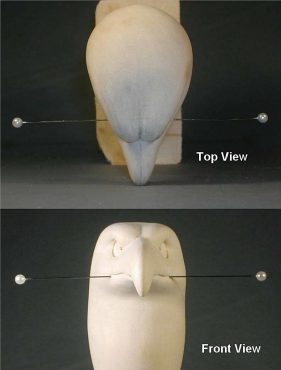 |
Tip: Getting Key Points to Line UpTake two stick pins or needles and push in slightly to the two points you wish to compare, (such as the eyes or corner of the beak). Then look at the piece carefully—do the pins line up when viewed straight on from the front-view? If not, adjust the pins until they do. Then look straight down from the top-view—do the pins line up in this position? If not, adjust again. Keep moving the carving, adjusting the pins until you find a position where the pins successfully line up from both views. Mark this position with a pencil, and transfer your pattern lines from this new point for accurate placement. |
Materials:
• Cherry: 21⁄2” x 2″ x 72″ (6.4cm x 5.1cm x 1.83m) (staff)
• Basswood: 23⁄4” x 4″ x 6″ (7cm x 10.2cm x 15.2cm)
• Wooden dowel: 3/8″ dia. (1cm)
• Glass eyes: 9mm yellow
• Two-part epoxy
Tools:
• #3 gouge: 1″ (25mm)
• Carving knife
• Detail knife
• V-gouge: 5/8″ (16mm)
• V-tool: 1/4″ (6mm)
• Veiners: 1/8″ (3mm), 1/16″ (2mm)
• #11 gouge: 1/4″ (6mm)
• Gouges: 1/8″ (3mm), 1/16″ (2mm)
• Carpenter’s square
• Band saw
• Drill or drill press
• Drill bits: 11⁄2” (38mm) dia. and 13⁄4” (44mm) dia. keyhole saw-style
• Drill bits: 1/8″ (3mm) dia., 3/8″ (10mm) dia.
• Rotary power carver
• Bur: 9mm barrel diamond
• Files, metal or diamond: assorted
CLICK HERE to download the Realistic Eagle Bust Pattern.
This article originally appeared in Woodcarving Illustrated Spring 2006 (Issue 34).