A carver needs more than sharp tools; a workspace, bench, and lighting are equally important
by Chris Pye
Carving, just like everything else, happens in a context. In other words, there are prior and surrounding circumstances that directly affect what you are doing. Indeed, they affect what you can do: the room where you carve, with its lighting and ambience; the bench at which you stand, its height and the ease with which you can move around it; the wood you’ve chosen and how you hold it; what carving tools you have at hand and other tools you have available to help prepare or finish; and so on.
It’s a mistake not to consider this aspect of your world as a carver. My attitude is that carving is difficult enough as it is, so you want everything possible going for you, supporting and encouraging you to create your best possible work. This includes the environment in which you work, with all its bits and pieces. It’s really about getting your mindset right before putting chisel to wood.
Before I turn to actual carving techniques in the next article in this series, I’d just like to highlight some important points to consider regarding the supporting elements of the carver’s world.
Due to the space constraints of the magazine, I have boiled it down to the essentials. You’ll find a lot more information in my book Woodcarving Tools, Materials & Equipment, Volume 2.
Workshop
I’m continuously amazed that some students never wonder why they are disinclined to spend time in a damp, cold garden shed with no electricity, and therefore don’t carve much; or wonder why they can’t see torn grain when they are working in a dark corner of a garage with only a fluorescent ceiling light at their backs.
As I said, we need all the help we can get! Of course, you may not have the luxury of a dedicated space. But wherever you carve, you want to look forward to being in it and find that it enhances what you are doing.
Your environment: Think about “orchestrating your environment.” You need to feel relaxed and comfortable; a space in which you look forward to spending time where it is not too warm or too cold. I like having quiet music on in the background. If you are standing—and you can stand more or less in the same spot for hours on end—think about rubber matting or something similar to ease your feet.
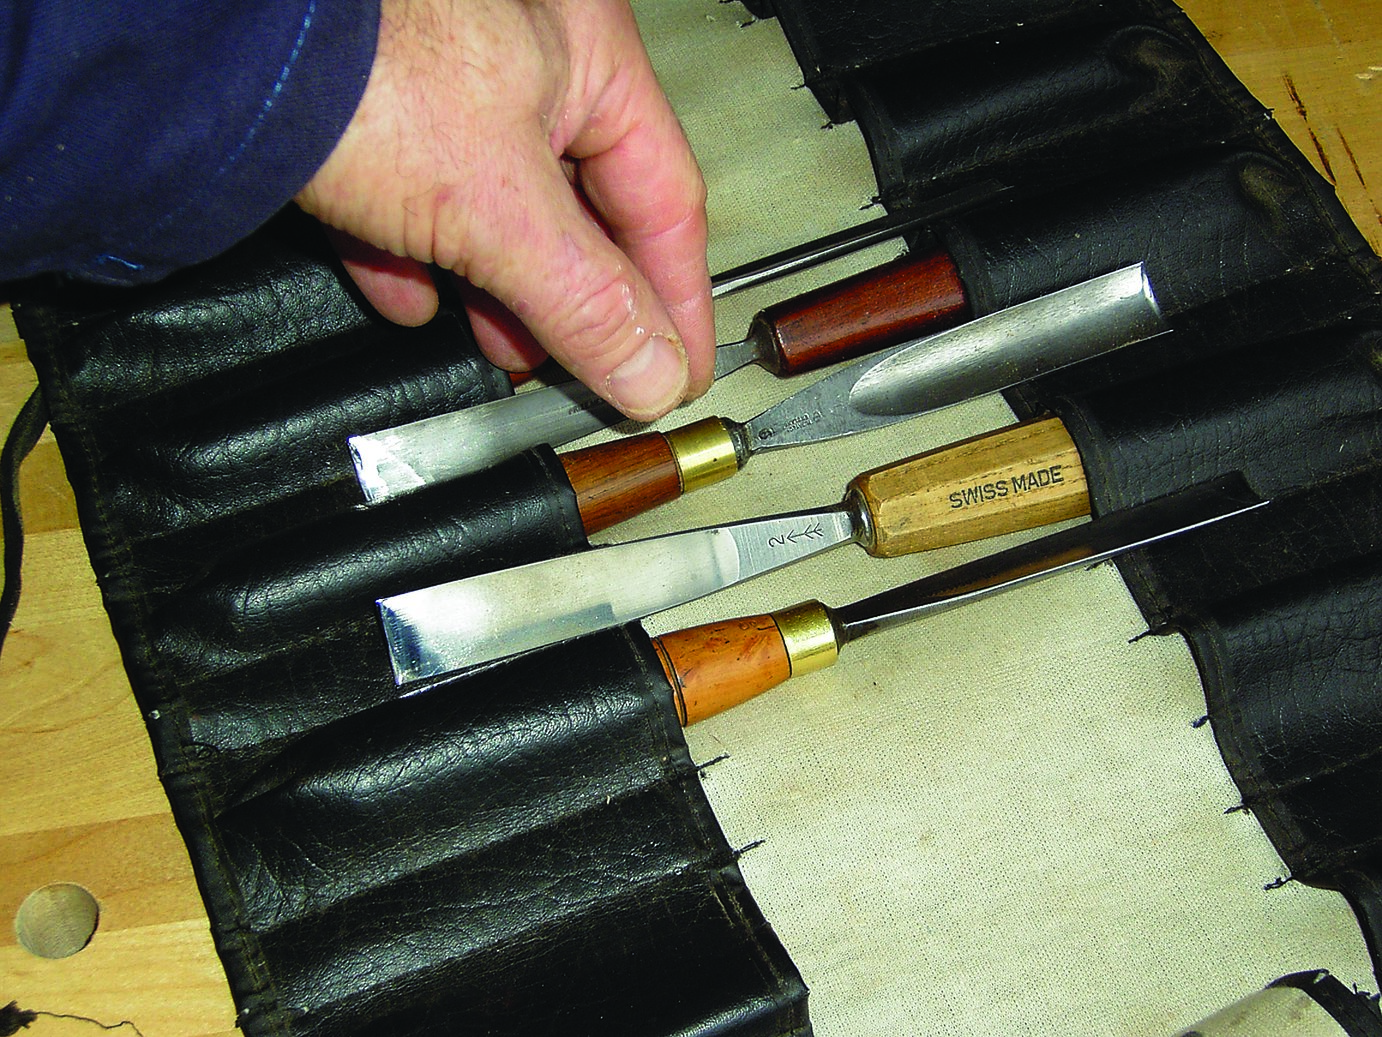
Tool rolls are great for transporting tools, but potentially hazardous if you choose to work out of them: to reach the one opposite you must pass over a row of sharp edges. Take all the tools out in one go and lay them on your work surface.

Drawers keep the tools safe, clearly distinguished and readily available as you need them.
Tool storage: Keep the tools you use a lot closest to your work area; store away those you seldom use. Tool rolls are good for traveling, but dangerous to use everyday—I see many cuts in fingers as students take out and put back their tools. Far better to keep your tools in racks or drawers.
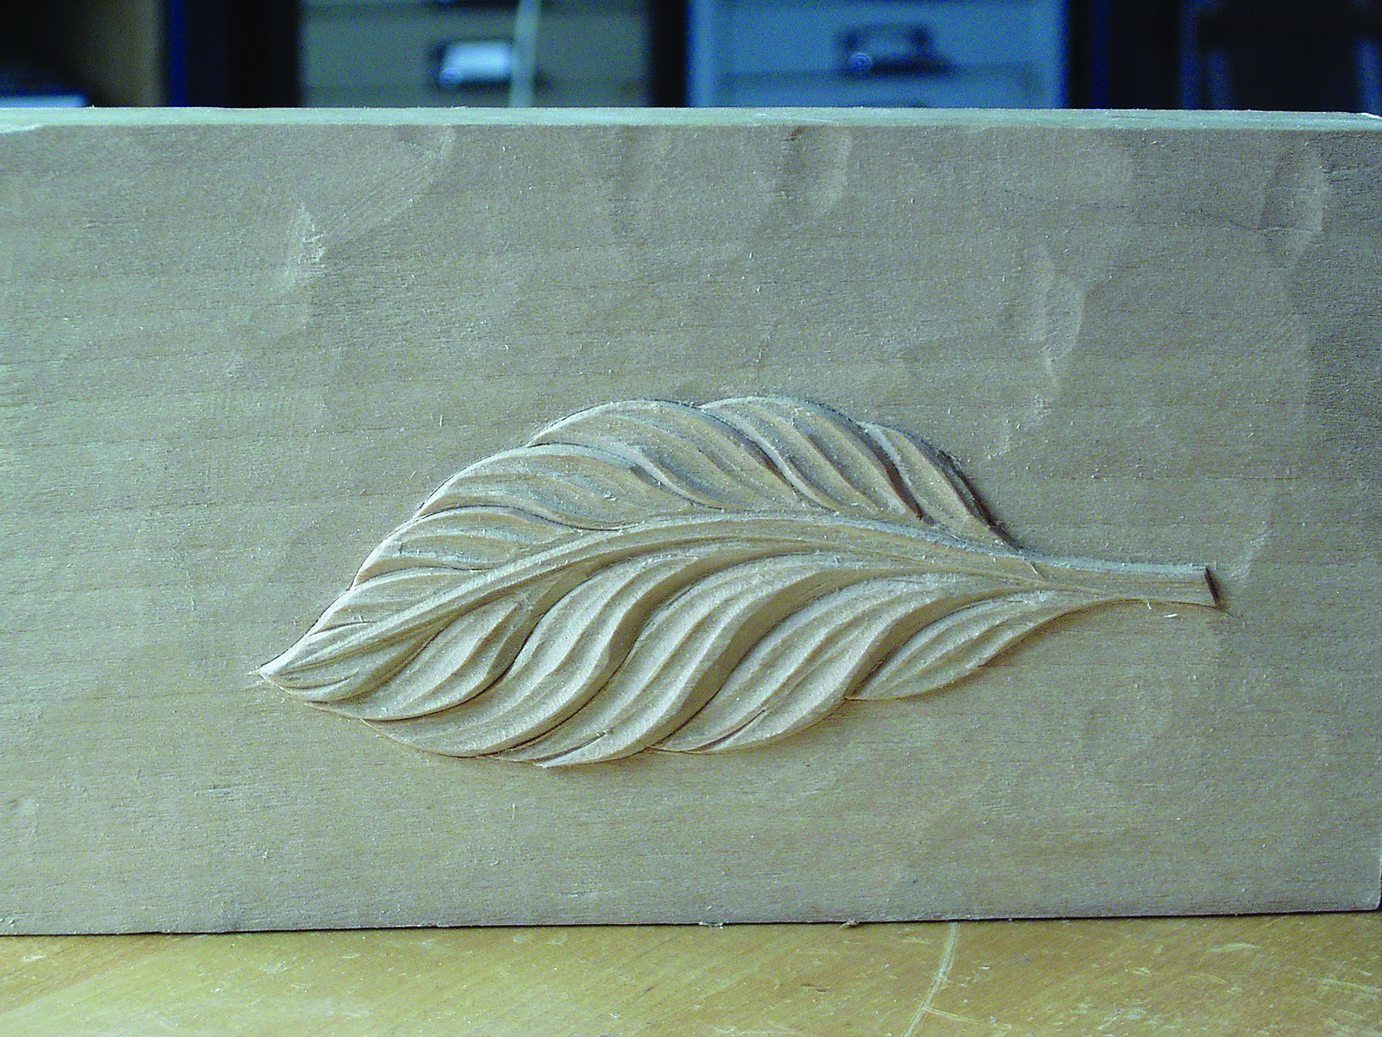
A simple, shallow feather carving: no paint, no pyrography, just cross light from the side creating the shadows and highlights that tell you what you are looking at.

The same feather with the shadows destroyed by the camera flash: dull and hard to read. How light plays on your three-dimensional work is the very essence of woodcarving.
Lighting: Woodcarving is all about light and shadow. If you are not painting your work, what else is there? All carvers do is play with depth. Natural light is always the most pleasant to carve in. I almost always need more than a general background light and have a number of adjustable lights—most of which are cheap and readily available.
Workstation
Since carvings vary so widely in size and type (from wide relief carvings to tall figures), there is no standard size and height, or even shape to a carver’s bench, despite the guidelines you have read elsewhere.
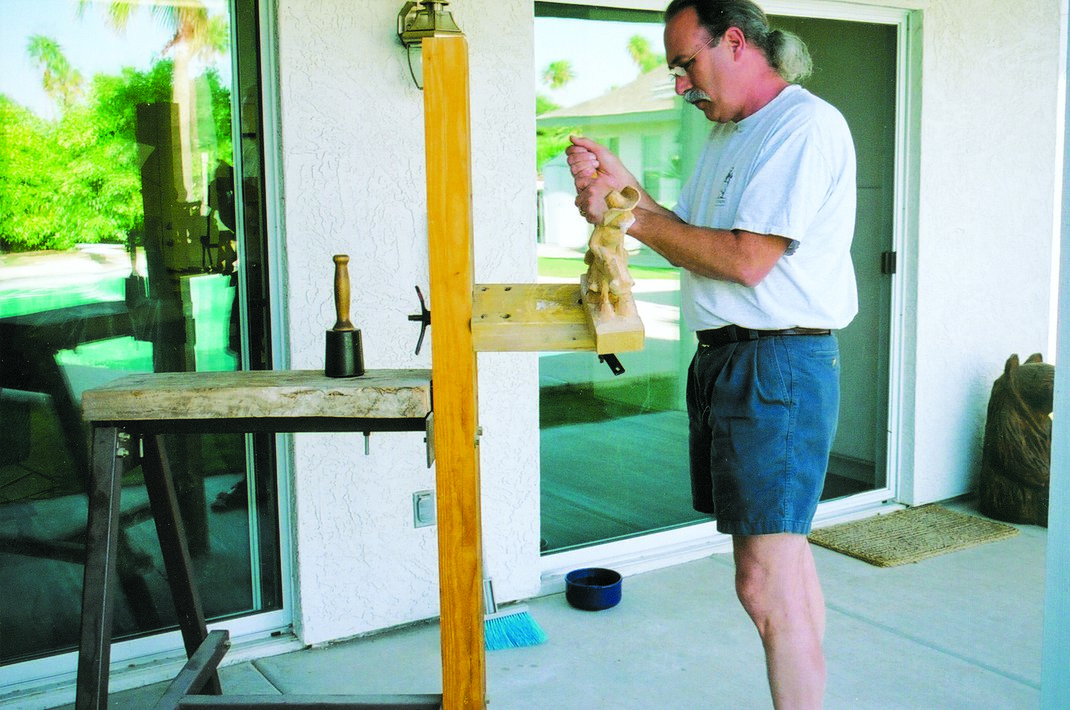
Rather than thinking you must have a bench first and fit your carvings to it, think more of your carvings first and what you might need. I think of carving at a workstation rather than a bench, because although I have a carving bench, it is almost always holding something else (a post, a tilting surface, an adjustable vise, etc.) rather than being the “operating table” it could be.
You first need an idea of the sort of work you have in mind and then build a workstation to suit—but it’s hard to know what you will be doing when you are starting. So, build something the equivalent of a strong table to get you going, but don’t get preoccupied with “bench” as an idea.
Whatever workstation you have for carving, three things are very important:
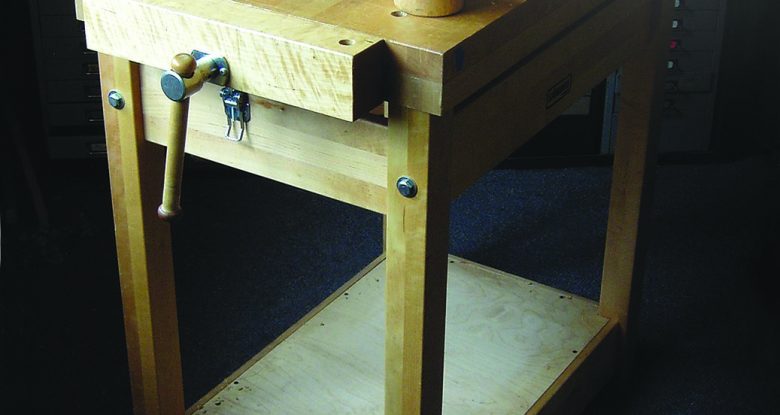
Construction: Although proper joints are no doubt best, carving benches can be successfully cobbled together by bolting and screwing pieces of wood together. This is great for those without woodworking abilities, means, or interest: ask a lumber yard to supply you with the wood, cut to size and assemble it yourself. Whatever your workstation looks like, make it sturdy. You will likely have to add weights to its base or bolt it to the floor to keep it stable.
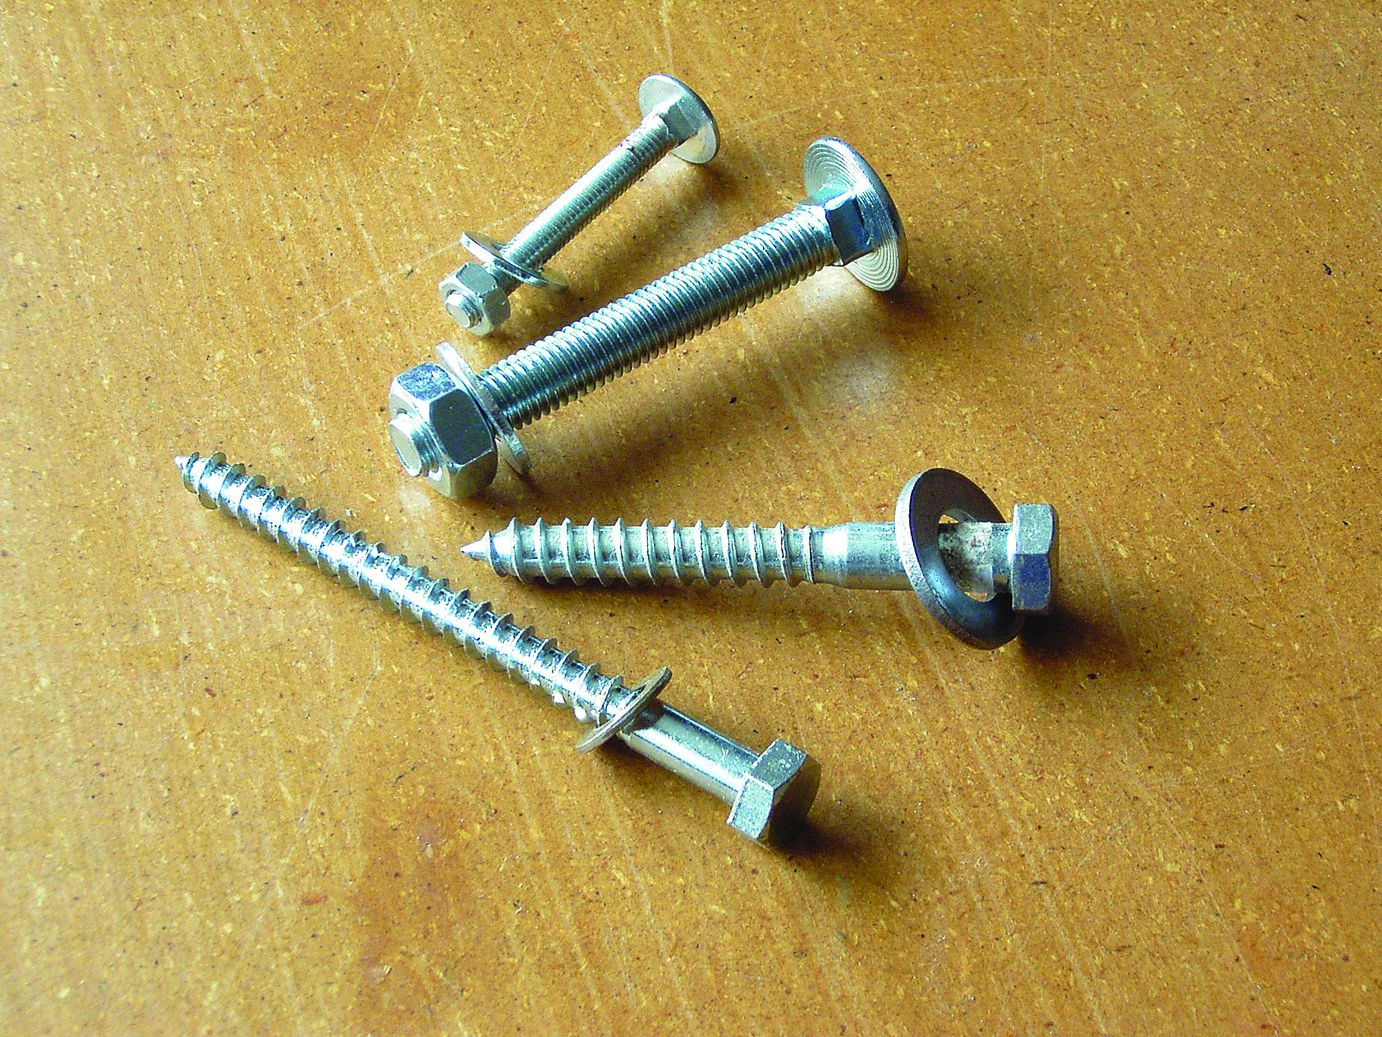
Carriage bolts and lag screws can be used to assemble a simple, yet solid, carving bench.
Height: Unless you are repeating the same thing time after time, the wide variety of size and type of possible carvings always makes the height of a bench or workstation a problem. You need to carve with as straight
a back as possible to prevent discomfort while you work. This usually means your bench or workstation will be a lot higher than a conventional woodworking bench. Think where in space you would like to place your workpiece if you had a magic wand, and then find a means of fixing it there, at that height, rather than having the work too low because that happened to be the height of your bench top. Carving can be quite tiring. Frequent breaks, stretching, moving about and a bit of fresh air will help you work for longer periods and with more vigor.
Adaptability: Over the years I have ended up with a variety of adjustable options that add to my basic bench, and have long since given up the search for the magic bench to end all benches. At the end of the day, you must be prepared and able to change what you have to suit a particular project.
Holding Devices
Traditional woodcarving involves long carving tools, and carvers hold these in both hands, often ambidextrously. There are certain exceptions—such as when you are using a mallet, or when “backing off,” a technique where one hand supports a fragile element of wood and just offers a thumb to aid the other hand as it manipulates the tool—but in general, both hands of the carver hold the carving tools. Therefore, we need something to hold the wood: a holding device.
Again, that wide range of carving types and sizes means there will be many ways of holding work, some suitable to one project, others suitable to another. Holding devices can range from cheap, simple bits of waste wood to expensive adjustable clamps. Whatever you choose, the more adaptable the better. Many beginners think they cannot achieve good work without a special and expensive way of holding work. Some modern devices do have many advantages, but remember just how ancient this craft is and how carvers must have worked in the past. You really don’t need much!


Whatever you use, some principles are invariable in the way you hold your wood to carve it. Your device should:
Hold the work securely: Only the tools move, not the carving. A sudden tilt or shift of the work at a delicate stage can be nothing short of disaster.
Allow you to get at the area you wish to carve: This usually means some way of reasonably quick adjustments. The need for back-breaking yoga-like postures, while interesting to spectators, doesn’t contribute to successful carving and is a sign you should re-think the way you are holding your work.
Be safe: Not injure yourself or your work.
As we go along in the series and work on different projects, I’ll briefly introduce you to a variety of ways of holding your work. For now, let me just mention my “A team:”
- Bits of wood: Yes!—it’s amazing what you can achieve with fences and wedges, posts clamped in carpenters’ vises, boards onto which you can stick work with double-sided tape or glue and paper and so on. And all for nothing but a little effort!
- ‘C’ Clamps: These and a regular woodworking bench vise are standard fare in most workshops. Why? Because they are so useful! It’s very satisfying to use these unassuming pieces of equipment and a few bits of wood to find a simple solution to holding your carving.
- Carvers Screws: With these you can hold both relief and “in-the-round” work. A simple, elegant, often underrated solution to many holding problems.
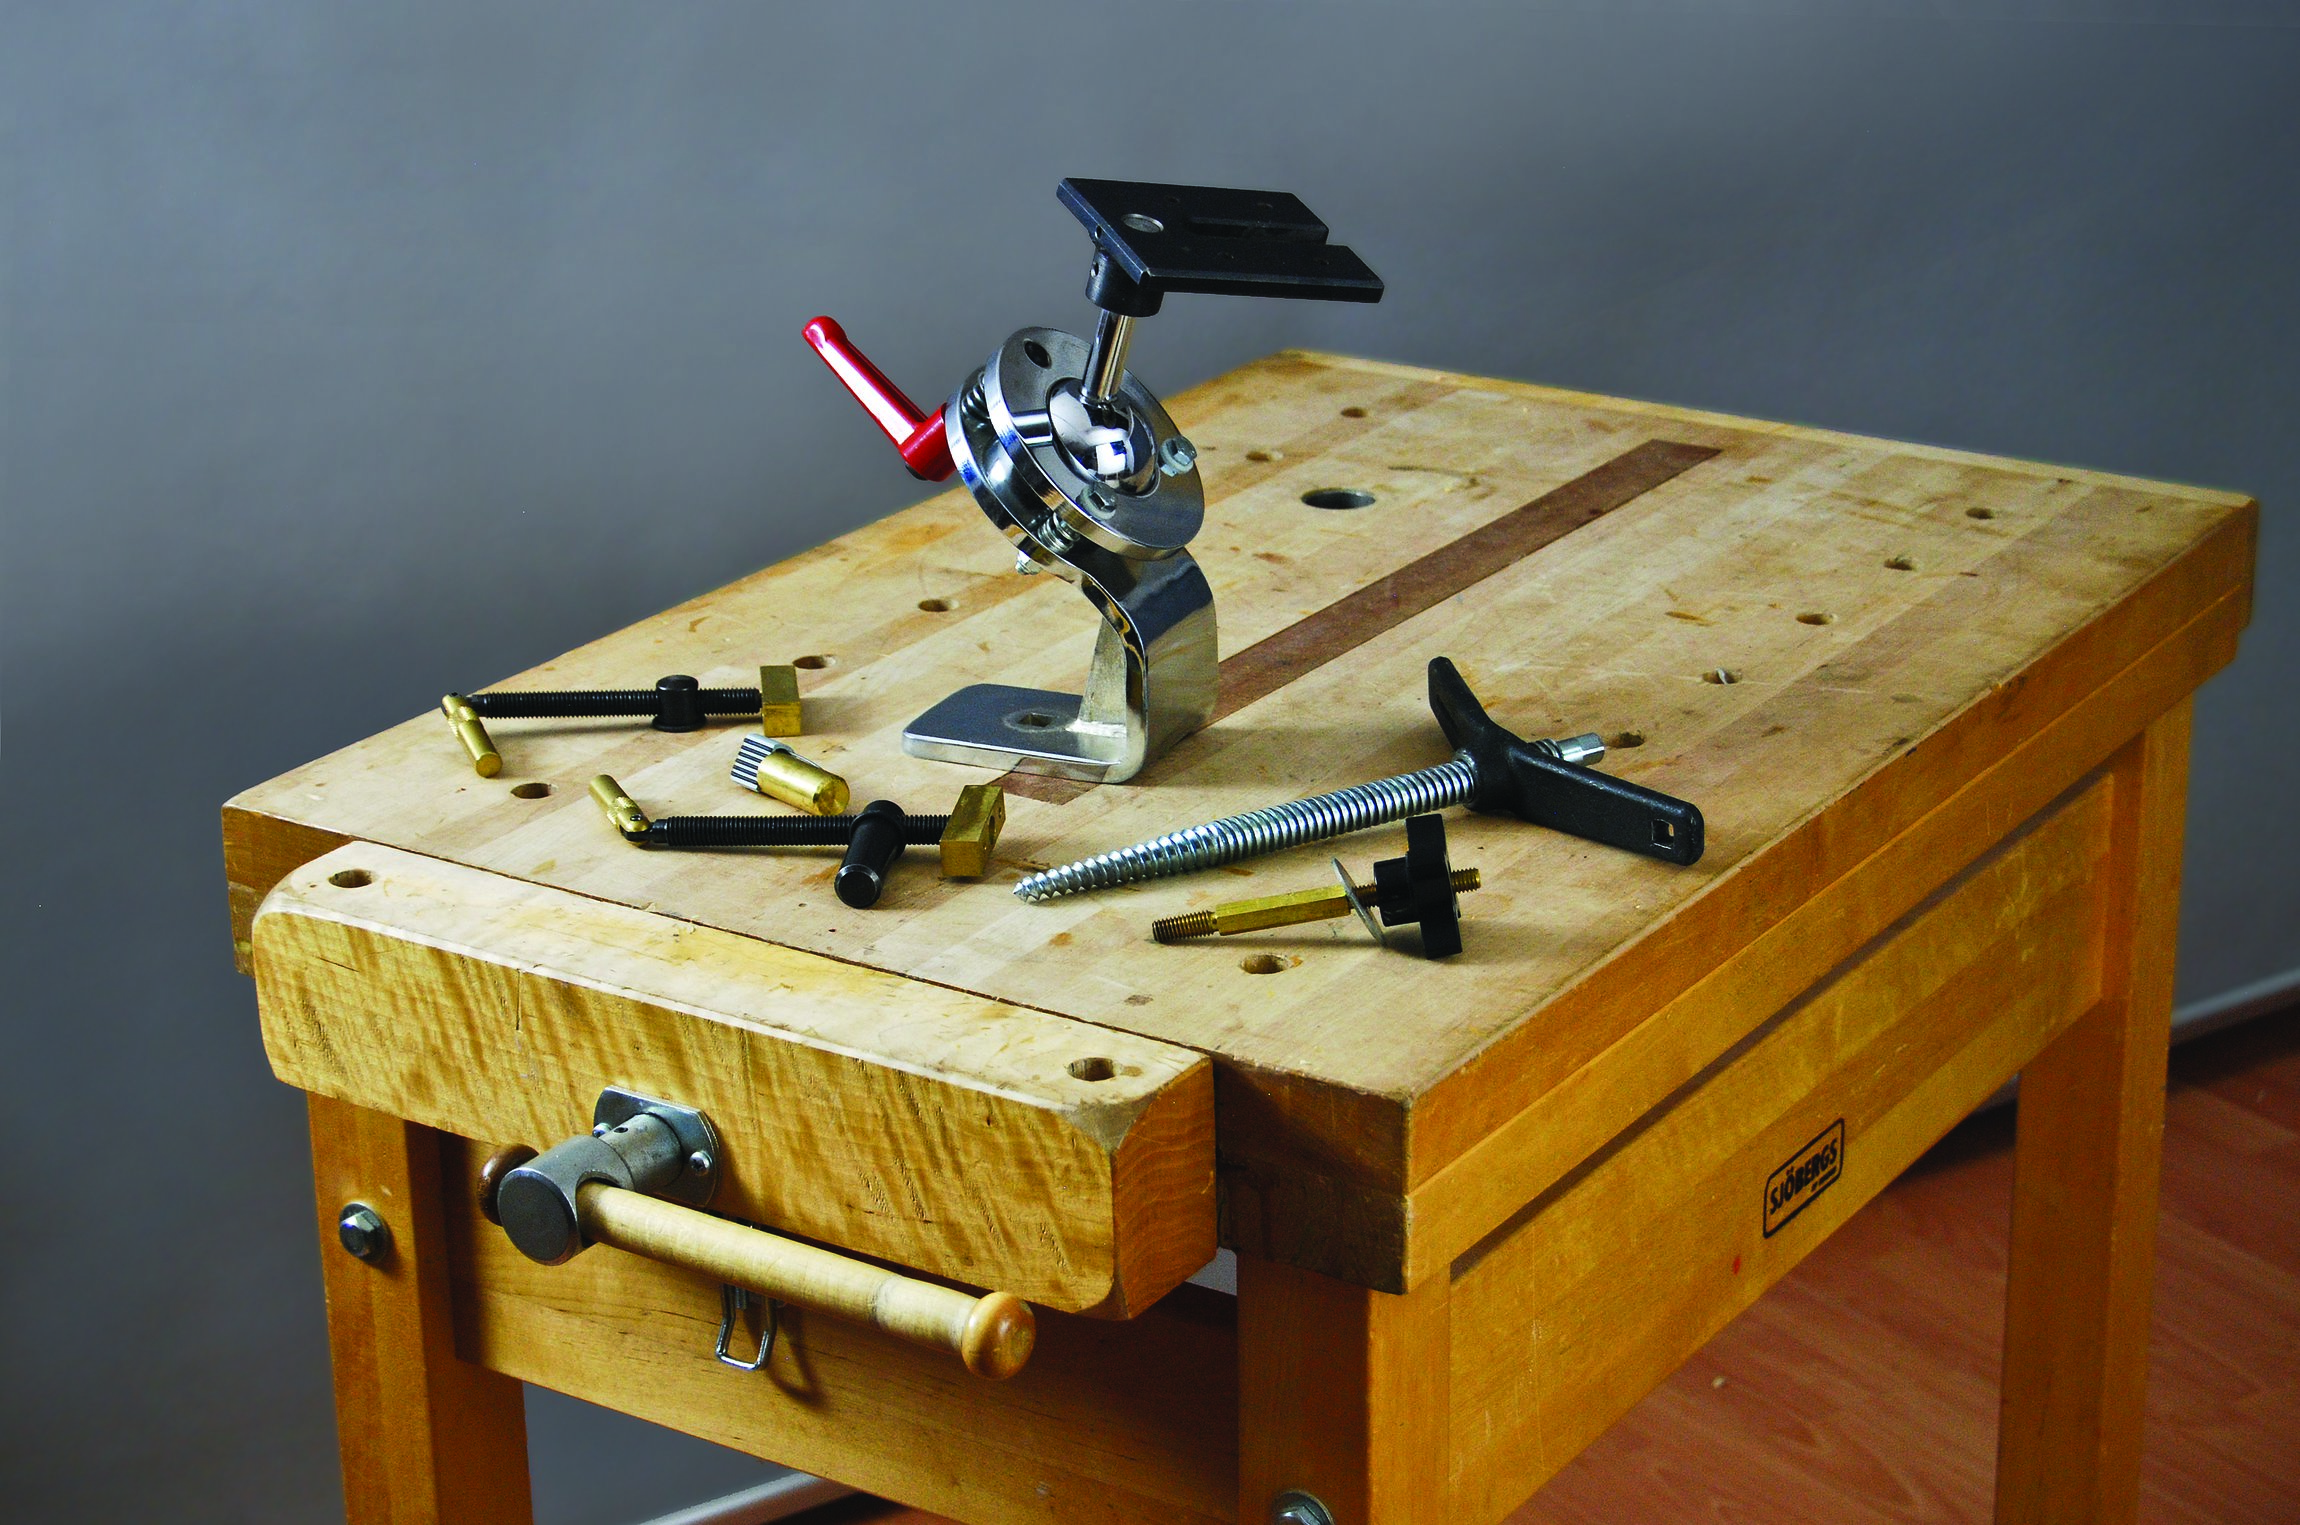
- Adjustable clamps and vises: There are many on the market and it’s a good idea to see what other carvers use and what their opinion is. View these devices as a starting point. You can attach pieces of wood to the metal plates to suit the particular carving you are working on. This adaptability is a key element in successfully holding and working with your woodcarvings. Some are expensive, some reasonably priced and this doesn’t seem to have a whole lot to do with the build quality. You just need one: see it as a starting point and create platforms, etc. using wood.
I’d suggest you wait to buy anything until later in the series when you see what these devices can do and whether they fit the sort of carving work you have in mind. Bear in mind that if you are only carving one sort of thing in the future, you will only need one (successful) way of holding it.
Wood
Carving is all about light and shadow. This is the principal reason why traditional carving woods are, in themselves, actually quite dull and uninspiring. In Europe, limewood (US basswood), oak, mahogany, and walnut—these are all bland woods. Why? Because carvers were interested in the forms of the acanthus leaves or tracery, or covering up the work with gold leaf. They wouldn’t want the figuring of the grain to confuse or dominate their 3-D forms.
You cannot really carve in the traditional manner on anything other than plain wood, mildly figured at best. I have seen heads carved in heavily figured wood that bestows what looks like some hideous skin disease on the subject. In traditional carving, the wood is a vehicle for the skill of the carver and does not intrude or play a role.
By all means use interesting timbers where you plan to show off the grain—abstract sculpture or those wide simple surfaces you see in woodturning—but remember that strong grain can really detract from the impact of a carving in the manner of a camouflage net.
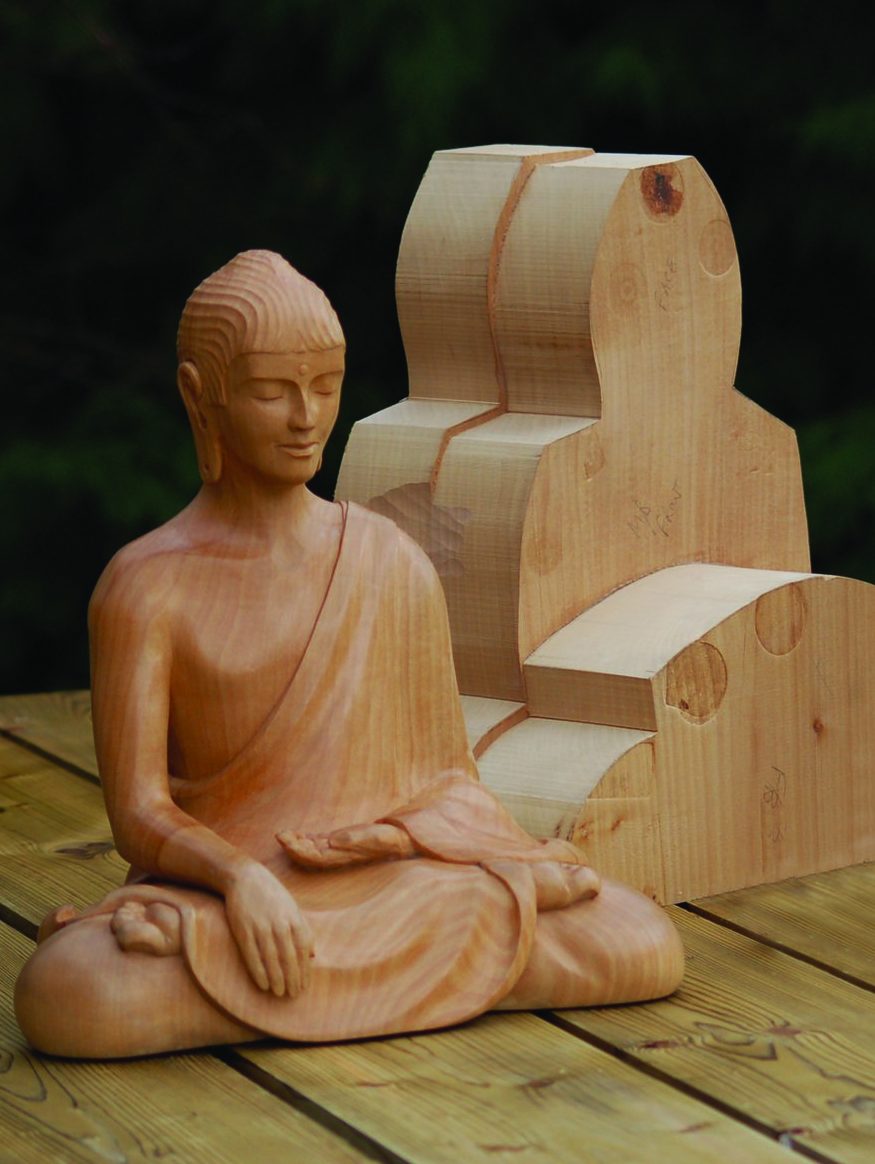
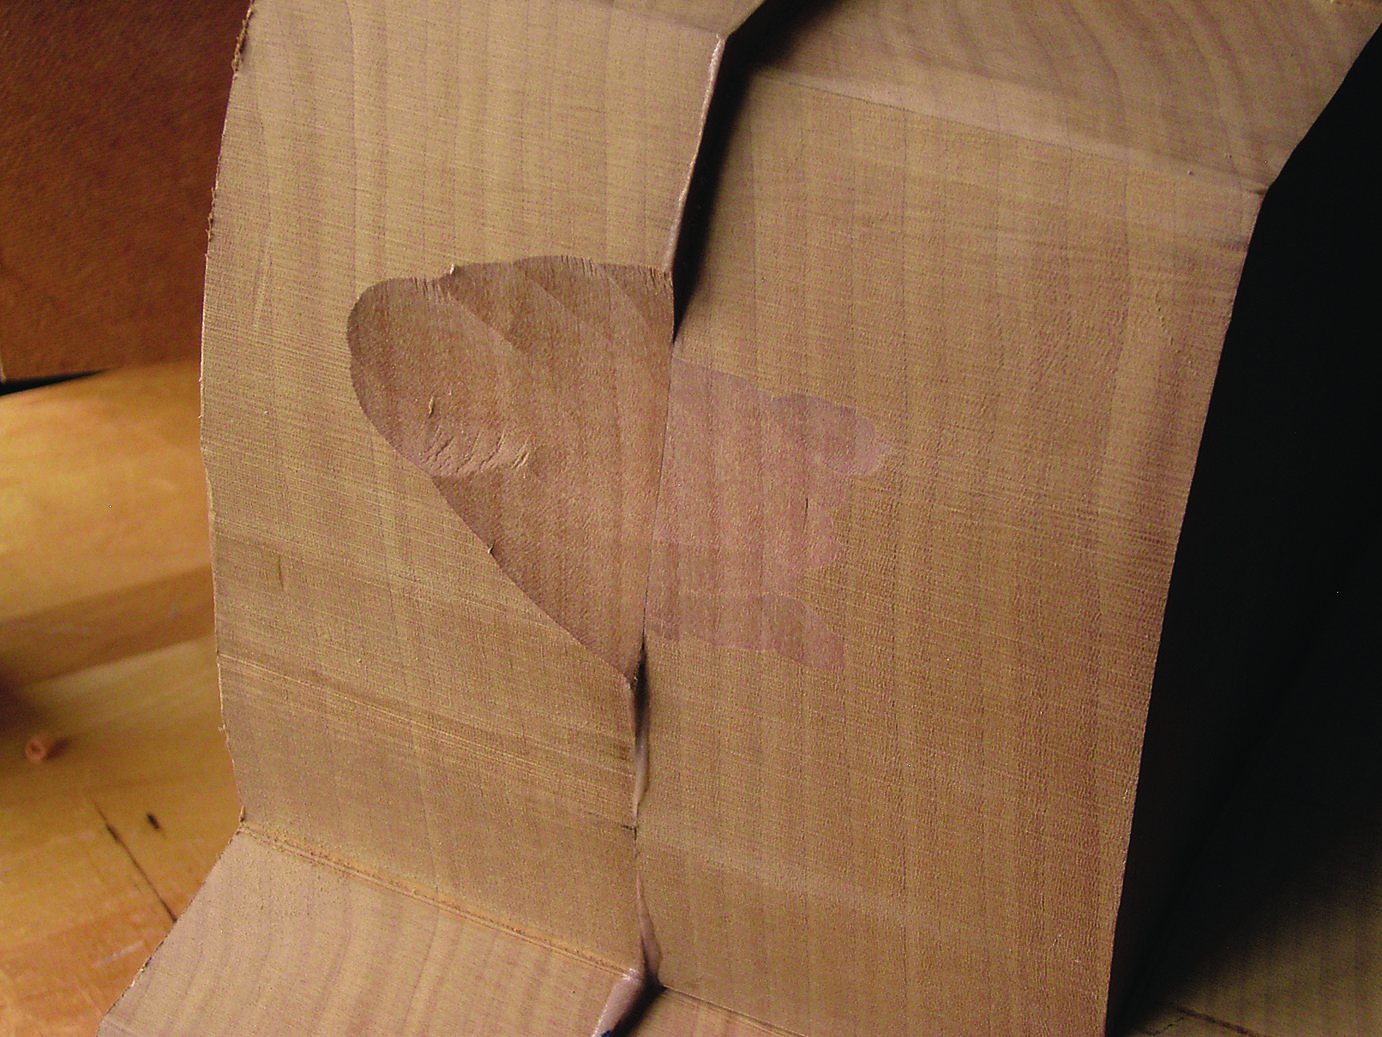
Here we have the starting block for a seated figure in limewood. The grain is fairly bland and the pieces carefully matched and meticulously glued together. Notice how the joints (shown in the close-up) are unobtrusive when carved over, as evident in the final carving.
Wood ideal for traditional carving should be seasoned (air-dried to ambient humidity); of tight, straight, predictable grain; knot and split free; of uniform color with minimal figuring, and medium density (halfway between say boxwood and pine).
Another virtue of negligibly patterned wood is the ability to join separate boards without noticeable joint lines in order to make a bigger starting block. Most carving in Europe has historically used European limewood and oak or South American mahogany (of which pattern-grade Brazilian is the nearest equivalent today). In the United States, basswood, butternut, and walnut are the most likely candidates—though there may be others of which I am unaware. Another wood that has good carving qualities is jelutong. Woods such as American cherry and maple would be too dense for conventional carving. The best thing is to look at other carvers’ work and study the type of wood they have used.
When looking for sources of carving wood, ask other local carvers and clubs; check out suppliers in carving magazines.
Remember that most carving is done in relatively small pieces of wood, so don’t forget about asking a local high-end cabinetmaker or woodworker for off cuts.
Storage: Keep your wood dry, out of direct sunlight and spaced so that air can circulate. Ideally, when you need a piece in the future, prepare it and bring it into your workshop to acclimate for as long as possible.
Most importantly: Proportional to the time, the cost of wood in a carving might be less than 1%. Think of all that time and effort you’ll be investing. Always get the best wood you can for the job: “Don’t spoil the ship for a pennyworth of tar.”
Other Tools and Equipment
Besides traditional tools, woodcarvers will usually have various other tools in the workshop to assist their work, either in the early or late stages:
Shop equipment: As a carver I find a band saw and a bench press (UK pillar drill) indispensable for preparing wood in the early stages. You don’t actually need to own them—just know someone who does!
Hand woodworking tools: Saws, spokeshaves and rasps are used in tandem with carving tools to remove wood more quickly or consolidate forms and surfaces.
Power tools: For carvers, plunging routers and jigsaws can be particularly useful for setting in depths or removing waste wood. Sometimes I’m asked whether using power tools isn’t “cheating?” My answer is that I finish my carving with traditional tools. Anything that helps me get to this point quicker, without imposing itself undesirably on my work, is fair game for me to use.
Background Ideas and Designs
There are three elements to a woodcarving: the wood in which it is made, the tools with which you make it (and technique of using them), and your design. What can I say about design: the conception, the meaning of what you are making? Design is by far the most important element.
No matter how lovely your piece of wood, or the execution of your work, if your design is dull, unbalanced or—dare I say it?—poor, then the carving will fail. Conversely, a first-rate design will always carry imperfect technique or flawed wood.
Thus, if you are going to be creative and not just a copier, you must give full attention to the design side of your woodcarving: how it works or communicates with the viewer. Also you need your design to be sympathetic to your wood, and within your abilities.
Unfortunately, this aspect of carving daunts many students. (“I’m not artistic!” “I can’t draw!”). The good news is that although artistry seems to have an element of inborn talent, what seeds we all have can be nurtured and developed.
We all have self-doubt, just as we are all afraid we might not be good enough to succeed, but believe me, over many years of teaching woodcarving, I have not met a student who didn’t develop their design sense considerably when they worked at it.
And one of the best ways I can suggest to “work at it” and mature as a carver is to cultivate three books:
Scrapbook: A “catch-all” for anything you see in the areas in which you are interested—either the subject itself or someone’s representation. Get into a habit of ripping out magazine photos, sticking in photocopies of pages from books or printed pictures from the web. Don’t discriminate. Grab it! You can have different scrapbooks for different subjects of course, and in no time you will have a portfolio of subjects, views, and stimulating impressions.
Notebook: In your notebook—a journal that you carry everywhere—you catch ideas and thoughts; comments on carvings you’ve seen, why they work, why they don’t, the wood that was used, the choice of finish; techniques you’d like to try, and so on. Again, don’t discriminate, or edit; just write it in. Note everything! Putting a date is interesting and you’ll browse through this book in the future and be sparked to all sorts of carvings.
Sketch book: A “sketch” is a quick, informal draft; descriptive notes in lines with perhaps, a few shadows thrown in. My sketches often include written jottings or impressions too. We are not talking a gallery level of drawing, just private reminders of the detail you saw, or the idea you had.

Don’t wait—start now! And if you conscientiously work on these three books, you will undoubtedly cultivate a priceless garden of ideas that will both feed your creativity and develop your eye for lines and sense of design.
Finally: I’ve seen many a carving in which it’s obvious that the carver has only a minimal idea what they are doing, carvings that have been started without adequate research and preparation. Remember, no matter what you carve: you cannot have too much preparation, but you can have too little. In which case your carving will suffer. Carvings don’t begin when you put a chisel to wood, but long before, in your mind, with the conception and subsequent design. So that is where your efforts begin.
About the Author
 Chris Pye is a master woodcarver, instructor and author of several books, including Woodcarving Projects and Techniques, produced by Fox Chapel Publishing. Chris runs the video-based teaching website, WoodcarvingWorkshops.tv, with instruction on tools, sharpening, lettering, relief carving, in-the-round projects and much more; and from where he writes a free monthly blog about woodcarving. You can see a gallery of his commissioned work at www.chrispye-woodcarving.com.
 This article was first published in Woodcarving Illustrated Spring 2007 (Issue 38).
Discuss this material on the Woodcarving Illustrated forums.