Fun and festive Halloween figure is easy to carve
By Cyndi Joslyn
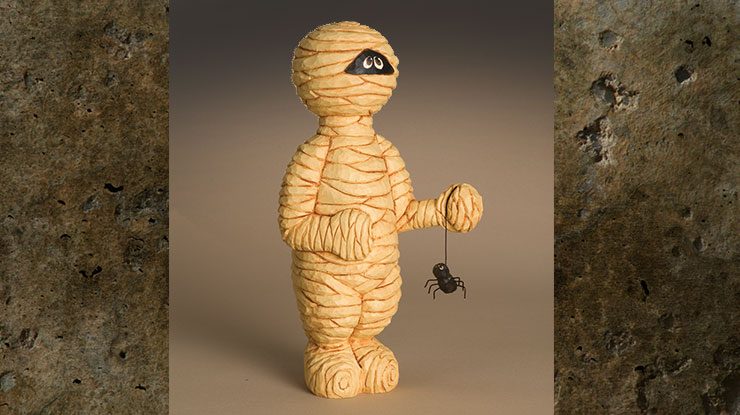
Here’s a fun figure to decorate a tabletop or any surface you like. You can easily carve it in a few hours using just a few tools. It’s just as easy to paint.
CLICK HERE to download the patterns for the Mummy.
Mummy: Roughing Out the Mummy
 |
 |
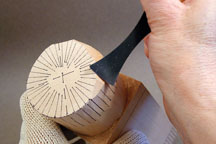 |
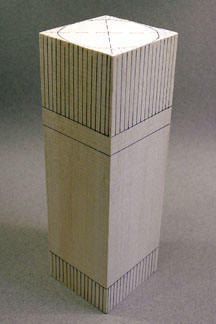
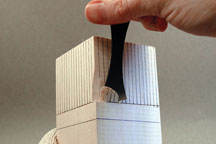
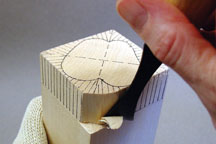
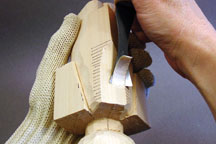
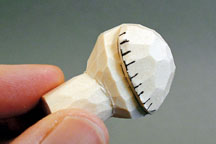
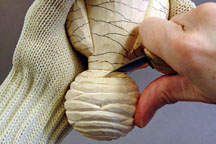
| 1: Transfer the body pattern to the block of wood sized for the body. I shade the area to remove. | 2: Score the line beneath the shaded area with a bench knife, and use a 7/8″ (22mm) #3 gouge to form an evenly rounded cylinder for the head. | 3: Shade the wood to be removed. Use either the 7/8″ (22mm) #3 gouge or the bench knife to round the top of the head. |
 |
 |
 |
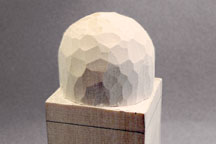
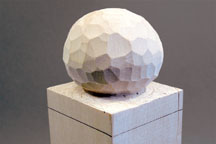
| 4: Continue rounding with the gouge or the bench knife. Work until the mummy’s head is evenly rounded. This is how your project should look at this point. | 5: Score the bottom of the head with the bench knife. | 6: Continue to remove wood in thin layers with the 7/8″ (22mm) #3 gouge to further define the head. |
 |
 |
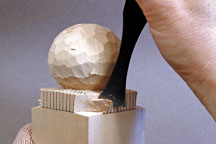 |
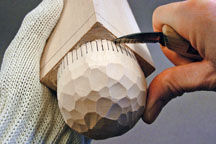
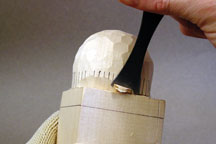
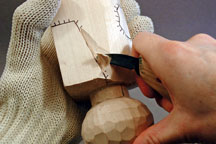
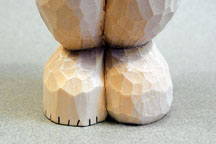
| 7: Carve in so the head at the top of the neck will be 1″ (2.5cm) in from the corners and 1⁄2″ (1.3cm) in from the sides. | 8: Shade the wood to remove around the feet. Score the line above the shaded area, and use the 7/8″ (22m) #3 gouge to remove the wood. | 9: Remove the wood in the shaded area to create the neck. Use the 7/8″ (22mm) #3 gouge. |
 |
 |
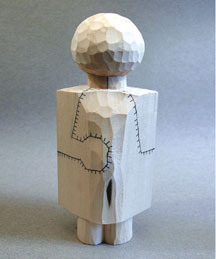 |
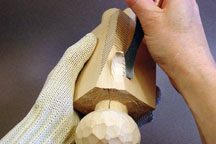
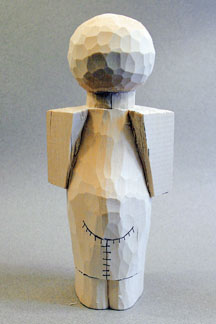
| 10: Remove the wood where the neck recedes under the head. Use a detail knife. Make the bottom of the neck 1-1⁄8″ (2.9cm) in from the corners and 5/8″ (1.6cm) in from the sides. | 11: Remove the wood in the shaded area, and round it. Use the 7/8″ (22mm) #3 gouge. | 12: Draw the arm patterns on the front and back of the mummy. |
 |
 |
 |
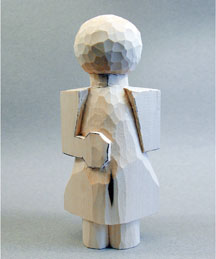
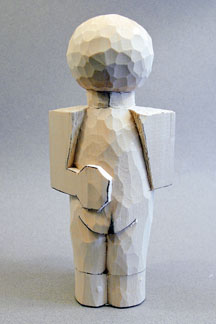
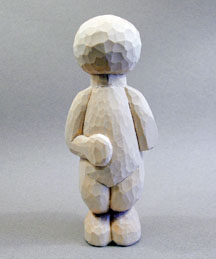
| 13: Score around the arms. Use the bench knife. Then, remove the wood in the shaded areas to define the arms. | 14: Continue blocking in the arms. The progress to this point shows the mummy’s head and neck defined and the feet and arms blocked in. | 15: Remove the wood in the shaded area on both sides of the mummy. This further defines the legs. Use the 7/8″ (22mm) gouge. |
Mummy: Adding the Details
 |
 |
 |
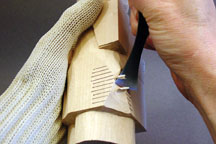
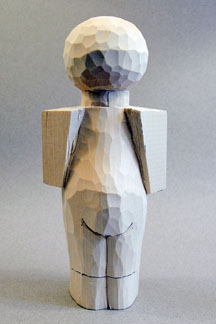
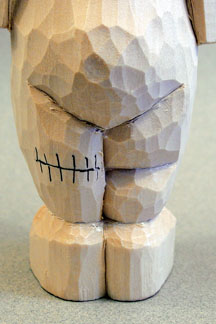
| 16: Remove the wood in the shaded area to define the mummy’s back. Use the 7/8″ (22mm) gouge and make a scooping motion to remove the wood. Round the wood in the shaded area to begin to define the legs. | 17: Extend the centerline up from the base of the feet 2 1⁄4″(5.7cm) on the back. Draw a curved line to define the mummy’s tush, as shown. This curved line is about 11⁄2″ (3.8cm) wide. | 18: Extend the centerline up from the base of the feet 23⁄8″(6cm) on the front. Draw a curved line to define the mummy’s lower belly. This line is about 11⁄2″ (3.8cm) wide. |
  |
 |
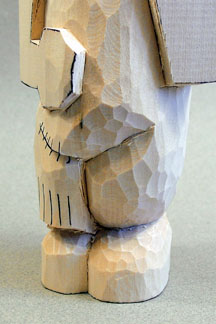 |
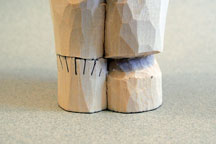
| 19: Use the bench knife or the detail knife to score these lines. Remove the wood, as shown, to define the legs on the front and back. | 20: With the bench knife, score around the top of the feet. Remove the wood in the shaded area to shape the feet. | 21: Remove the wood in the shaded area with the bench knife. This further defines the legs on the front and back and to round the belly and tush. |
 |
 |
 |
| 22: On the back of the mummy, draw a line to define the back of the knees. This line is about 1″ (2.5cm) wide and up 1-1⁄2″ (3.8cm) from the bottom edge of the feet. | 23: Round the edges of the feet. Use the bench knife or the detail knife. | 24: Mark the wood to be removed from the sharp corners of the arms and hands. Round the edges with the bench knife. |
 |
 |
 |
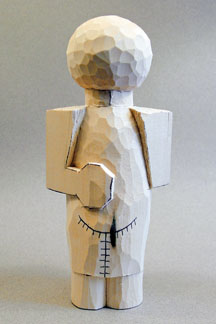
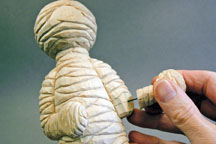
| 25: Continue rounding the arms until they are well defined. The progress to this point illustrates clearly defined legs, belly, and tush. The arms and feet have also been defined. | 26: Cut the pattern for the left forearm from 1″ (2.5cm) wood. Use a band saw. With the bench knife, round the wood in the shaded area to shape the forearm. | 27: Draw the line for the hand. Use the bench knife to remove a little wood from under the line to define the hand. Round the edges of the hand. |
 |
 |
 |
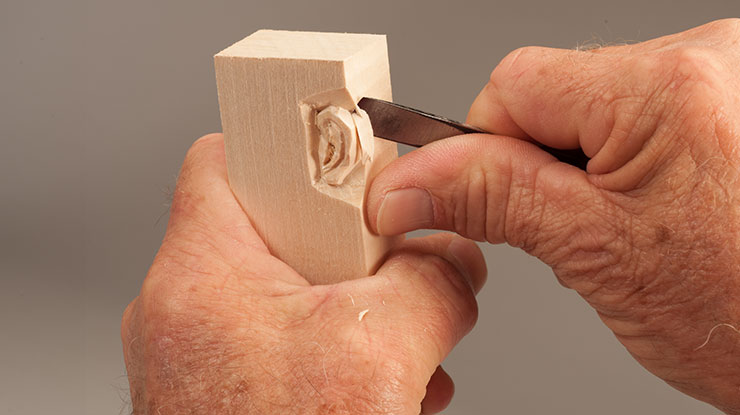
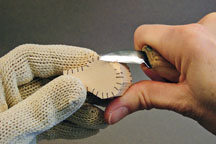
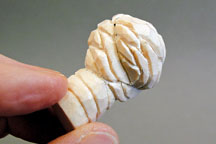
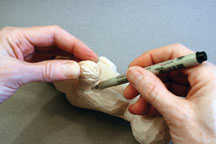
| 28: Draw a random circular pattern on the forearm to create the rags that wrap the mummy. Score the lines and remove a small amount of wood under each line. Use the detail knife. Use the bench knife to carve a deep line across the face of one side of the ball to show where the fingers overlap the palm of the hand. | 29: Line up the left forearm to the desired position near the left elbow and trace this position onto the body. | 30: Transfer the face pattern. Score the outline and remove a small amount of wood with the detail knife, as shown. |
Mummy: Adding the Final Details
 |
 |
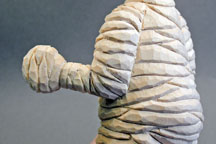 |
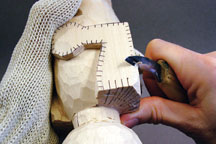
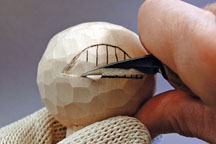
| 31: Draw a random circular pattern on the mummy to simulate the rags that wrap the body. Score all the lines and remove a small amount of wood under each line using the detail knife. | 32: Drill a 1/16″ (2mm) diameter hole in the end of the arm. Use cyanoacrylate (CA) glue to attach a short piece of wire in the hole. Use the wire to mark the location of the hole on the body, drill a 1/16″ (2mm) diameter hole at the mark, and use cyanoacrylate (CA) glue to attach the arm to the body. | 33: With the bench knife, blend the arm sections together. Draw a circular pattern to connect the sections. |
 |
||
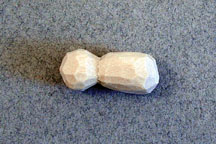
| 34: Transfer the spider pattern to the block. Round the segments with the detail knife. |
Painting and Finishing

Paint the mummy and the spider using the colors listed in the supplies list and in the color chart. After the paint dries, apply a mixture of equal parts water and water-based satin varnish. When that dries, apply a mixture of one part burnt sienna acrylic paint, one part raw sienna acrylic paint, and two parts antiquing medium to the carving and then wipe off the excess with a soft cloth such as an old T-shirt.
Assembling the Mummy
 |
 |
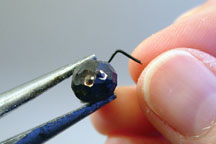 |
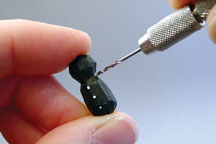
| 35: Using a hand drill and a 1⁄16″ drill bit, drill a hole at the center point where the spider head and body connect, as shown. Also drill three holes in each side of the spider at the points highlighted by the white dots. | 36: Drill a hole in the top of the mummy’s hand, as shown. | 37: Cut six 1⁄2″ (1.3cm) lengths of 22-gauge black-coated wire for the spider legs. Bend the wire in an L shape, as shown. Using cyanoacrylate glue, glue the legs in the holes drilled. |
 |
||
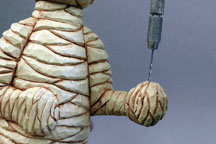
| 38: Using cyanoacrylate glue, attach a 2″ length of black elastic sewing thread in the hole drilled in the spider’s head. Glue the remaining end of the elastic in the hole in the mummy’s hand. |
Materials:
• Basswood, 2-1/2″ (6.4cm) square: body, 8″ (20.3cm) long
• Basswood, 1-1/8″ (2.9cm) square: left arm, 1-3/4″ (4.4cm) long
• Basswood, 3/8″ (1cm) square: spider, 7/8″ (2.2cm) long
• Baling wire
• Wire, #22 black-coated: spider legs, 6 each 1/2″ (1.3cm)
• Elastic sewing thread, black: 2″ long
• Cyanoacrylate (CA) glue
• Acrylic paint, such as Delta Ceramcoat: autumn brown, black, dark brown, light ivory, old parchment, burnt sienna, raw sienna
• Varnish: water-based satin
• Antiquing medium/retarder, such as Jo Sonja’s
• Cotton swabs
Tools:
• Knives: bench, detail
• #3 gouge: 7/8″ (22mm)
• Band saw
• Hand drill with bit: 1/16″ (2mm) dia.
• Paintbrushes: #2 to #8 flat, #0 or #1 liner, 3/4″ (19mm) wash, old flat
About the Author
Cyndi Joslyn is a professional woodcarver with flair for handcarved folk art figures. In the 1990s, Joslyn took part in a volunteer effort to produce one of the first handcarved carousels created since the 1930s. Th e collection of 38 carved ponies and two chariots, completed in 1995 in Missoula, Montana, drew national attention. Her outstanding talent earned Joslyn the distinction of being the only woman “head carver” on the project.
 For more Halloween projects, check out Halloween Woodcarving by Cyndi Joslyn.This book offers 10 original and detailed patterns and the expert instruction to carve whimsical Halloween-inspired characters including a mummy, witch, black cat, ghost, and more. Available for $16.95 plus S&H from www.FoxChapelPublishing.com.
CLICK HERE to subscribe to Woodcarving Illustrated magazine
CLICK HERE to subscribe to Strop Talk, Woodcarving Illustrated’s eNewsletter
CLICK HERE for more Autumn or Fall themed projects.