Create this clever, hold-anything vise for less than $30
by Mike Burton
This article was first published in issue 34 of Woodcarving Illustrated.
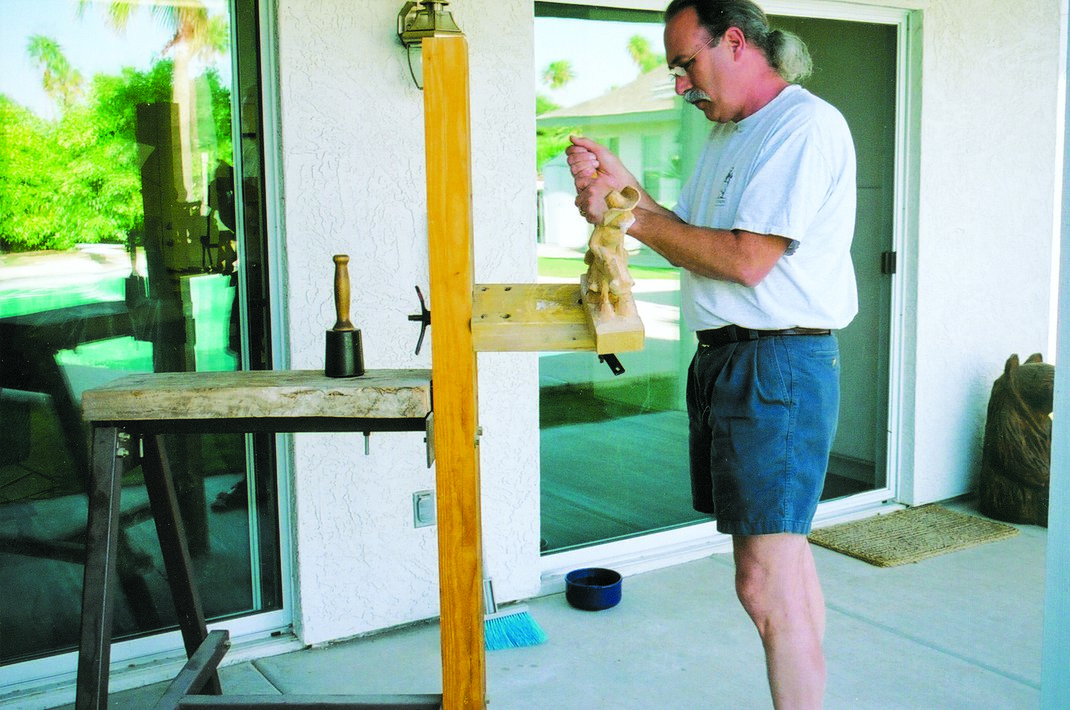
When doing any type of full-form sculpture, holding the work can pose a challenge. To meet this need, I’ve developed a rotating vise that will meet many holding challenges.
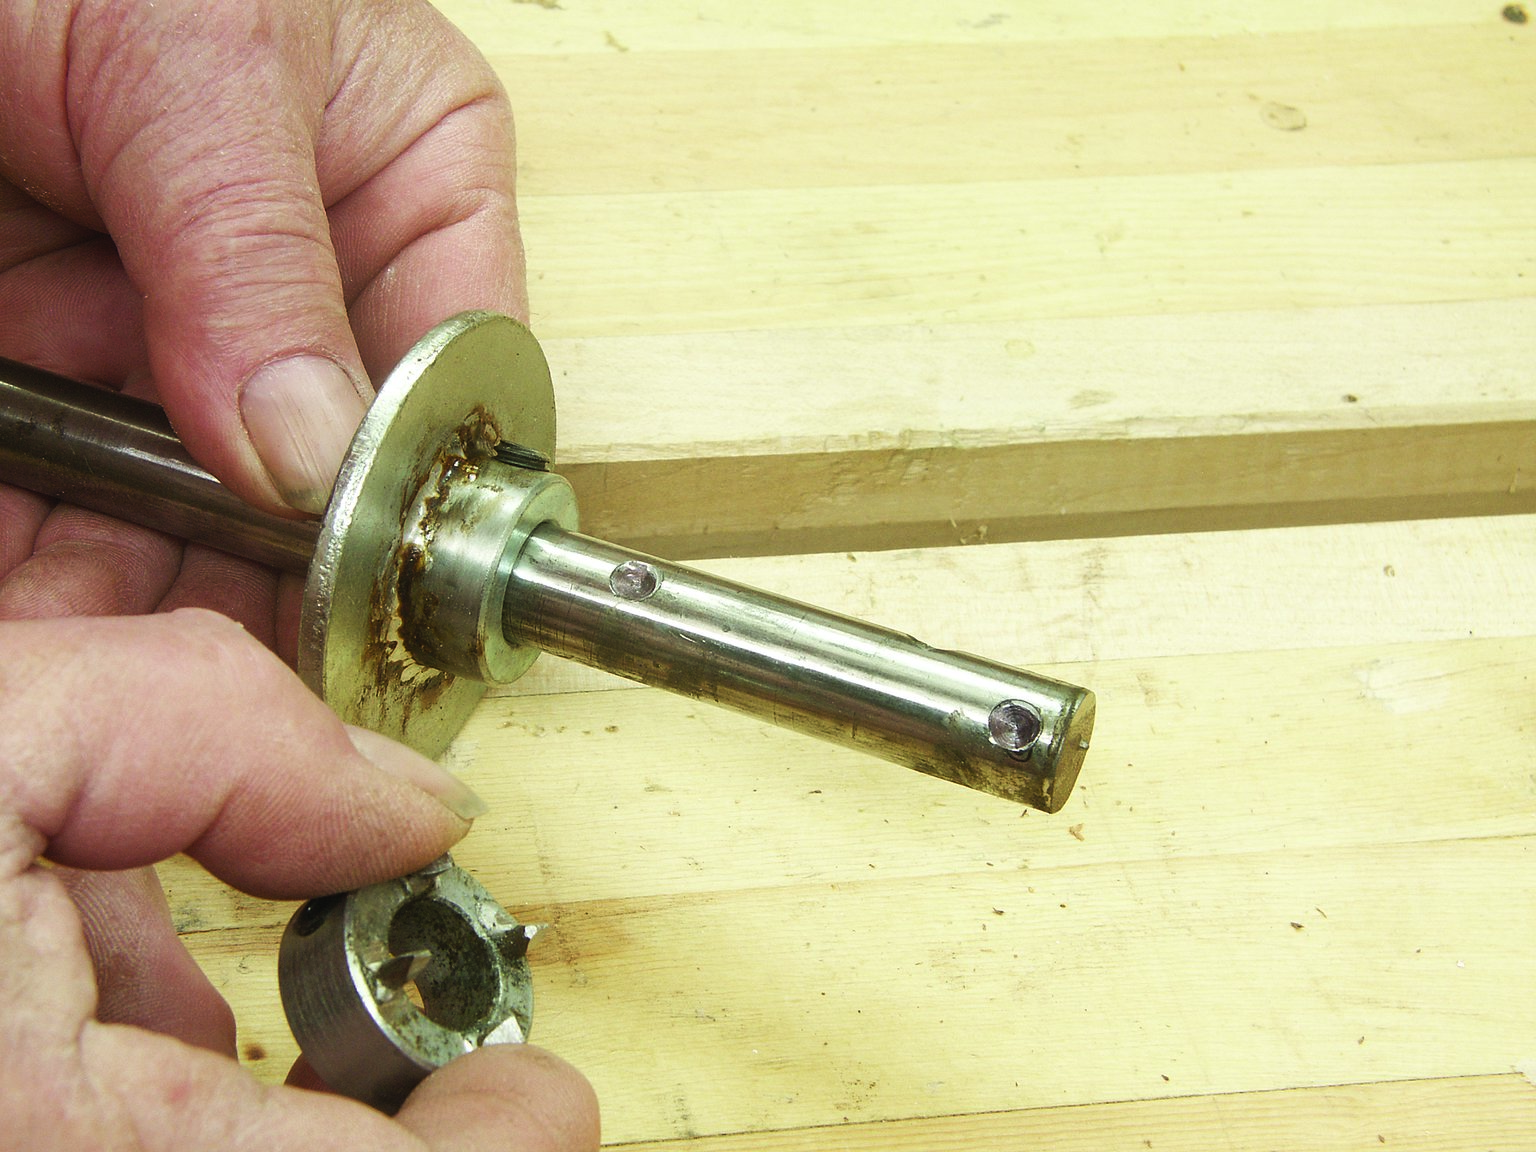
This simple device consists of two shafts. One is tapered to a point and one ends in a spur center. You could think of it as a lathe without a motor, except that on the spur-center shaft a large washer is placed to provide friction against the bearing block to prevent unwanted rotation.
The Vise in Use
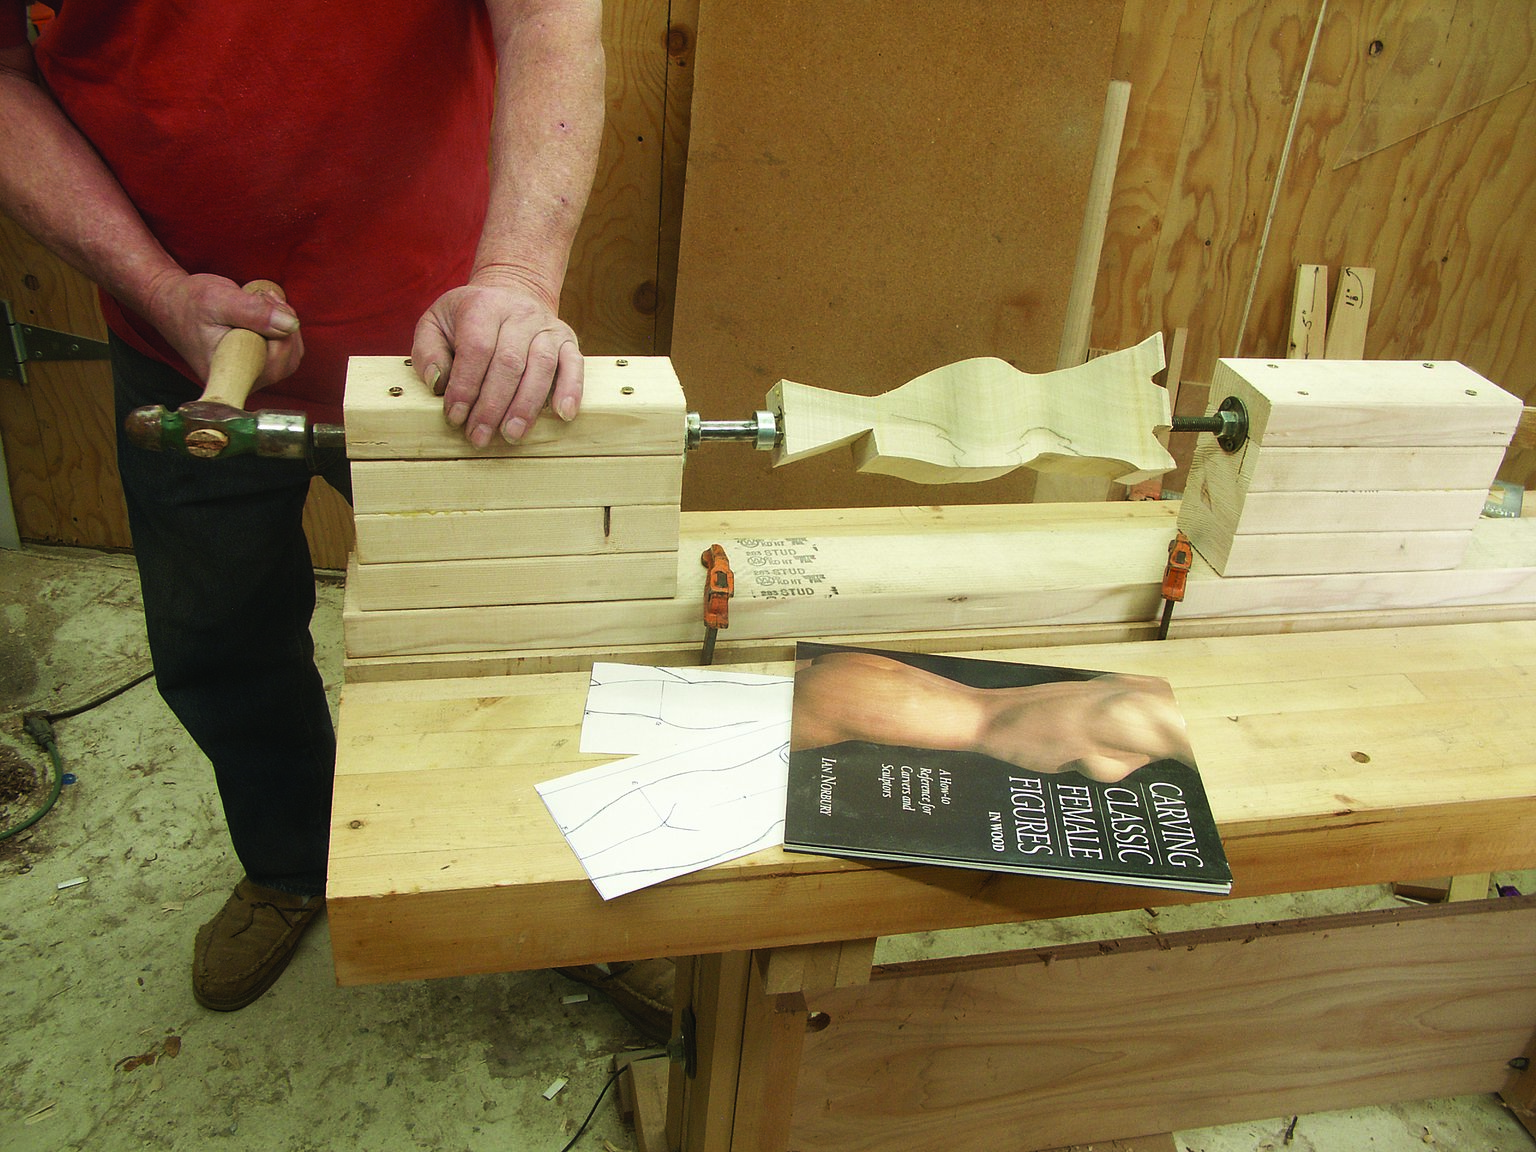 In order to use this vise, you need to plan ahead when you are roughing out the project. If you plan to cut out the blank on a band saw, you may need to leave tabs on each end to accommodate the vise. These tabs can be cut off in the final stages of carving, and the area left can be carved using another means of support (lashing a project to a 2 x 4 with an Ace® bandage provides gentle but firm holding).
Center your project in the vise, and tighten the point shaft. Then, give the end of the spur shaft that protrudes from its bearing block a firm blow with a hammer. This will firmly seat the spur. When carving, loosen the point shaft before rotating.
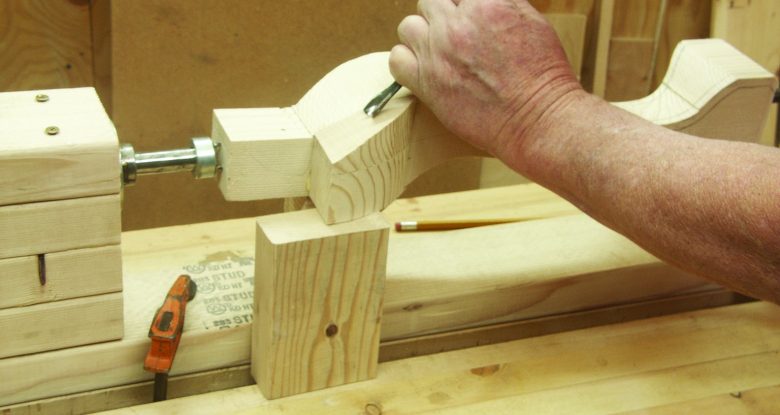
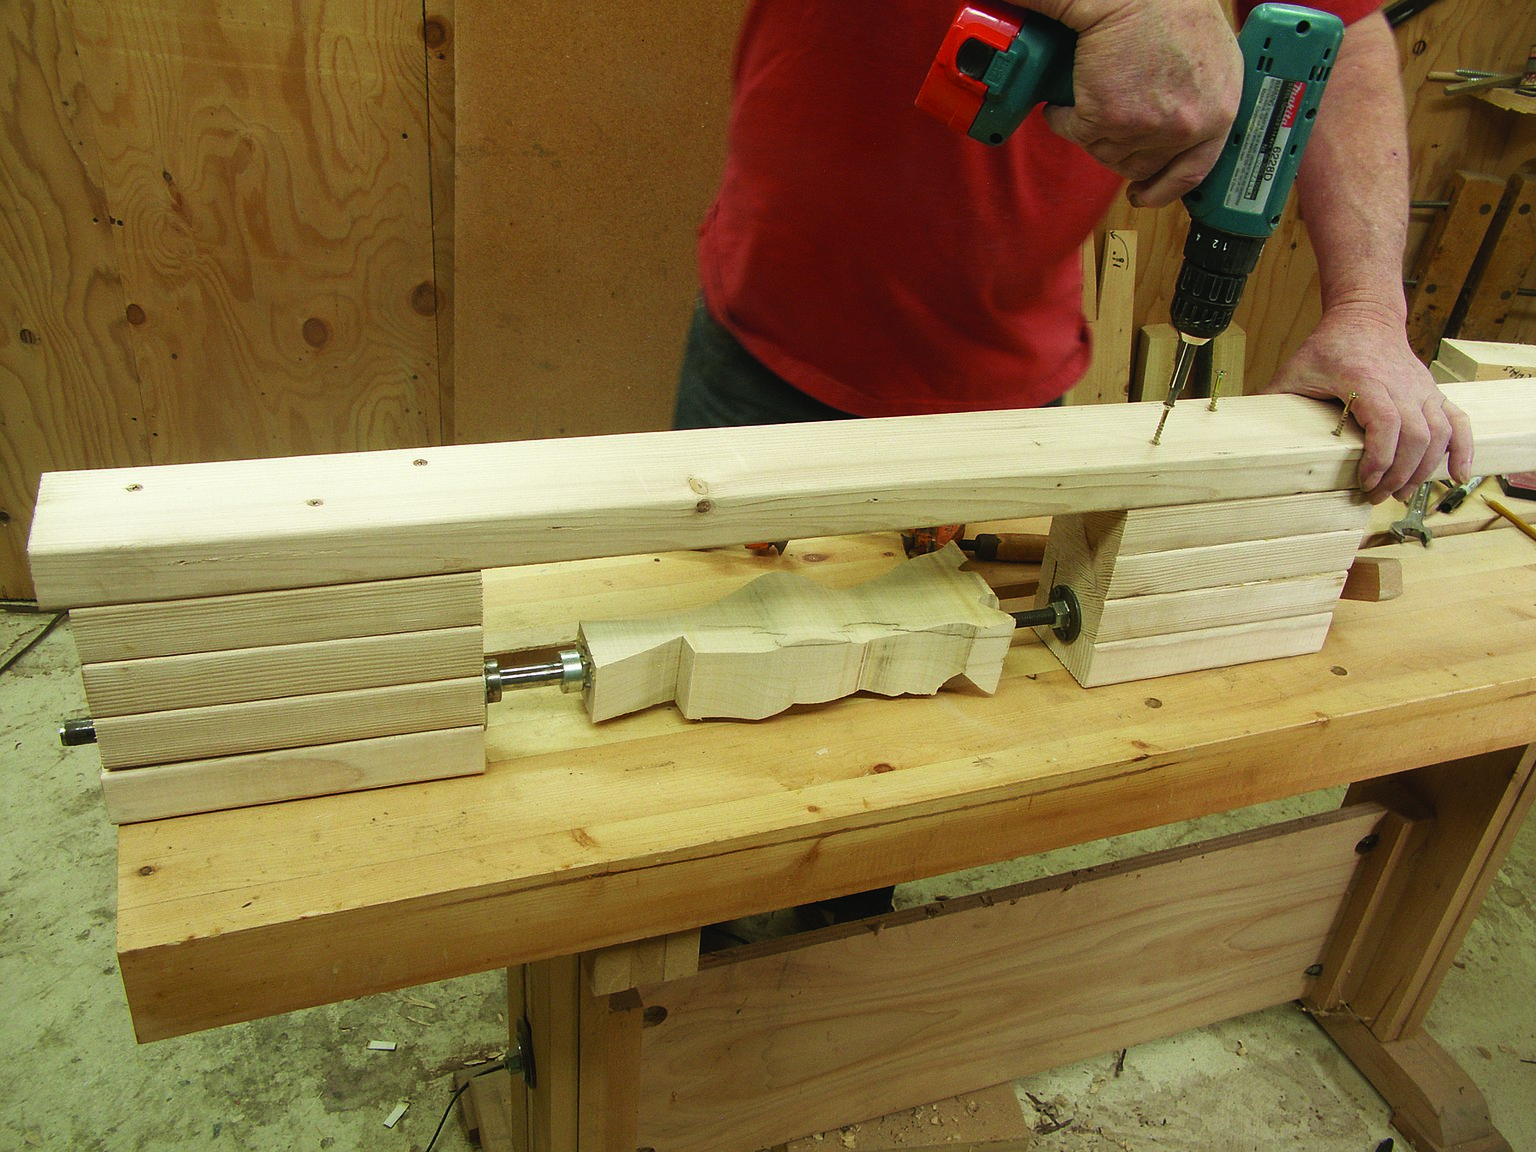
As you carve, keep your pressure or mallet blows in line with the shafts or perpendicular to your bench top at the upper center of your project. Keep in mind the project is prevented from rotating by the friction washer only. Heavy pressure to the sides of the axis of the shafts can cause unwanted rotation. There will be times when such pressure can’t be avoided. In these instances, provide extra support beneath the wing block, as shown above.
A Word on Soldering
CAUTION: All soldering should be carried out in a well-ventilated area. In no way should the galvanized components become discolored, indicating too much heat. This means the galvanizing zinc is burning and releasing harmful fumes. Remember, you are working with very hot items that can cause burns if handled. Also, this is a “safety glasses” operation.

The pieces to be soldered should rest on a non-flammable, insulating surface. Firebrick is an excellent choice, but scraps of drywall will work. To prevent drywall paper from burning during soldering, take the top layer of drywall outdoors, and in a safe place, standing upwind, burn off the top layer of paper.
Clean all areas of the joint with steel wool, fine sandpaper, or a wire brush, and apply a thin coat of flux. Before applying any heat, cut a small piece of solder, and place it near a joint. Heat all components to be joined evenly and slowly. If you melt the tiny piece of solder, and it blows off the assembly, you are heating too fast. Back the torch away. When the tiny piece flows, the joint is hot enough. Add more solder from the coil, taking care not to disturb the position of the components.
Let all soldered assemblies cool naturally. This could take 15 minutes or more.
Making the Vise
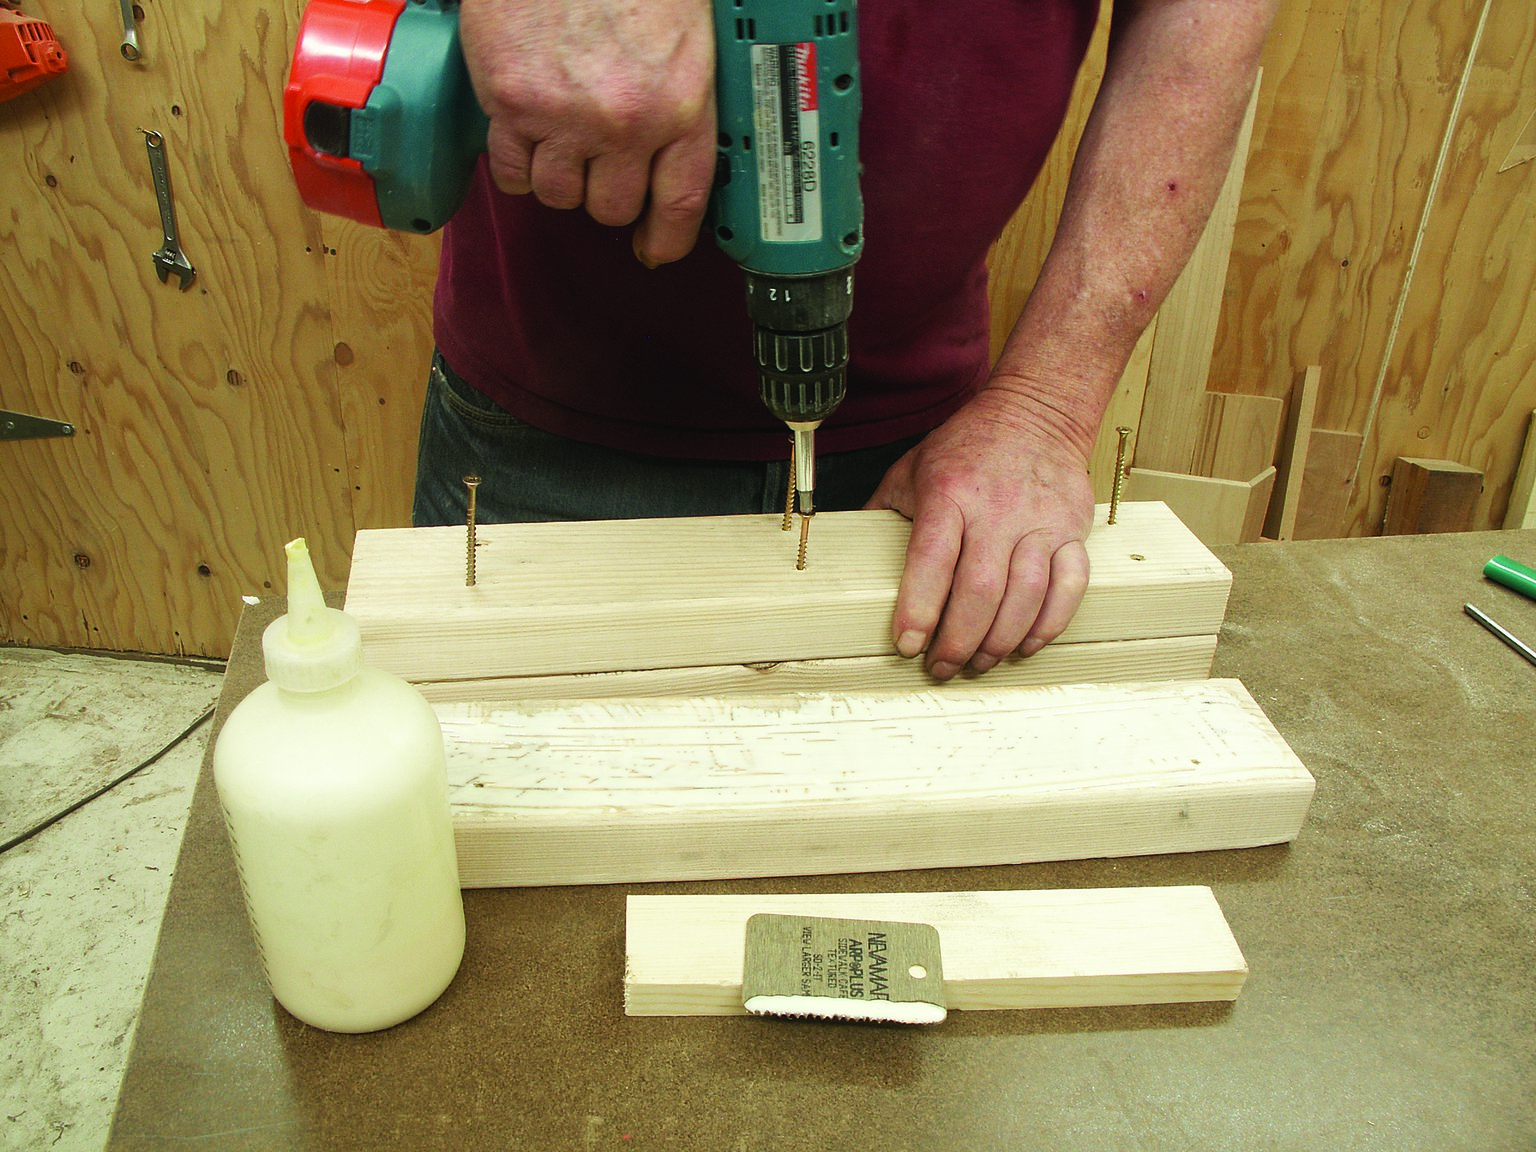
1. Glue together two 18″ lengths of 2 x 4. Drill six 5⁄32″-diameter pilot holes in one, and screw it to another with 21⁄2″-long drywall screws after spreading one with carpenters’ glue. Clamps may be used, but the drywall screws will prevent the 2 x 4s from sliding all over each other as the clamps are positioned and tightened. Turn the assembly over, and screw and glue a third 18″-long 2 x 4 to the other side. Wipe away any squeeze-out with a damp cloth. Once the glue has set—about 30-minutes—remove the 12 screws. This assembly will permit you to carve subjects as large as about 8″ in diameter. If you feel that you will be carving larger subjects, add another 2 x 4 or two.
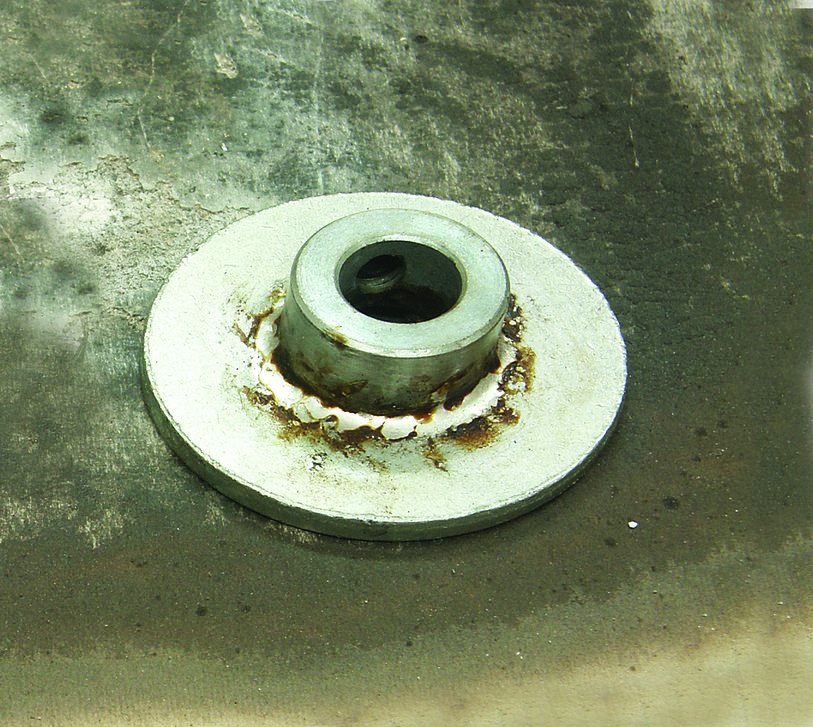
2. Prepare your shaft fixtures. Place a 5⁄8″-diameter shaft collar on a 1″-diameter washer, and solder these together. This will become your friction washer.
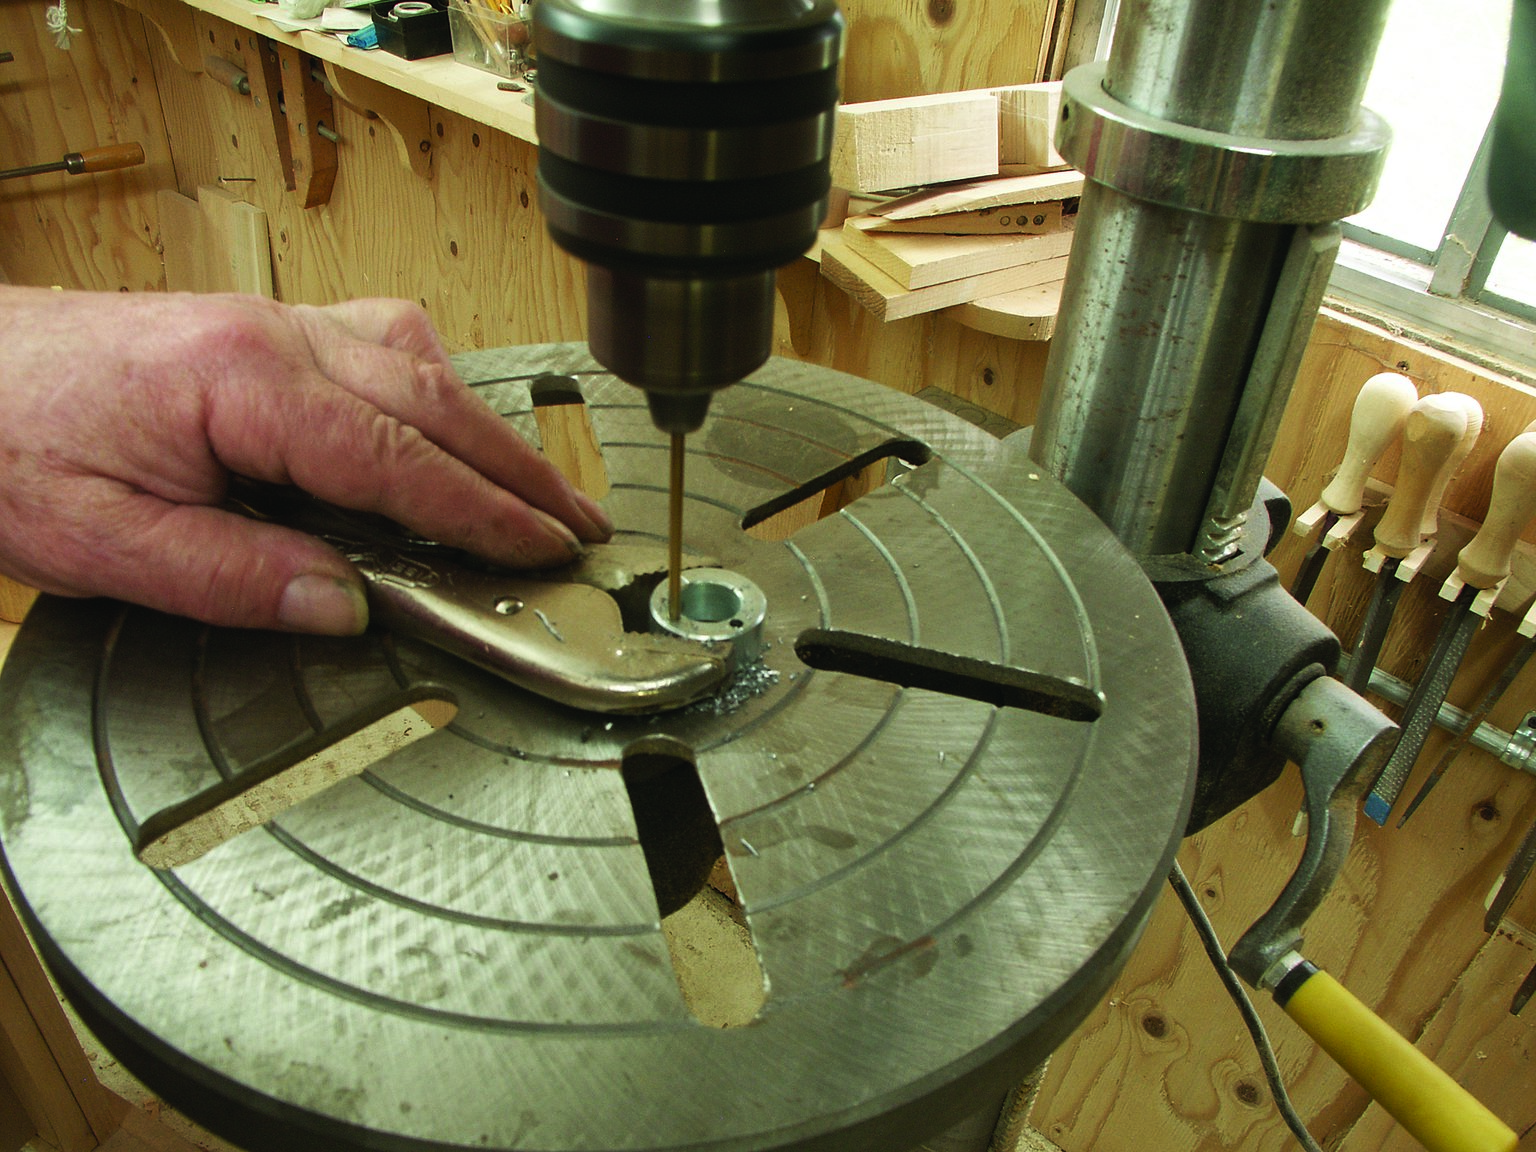
3. Prepare the spur center. Carefully lay out and drill four 1⁄8″-diameter holes, at 90° intervals around a 5⁄8″-diameter shaft collar. Be sure to avoid the set screw. The holes should go almost, but not totally, through the shaft collar.
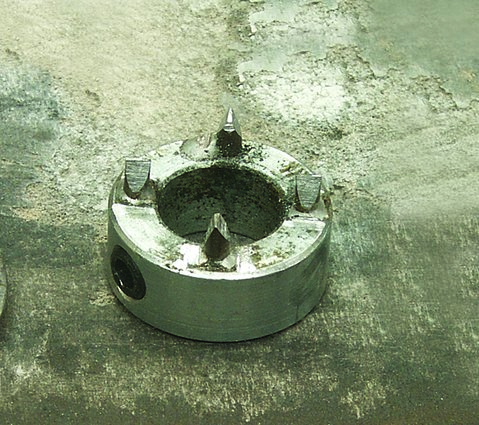
4. Cut four pieces of 1⁄8″-diameter steel rod to size. The length depends on how deep you drilled the holes into the shaft collar—in the end you want them to protrude from the shaft collar by about 5⁄16″. Solder them in place, and allow the assembly to cool.
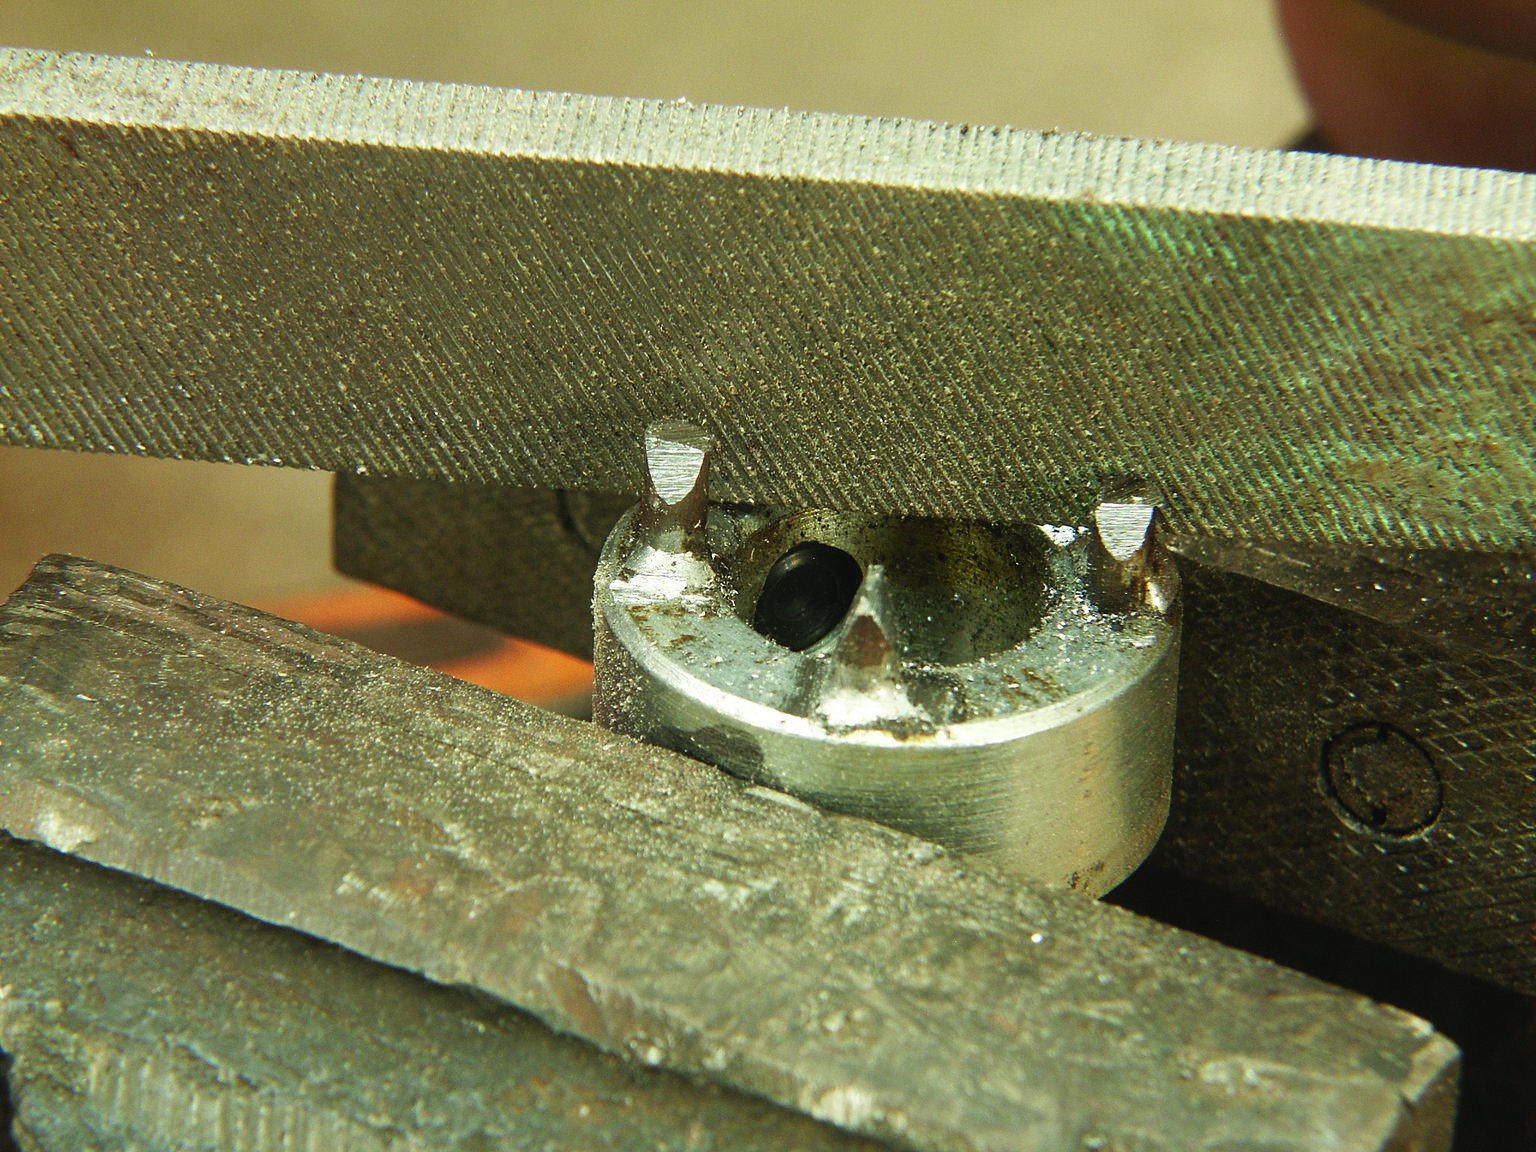
5. File the ends of the rods to a sharp edge of about 30°. This spur-center is designed for small projects.
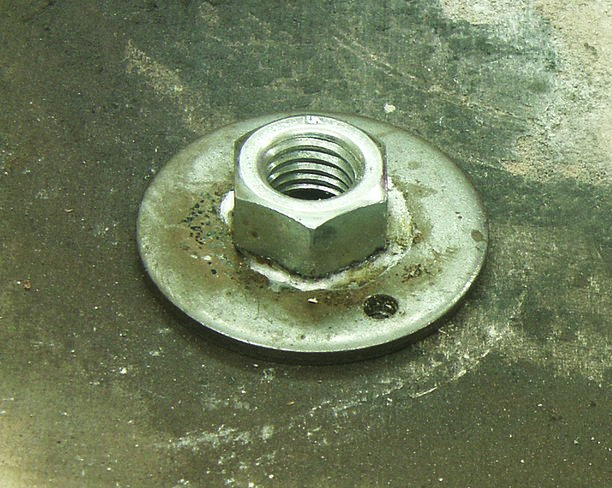
6. Prepare the point-bearing lock. Set a 1⁄2″-diameter nut over a 5⁄8″-diameter washer with two 1⁄8″-diameter holes drilled in it. Solder the nut in place. When screwed to the point bearing, this assembly will prevent the nut from rotating.

7. Prepare your handle. Drill a 7⁄16″-diameter hole almost through a piece of scrap that measures 11⁄2″ x 4”—feel free to whittle or carve the wood for comfort. Swab the hole with carpenters’ glue, and screw in a piece of 1⁄2″-diameter by 123⁄4″-long all-thread.

8. Lock the handle in place. The glue should hold the wood in place, but to make sure it doesn’t come loose, drill a 1⁄8″-diameter hole through both the wood and the all-thread. Insert a piece of 1⁄8″-diameter steel rod, clip it off, and peen both ends. Peening is done by placing one end of the rod on an anvil or other heavy metal object then firmly tapping the opposite end many times with a small hammer. Turn the assembly frequently so that both ends of the rod are treated. This will prevent the rod from coming loose. Grind or file the other end of the all-thread to a point of about 38°.
9. Make a pockmark at the end of the 5⁄8″-diameter shaft. Use a 1⁄4″-diameter drill bit to make the pockmarks, which will engage the set screw of the spur center. Make another about 21⁄2″ down the shaft so the friction washer can be locked away from the work. This will prevent the spur block from interfering with your work.
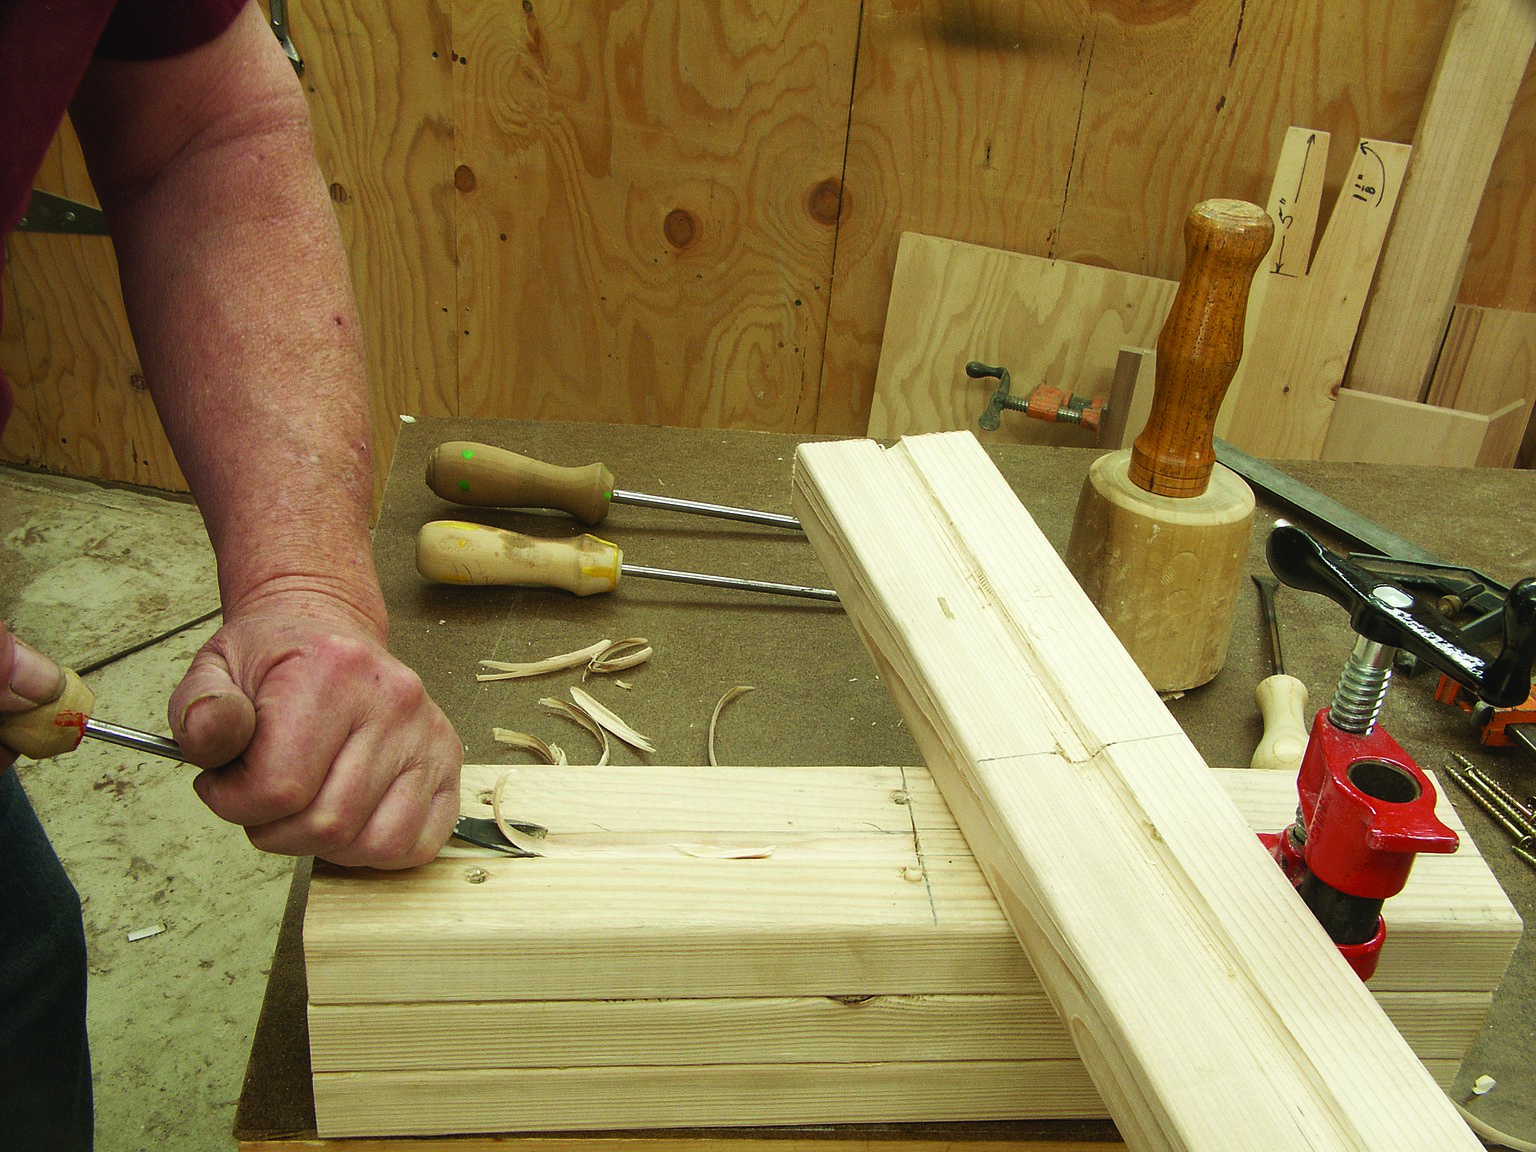
10. Prepare the bearing block. Mark the center of your 2 x 4 assembly. Lay out lines for cutting a 5⁄8″-wide channel in one-half of the assembly and a 1⁄2″-wide channel in the other half. Do likewise with an 18″ length of 2 x 4. With the appropriate size of gouge, carve half-round channels in both assemblies and the 2 x 4. This will provide a bore for your spur and point shafts. After carving, cut both the assembly and 2 x 4 in half—I use a band saw. This cut should be made as square as possible, for one surface will engage the friction washer. If the surface is not square with the shaft, it will cause uneven pressure on the friction washer and break the solder joint.
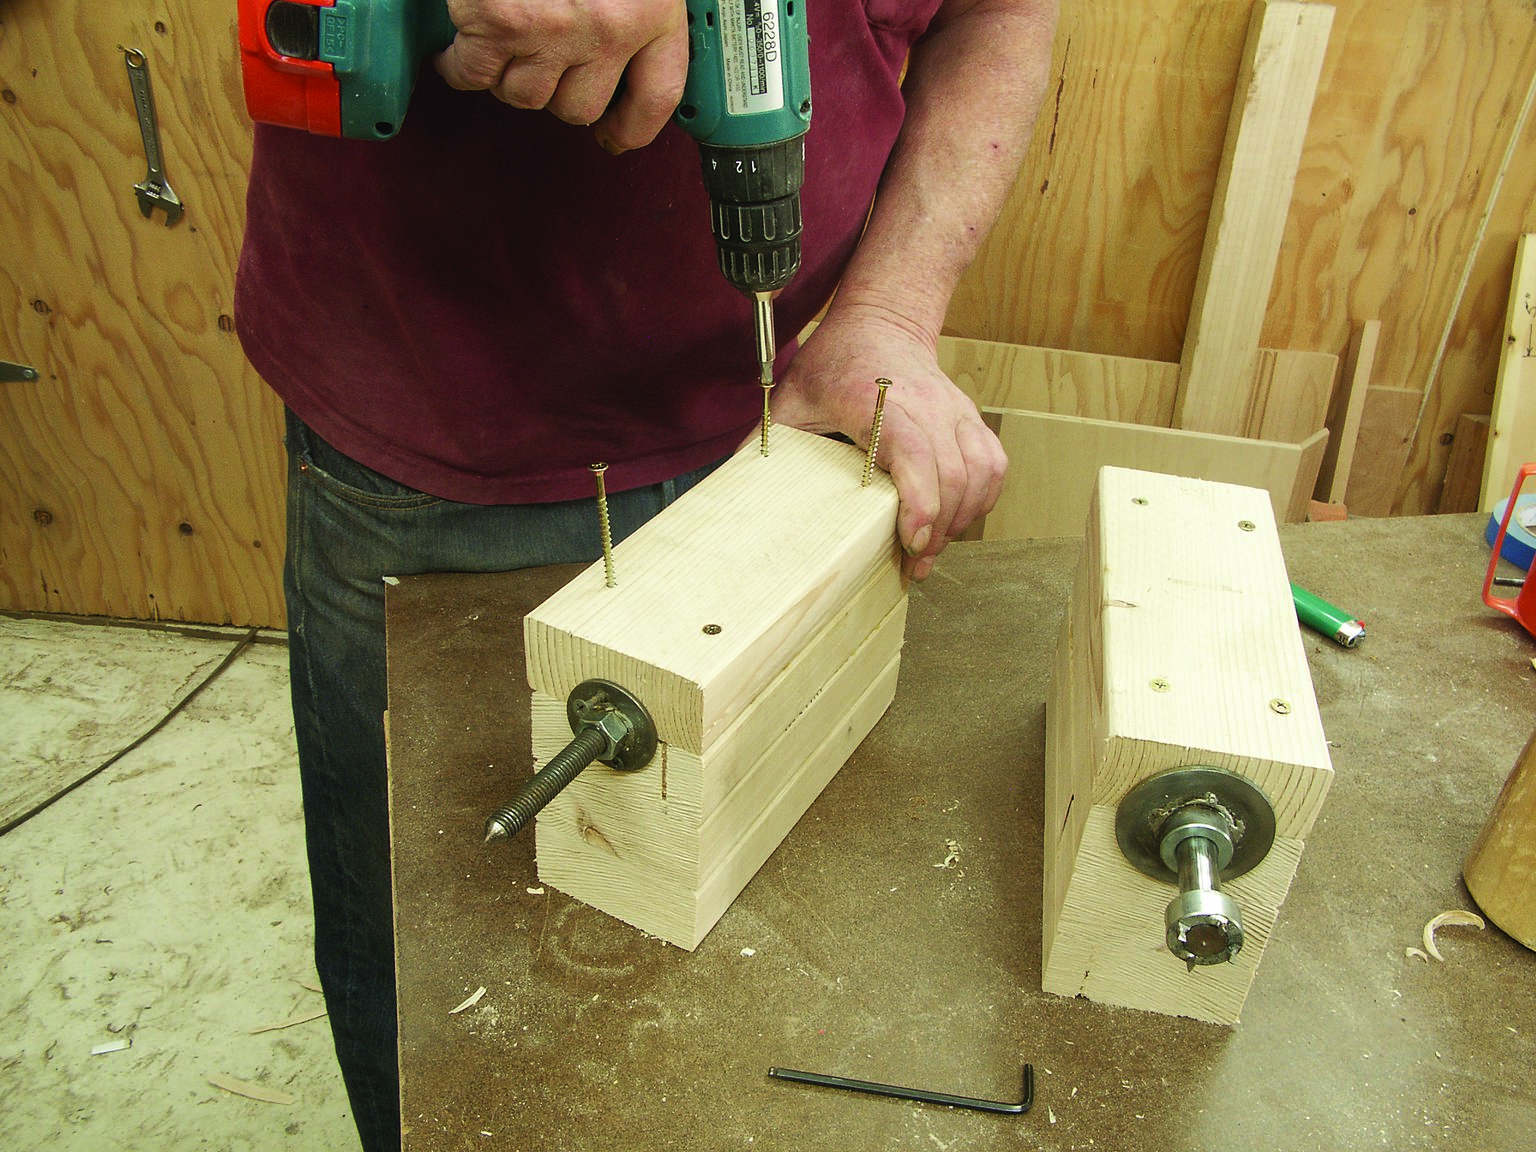
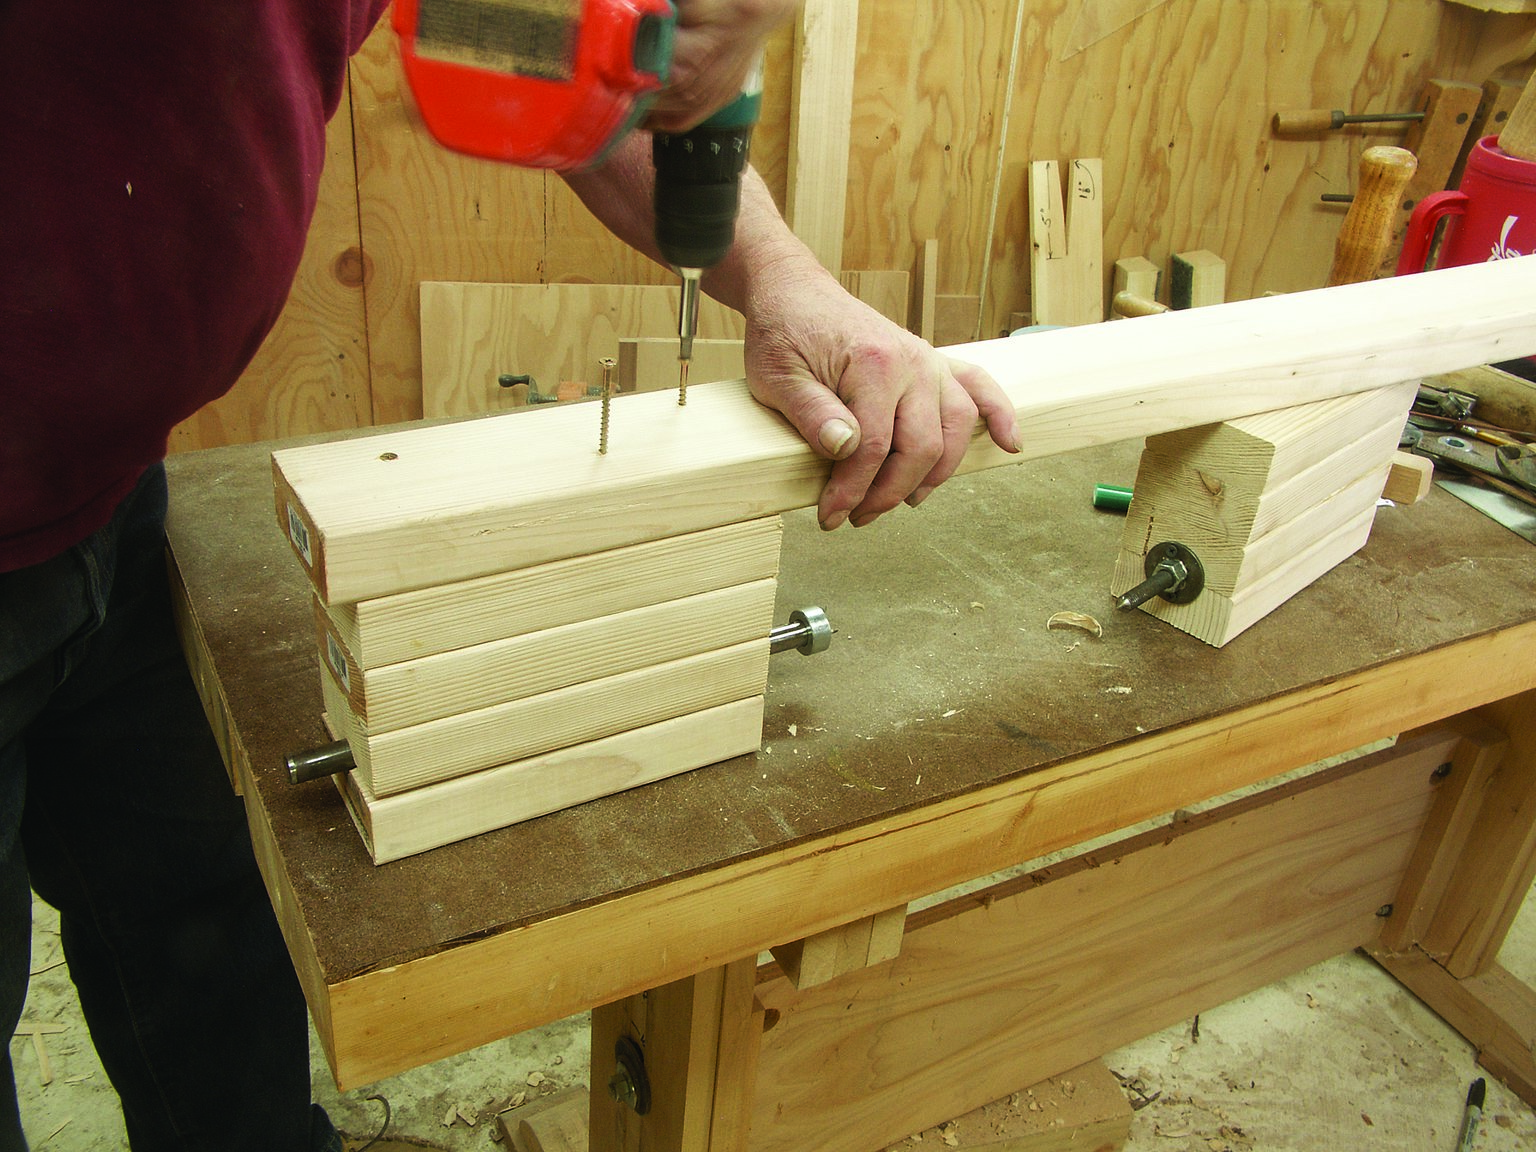
11. Assemble the point and spur bearings. Insert the 21⁄2″-long drywall screws through pre-drilled holes, as shown above. Once the point bearing is assembled, use two 1″-long screws to fasten the point bearing lock to the assembly. The shafts should turn with hand pressure. If they don’t, loosen the screws a bit.
12. Mount your spur bearing to the end of a length of 2 x 4. Use the 21⁄2″-long drywall screws. The 2 x 4 should be about 30″ longer than the longest project you intend to carve. Mount the point bearing in such a position that the end-to-end of the shafts will accommodate your project. Clamp the vise to your bench, and you’re ready to work.
Materials & Tools
Materials:
- 2 each 2″ x 4″ x 8’ studs (select ones that are as straight and knot-free as possible)
- 14 each 21⁄2” drywall screws
- 2 each 1″ drywall screws
- 1″-diameter steel washer
- 3⁄4“-diameter steel washer
- 2 each 5⁄8“-diameter shaft collars
- 5⁄8“-diameter shaft stock at least 123⁄4” long
- 1⁄2“-diameter all-thread at least 123⁄4” long
- 1⁄2“-diameter nut
- 1⁄8“-diameter steel rod at least 6” long
- Hardwood scrap about 1″ x 11⁄2” x 4″
- Solder and flux
- Firebrick or drywall scraps
- Carpenters’ glue
Tools:
- Hand-held propane torch (Mapp® gas will work even better)
- Drill and bit assortment
- Carving gouges
- Hacksaw or abrasive cutoff wheel
- File
- Wire brush
- Mallet and a couple of hammers
Patterns:
Discuss this material on the Woodcarving Illustrated forums.