

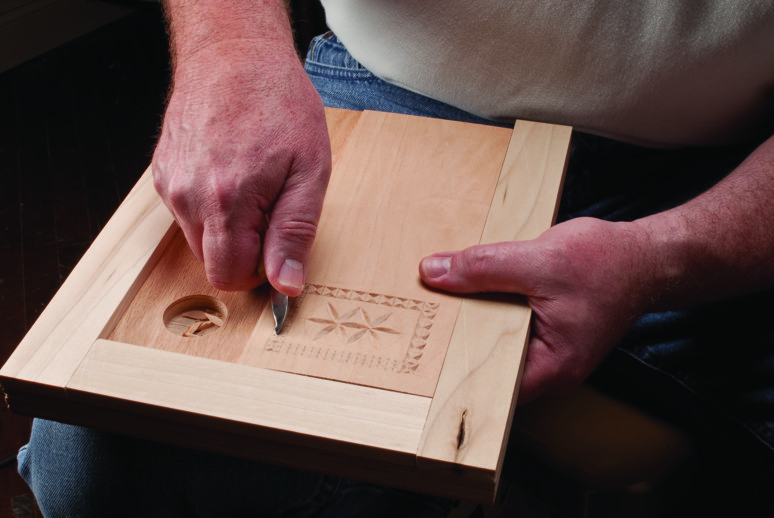
No room in the house is off limits with this portable carving station made from scrap.
by Charles Brown
This article was first published in issue 34 of Woodcarving Illustrated.
The dimensions of the lapboard depend on a couple factors; I made mine to fit comfortably in my easy chair. Your physique and available materials also play a part in your dimensions.
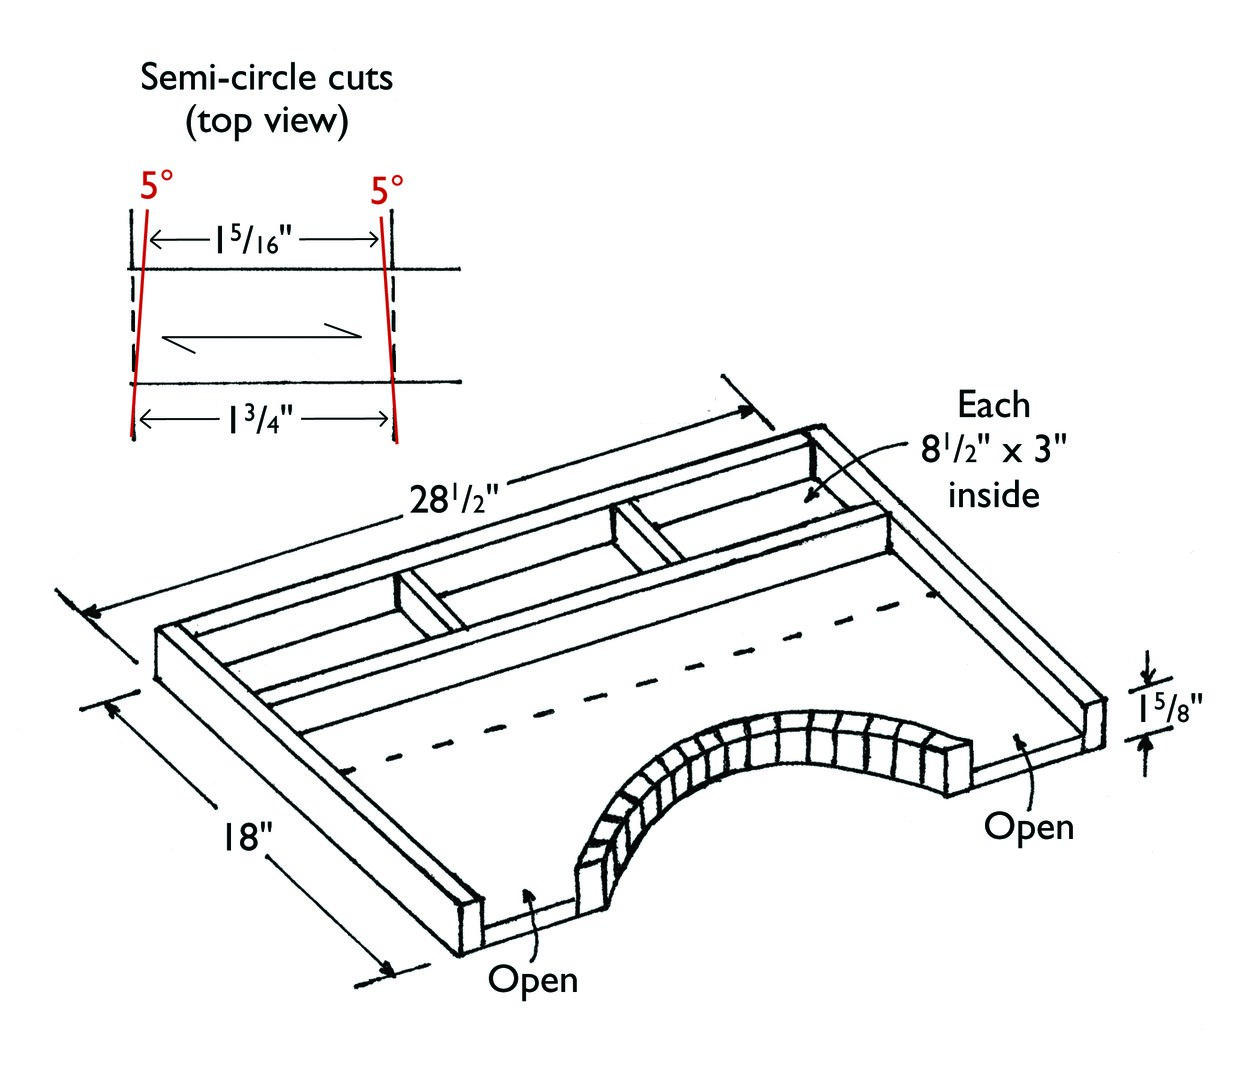
Step 1: Cut out your keystone pieces. Set your table saw or miter saw to cut at a 5° angle. Make your first cut. Flip your piece end over end. Mark your piece so the long dimension will be 13⁄4” and make another cut. Continue cutting until you have 16 keystone pieces. I used several pieces of scrap; that way it keeps your hands away from the saw blade. Leave the two end pieces a little longer.
Step 2: Glue up the semi-circle rail. Place these keystone pieces side-by-side. Flip them back and forth until they form the semi-circle. The two long pieces will be your end pieces. Glue and clamp the pieces together, starting on one side. Work your way over to the other side.
Allow the glue to dry, and sand it smooth.
Step 3: Assemble the lapboard bottom. Edge-glue the two pieces together. Trace the semi-circle rail onto the bottom, and mark the end pieces of the rail. Cut out this semi-circle with a scroll saw, bandsaw, or jigsaw and trim the ends of the rail to fit. Sand the cutout to fit the rail.
Step 4: Assemble the lapboard. Glue and nail the sides, back, and compartment to the bottom, as shown in the diagram. Glue and nail the semi-circle rail in place. Trim the end pieces to match the bottom. Note:
I left an opening to rest my arms on and to use as a cleanout. It is possible to add front pieces to completely enclose the lapboard. After assembly, I suggest you round over all edges for comfort.
Step 5: Apply your finish of choice. It is possible to leave it natural, but if you apply polyurethane, it will be easier to clean up.
Materials & Tools
Materials:
- 2 each 3⁄4” x 9″ x 281⁄2” pine (bottom)
- 2 each 3⁄4” x 15⁄8” x 18″ pine (side rails)
- 2 each 3⁄4” x 15⁄8” x 27″ pine (back rail and front of compartments)
- 2 each 3⁄4” x 15⁄8” x 3″ pine (compartment dividers)
- 2 each 3⁄4” x 15⁄8” x 15″ hardwood of choice (see Step 1—keystone pieces)
- Wood glue of choice
- 8d finishing nails
- Assorted grits of sandpaper
Tools:
- Sander
- Jigsaw, bandsaw, or scroll saw
- Table saw or miter saw
Patterns:
About the Author
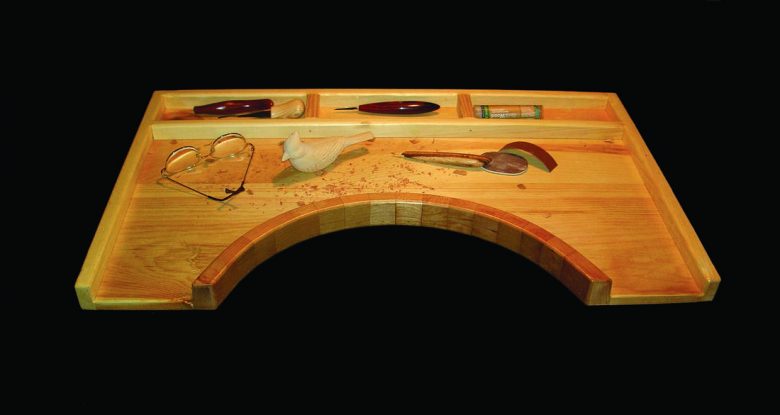
Charles Brown of Cincinnati, OH, is the winner of the 2005 Woodcarving Illustrated Poor Man’s Tool Contest with his home-made “lapboard.” With this lapboard, you can carve mess-free anywhere—Charles says you can take your carving out of the basement and carve in the comforts of your easy chair. Flip it over, and it becomes a handy portable writing table. Charles won $100 for his winning entry.
Discuss this material on the Woodcarving Illustrated forums.


