Great as a tool or a hair accessory, these projects are a cinch to shape and finish
By Keoma McCaffrey
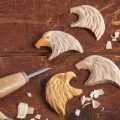
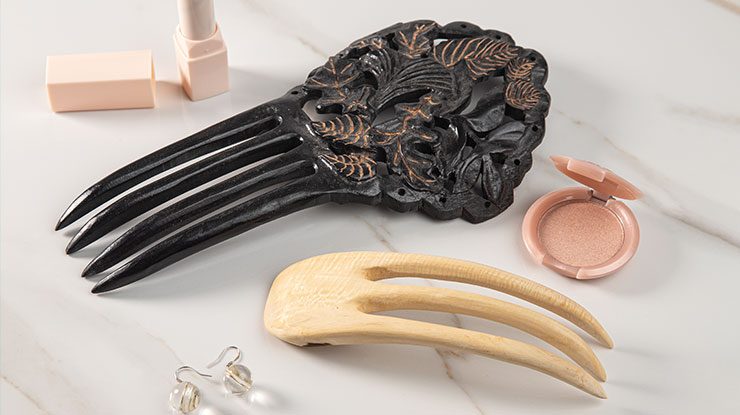
For over two decades, I have been making combs and selling them at fairs and online, and from there they travel to households around the world. Recently, I was contacted by a woman whose mother had just passed a beloved comb, one that I had made her years ago; now that’s a real heirloom. Once you get the initial idea down, the variations are boundless. Just be careful—combs are addictive! This pattern, with its smooth, flat space at the top, makes a great canvas to either show off the gorgeous wood you used or display other skills, like woodburning, painting, or relief carving.
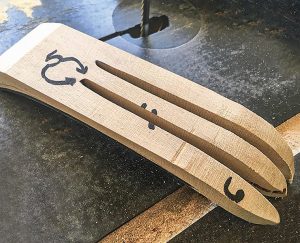
Getting StartedSketch the top and side pattern views on the block with a pencil, or photocopy the patterns and attach them with repositionable spray adhesive. Cut the top view on a scroll saw, and then turn the piece on its side and secure it in a vise. Cut the second view on a band saw. Note: The side pattern view is too thick to cut on a scroll saw, as scroll saws can typically handle wood no more than 2″ (5.1cm) thick. You’ll notice that this pattern has an arch shape. Straight hair combs and forks are great, but the arch shape sits around the contours of your head instead of just pressing against them. This allows you to wear it all day without getting a headache. |
 |
CarvingShape the comb. Round over all harsh edges on the blank, including between the teeth, using a rotary tool with a fluted cone-shaped carbide cutter. Widen the space between the teeth, removing a little wood at a time and maintaining a soft arc shape between the teeth. Note: When carving spacing between the teeth, remember to round the arc shapes instead of squaring then off. Refine the comb’s shape. Use the rotary tool with a sanding disc to smooth and round each tooth completely, tapering the teeth to somewhat sharp points with blunted ends. Then smooth the top and sides of the comb. Do this on the front and back. Add ornamentation as desired; I recommend woodburning, painting, or relief carving. I included a bonus relief carving pattern of oak and gingko biloba leaves, available online. |
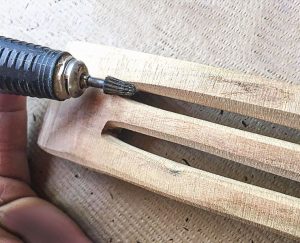 |
Tip: It’s All About The TeethIn order for the comb to slide easily through your hair, it helps to round the two outermost teeth so they face slightly inward. The remaining (inner) teeth can be straight. |
FinishingFinish the comb. As this will be used in hair, a natural finish is always better; I recommend raw linseed oil mixed with a drop of lavender essential oil (substitute your favorite scent here). Over time, each comb will pick up the natural body oils of its owner and take on a glow all its own. If you prefer a clear, glossy finish, I recommend using three to four coats of a spray-on clear enamel, buffing with a fine sanding sponge between applications. |
Tip: Go To GiftHair combs make wonder-ful gifts for anyone with long hair. Do you ever see women using pens or pencils to hold their hair up? They need a handmade hair comb! I like to leave one for my server when I leave an eating establishment. |
Materials• Hardwood, such as Osage orange or walnut, 1 1/2″ (3.8cm) thick: approx. 3″ x 6″ (7.6cm x 15.2cm) • Pencil • Spray adhesive: repositionable (optional) • Sandpaper: assorted grits • Natural finish, such as raw linseed oil • Essential oil, such as lavender: 1 drop (optional) • Clear spray enamel (optional) • Acrylic paints (optional) |
Tools• Band saw • Scroll saw • Rotary tool with bits: sanding disc, fluted cone-shaped carbide cutter • Sanding sponge • Vise • Woodburner (optional) |
| About the Author |
|
Keoma McCaffrey lives in Northern California with her husband, Jeff, and three sons, and a passel of animals. She carves most of her work from salvaged local hardwoods. She is a moderator on the Woodcarving Illustrated message board, woodcarvingillustrated.com/forum. |
 |
Get the Summer 2023 Issue Purchase the IssueFor more articles like this, subscribe to Woodcarving Illustrated magazine. Magazine SubscriptionPlus! Get digital mini magazines in your e-mail between printed issues.
|