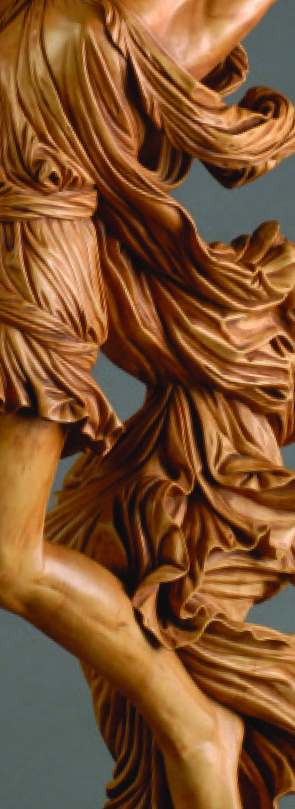
Fred Zavadil creates amazing flowing fabric in his award-winning carving “The Archer.”
Create Accurate details by studying how clothing relates to anatomy
By Mary-Ann Jack-Bleach and Fred Zavodil
Photography by Chipping Away Inc.
Whether you carve realistic figures or caricatures, it is important to understand how the underlying anatomy affects material. The clothing must convey the figure’s movement or pose. Accurate detailing of the material’s wrinkles and folds can be challenging, but the end result is worth the effort.
The best way to carve realistic-looking fabric is to start with a clay model. Most carvers use photos and other reference material, but this technique has limitations. The carver may focus on the clothing folds and carve into the body parts beneath the fabric. The resulting carving may have great detail, but overall look slightly off.
You can avoid the pitfalls of getting caught up in the fabric details by beginning with a clay model that focuses on the anatomy of the figure. This approach takes discipline as you must learn to work on two separate stages of clay modeling.
Creating the Clay Model
The first step in the planning process is to determine the size of the final carving. The height of the figure determines the body proportions, even if you will be exaggerating some of the features for a caricature carving. We built a 19″-tall figure for this demonstration. Create an armature to support the figure (see page 70 for techniques to create a simple armature) and build up the figure using your modeling clay of choice, such as firm Kleen clay.
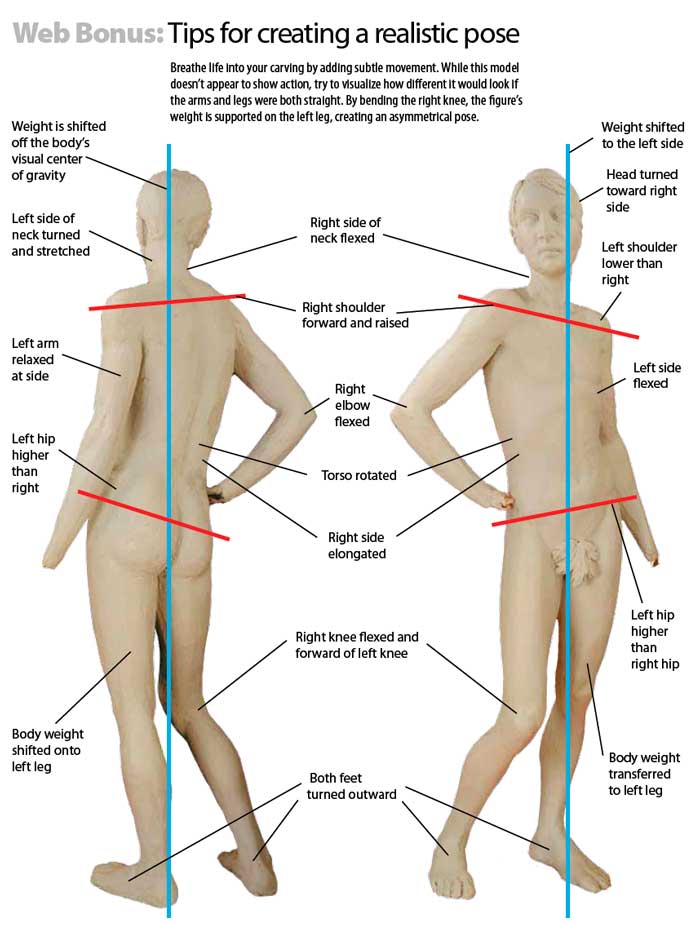
The clay model’s body proportions and anatomy must be correct. No matter how the clothing lies, it will not disguise a poorly proportioned figure. The clothing can actually accentuate the areas that are not anatomically correct. Use anatomy reference books, photographs, or live models. Invest whatever time it takes to get the underlying bone structure and musculature correct. The exaggerated asymmetrical pose of this clay model allows us to demonstrate a variety of interesting folds and fabric tension.

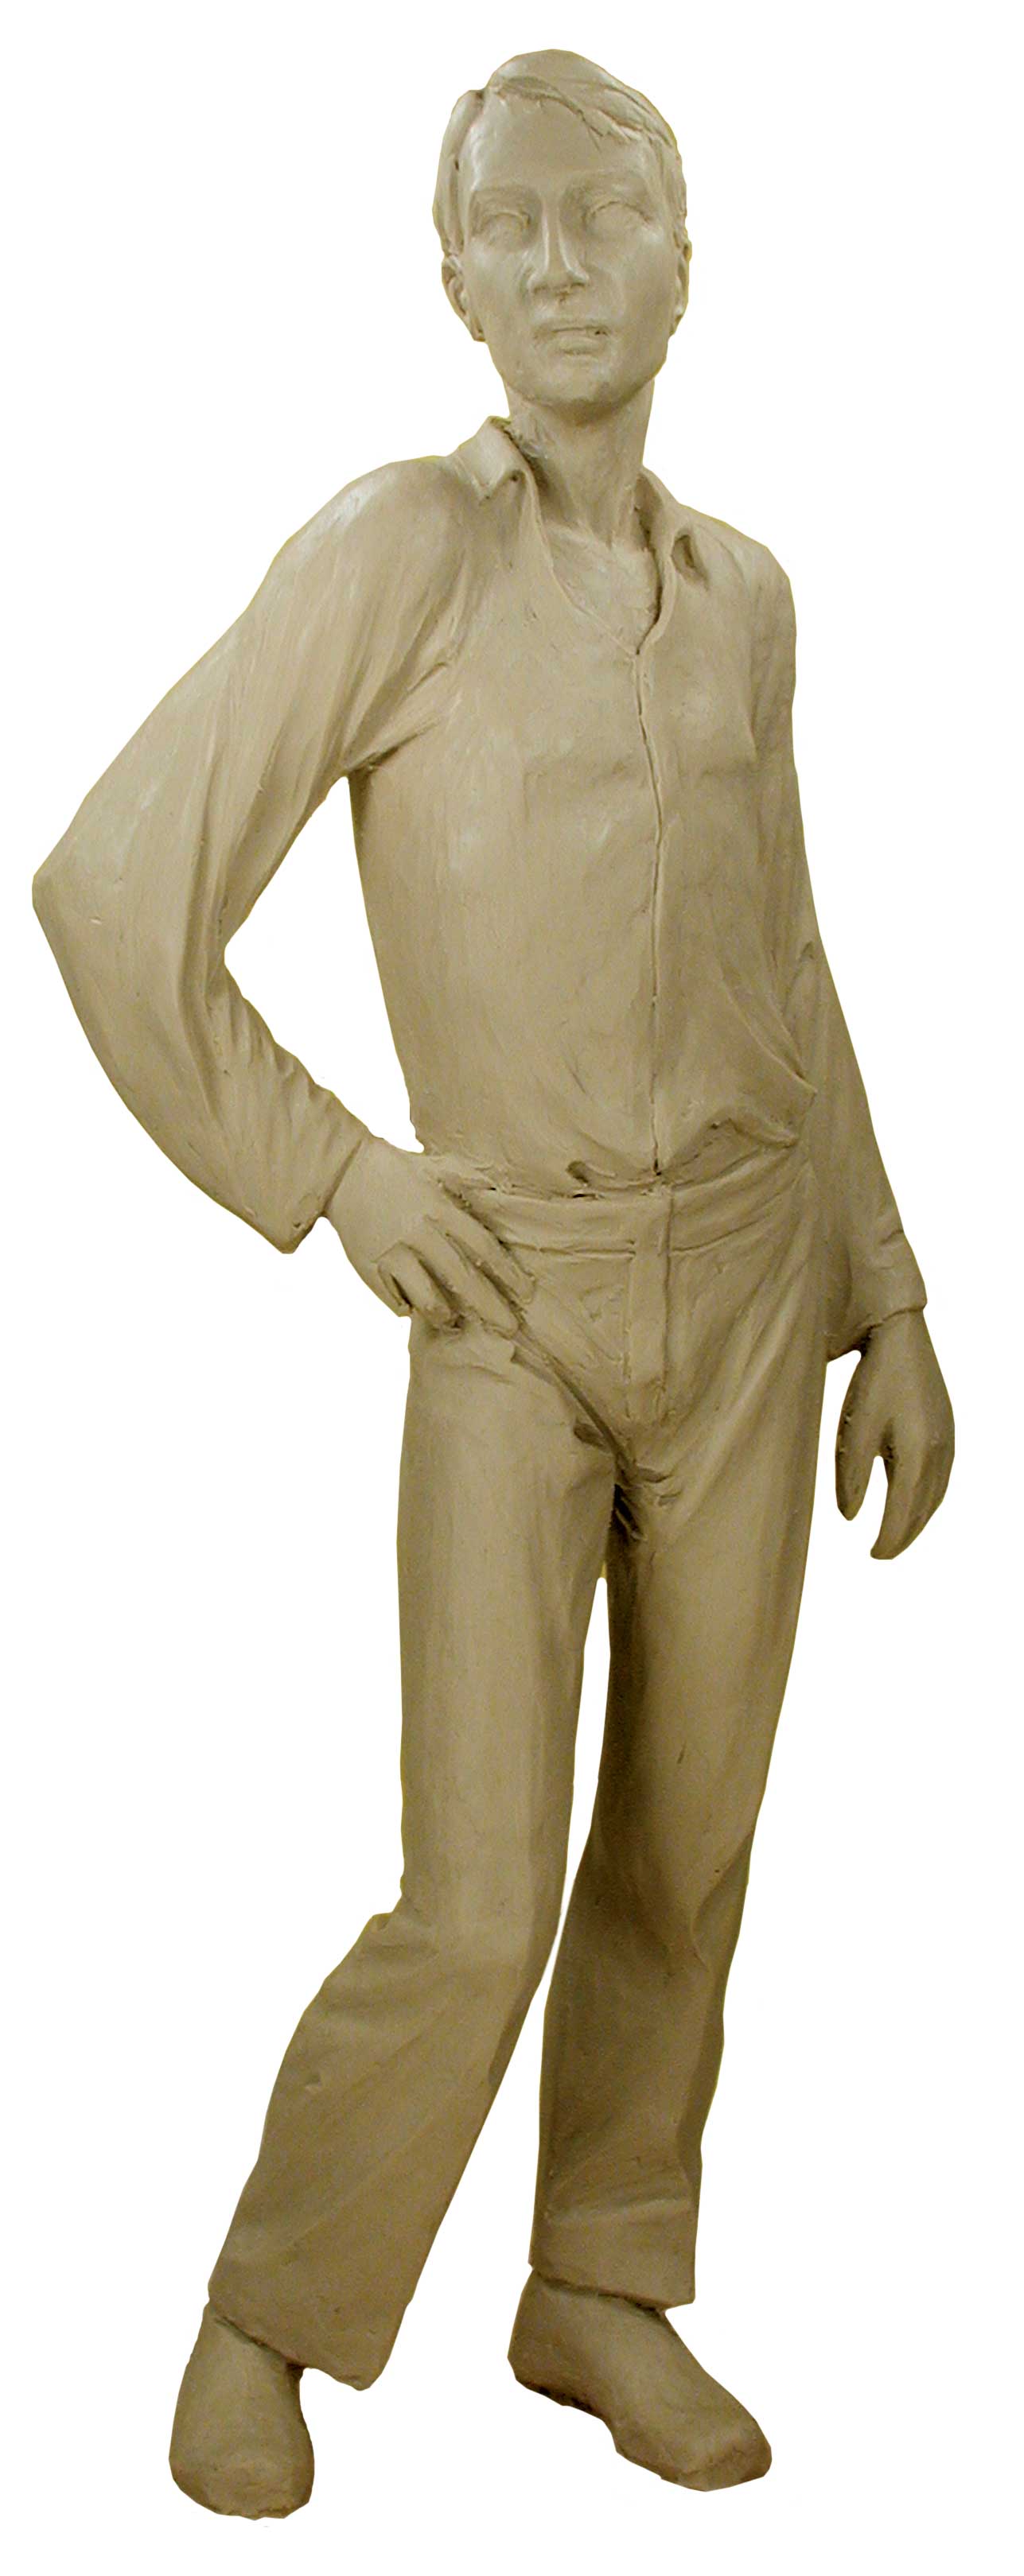
Adding the Clothing to the Model
In this stage, we represent clothing by layering small amounts of clay on top of the figure. Very little clay is added so the final figure size is close to that of the original nude figure. The way the fabric acts depends on the body parts that lie beneath it. Gravity and the nature of the fabric also play a role in how the fabric will move and fall.
Think about the different pieces of clothing in relation to each other. Because the shirt is tucked into the pants and the hands are on top of the pants, the pants must be added first. In some areas, such as the shoulders and chest, where the thin fabric clings to the body, almost no clay is needed.
A primary benefit of working in clay is when you are not happy with the result, you can re-work the area. This luxury is not possible when carving directly in wood.
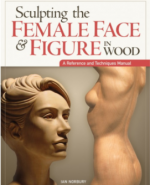 For more information about carving the human figure, read Sculpting the Female Face & Figure in Wood by Ian Norbury. The master woodcarver shares his techniques for sculpting the female face and form in wood. Includes six step-by-step projects, in-depth anatomical drawings, and a photo gallery of finished work. Purchase the book for $24.99 plus S&H at www.foxchapelpublishing.com.
 CLICK HERE to read more great projects from Woodcarving Illustrated Summer 2009 (Issue 47).