Power carving offers many benefits and retains many of the same qualities as handtooled carvings
By Jack Kochan
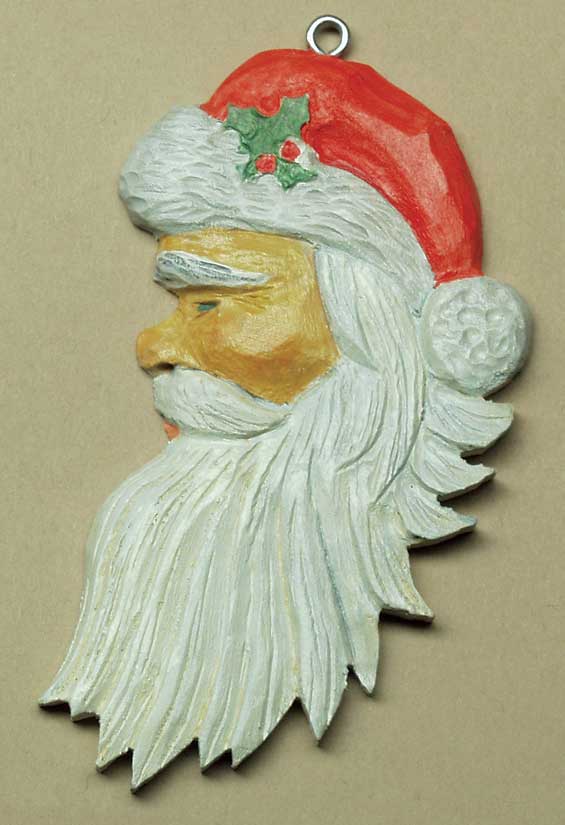
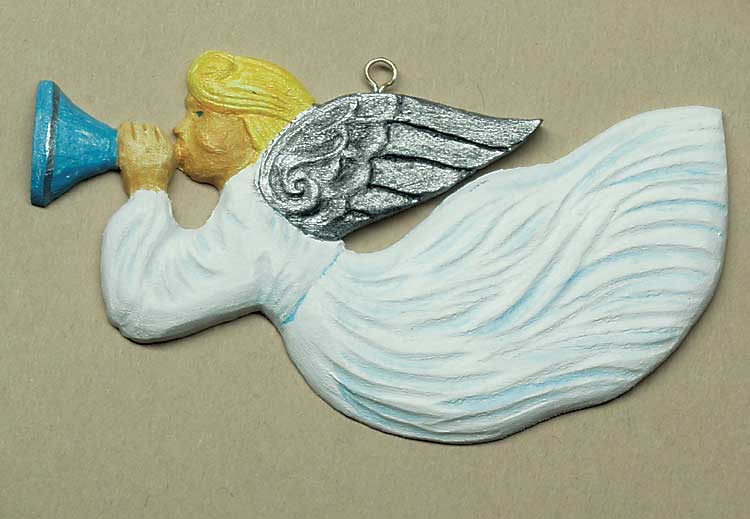
Ornaments never seem to lose their popularity, especially ones carved from wood. The angel design, which I modified, originally came from an old magazine. The Santa was a piece of commercial art in a gift catalog. Working up patterns is time well spent since I copy them repeatedly to generate very welcome gifts or use them as teaching aids.
Powerful Issues
Most readers know me as a power carver. While I am not opposed to whittling or traditional sculpting methods, I find that power tools offer many benefits. For one, I don’t have to sharpen the rotary bits I use. When they become dull, I simply discard them and buy replacements. For another, these same bits don’t offer the sharp cutting edges of traditional handtools, which, of course, must be constantly touched up, honed and even resharpened. And given the variety of bit sizes and shapes, I can virtually duplicate any handtool cut, whether the result is flat, curved or V-shaped. But most important, power carving requires much less physical effort. The handpiece common to flexible shaft machines and micro motor tools is doing the bulk of the work, such as removing wood or finishing up with an abrasive. The equipment is particularly beneficial for those with arthritic conditions who find it difficult to manipulate a knife or other edge tools.
 Most handtool carvers probably don’t realize how easy it is to learn power carving. In many cases, when doing projects like these ornaments, the technique involved is comparable to using a pencil or pen on a piece of paper. Young children, in fact, adapt very nicely to the equipment and will turn out simple relief carvings with ease. Introducing an eight-year-old to carving with a knife is a route I prefer not to take. Still, with any equipment that grinds, cuts or abrades, safe practices are a must (see sidebar below).
Painting by the Numbers
After both carvings are finished, I seal the wood with a 50:50 mix of lacquer and lacquer thinner and let it dry thoroughly. Since the sealer tends to raise the grain, I de-fuzz with a ScotchBrite disc on a mandrel run at low rpm. If unwanted scratches or rough areas turn up, some touchup sanding is required. The smoother the surface, the better the painted finish will appear. I then seal the re-sanded areas with the lacquer-lacquer thinner mix.
Priming the wood is next. I use a 75:25 mix of gesso and flow medium. Two or three coats may be required to achieve the degree of whiteness I prefer for the basecoat. A hair dryer will make the gesso “dry to the touch” in minutes, but a longer time is needed for the primer to cure or set up. After the gesso has cured, I de-fuzz the wood once again, this time by scrubbing it with an old toothbrush or soft bristle rotary brush in a power tool.
Many acrylic paints, which dry quickly, are available for the ornaments, but I prefer Jo Sonja’s Artists’ Colors. As a wildfowl carver, I find these paints ideal, and they work nicely for the angel and Santa. Paint names listed below are those used by the company. I add a small amount of matte varnish to all the colors for two reasons. For one, it provides a semi-gloss finish. For another, it acts as a binder for the paint pigments, making the colors more durable.
I recently came across Jo Sonja’s Silver. Applying it to one area of the angel, I was delighted with the results. The overall look is one of pewter rather than shiny metal. I may well put aside the other colors and use Silver on an entire angel in the near future.
Power Carving Safety Tips at a Glance
Wear a dust mask or a respirator or use a dust collection system. Power carving, in almost all cases, produces dust. All wood dust is harmful to the respiratory tract.
Safety glasses or goggles are a must. Chips often fly off the wood erratically and dust will affect the tear ducts.
Wear close-fitting clothing and tie up long hair. Rotating bits don’t discriminate between wood and other easy-to-catch objects.
Invest in a footswitch. If the handpiece gets tangled or dropped, release your foot instead of having to hunt for the motor’s on/off switch.
Power carve when you feel fresh. All work and safety-related surveys indicate that most accidents occur when fatigue has set.
Getting the Hang of It
Finding the right spot for a screw eye or other hanger is always troublesome on an irregularly shaped or unbalanced object. To locate the place for the hanger, use a simple tool that consists of a dowel with a pin inserted into one end. Push the pin into the back of the carving and hold the project so that it hangs vertically. When it appears balanced, draw a circle around the hole or make a pencil mark on the top end for a screw eye.
Materials:
Basswood: 1/4″ (6mm) thick, 3/8″ (10mm) thick if carving both sides: angel, 3″ x 5″ (76mm x 12.7cm); Santa, 2 1/2″ x 4 1/2″ (64mm x 11.4cm)
Acrylic paints
Flow medium
White and black gesso
Lacquer
Lacquer thinner
Acrylic varnish
Tools:
Flexible shaft machine or micro motor tool
Cylinder-shaped diamond bit with (grit-free) safe end
Long bud stump cutter
Needle-shaped diamond bit
Ball nose abrasive stone
Slightly tapered or cylindrical diamond bit
Diamond bit, ball-shaped: 5/32″ (4mm) dia.
Abrasive stones: flame-shaped, tapered white
Tapered sanding roll on a mandrel
Sanding stick
ScotchBrite disc
Toothbrush
Small eye punch
Screw eyes
CLICK HERE to download the Angel and Santa Ornaments Patterns.
 For further information on power carving read Power Carving Manual (Best of WCI). Carvers will learn all about the various benefits of carving with power tools and how to master this technique. Additional information about power units, hand pieces, carving burs, materials shopping, and more is included. The book is available at www.foxchapelpublishing.com for $19.95 plus S&H.
 This article first appeared in Woodcarving Illustrated Holiday 2003 (Issue 25).