 Use inexpensive power tools to get a sharp edge fast
By Mac Proffitt
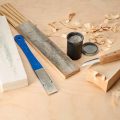
The goal in power sharpening is the same as hand sharpening—a sharp tool. But many people find power sharpening quicker and easier.
Safety
When you sharpen tools with power, you generate heat, sparks, and noise. Always wear hearing and eye protection. Keep water handy to cool the tools; just dip the tool in water if it starts to get warm.
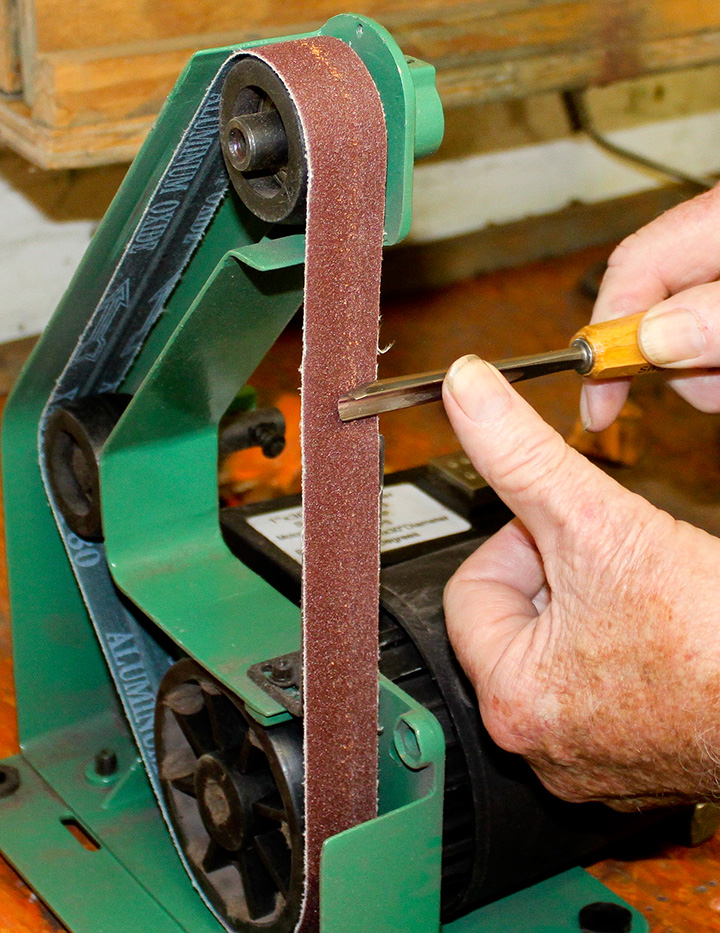
Sharpening with a Belt Sander
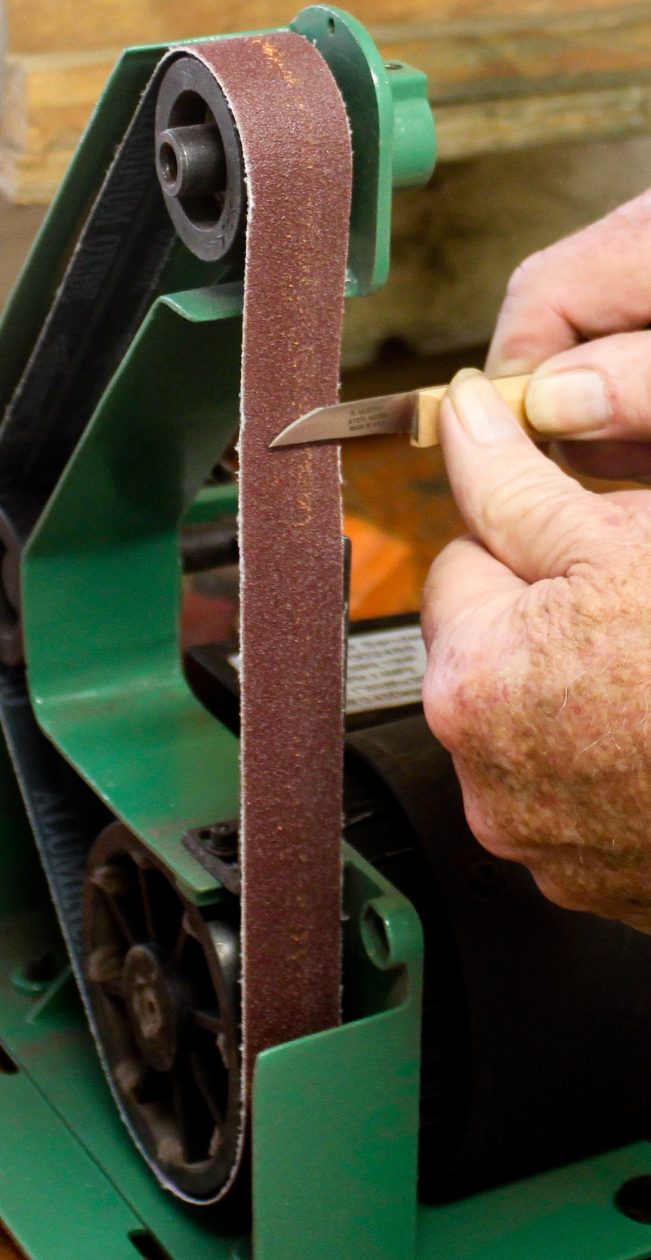
All you need to get started power sharpening is an inexpensive 1″ (25mm)-wide belt sander with an 80-grit belt. Many people are afraid to use a coarse belt, fearing that it will burn the tools. Actually, the 80-grit belt reduces the heat generated by the grinding process because the extra air space around the abrasive particles helps pull the heat away from the tool and keeps it cooler. The downside is that a coarse belt leaves scratches in the tool, which may require the use of a finer-grit belt or a coarse buffing compound to remove. A few light passes with the fine-grit belt usually remove the scratches. Use a light touch and let the belt do the work.
 Knife Sharpening
Hold the blade flat against the belt and position the blade so the belt rotates away from the cutting edge. Push the point away from you while keeping the blade bevel in full contact with the belt, which pushes the heat back into the handle. Make a few passes on one side of the blade and then switch to the other side. Continue the process until you start to see a wire edge developing. At that point, keep sharpening that side of the blade until you develop a consistent wire edge the length of the blade. Then, change sides to finish the other side.
Gouge Sharpening
Hold the gouge perpendicular to the belt and make sure the entire bevel of the gouge is against the belt. Rotate the tool smoothly and continuously along the curve of the gouge. Make sure the wings of the gouge are both the same thickness; if one area is thicker than another, remove the excess metal from the thicker area before rotating the gouge across the whole sweep. Check the inside of the gouge for a wire edge with your finger. The size and thickness of the gouge determines how many passes it takes to sharpen the tool.
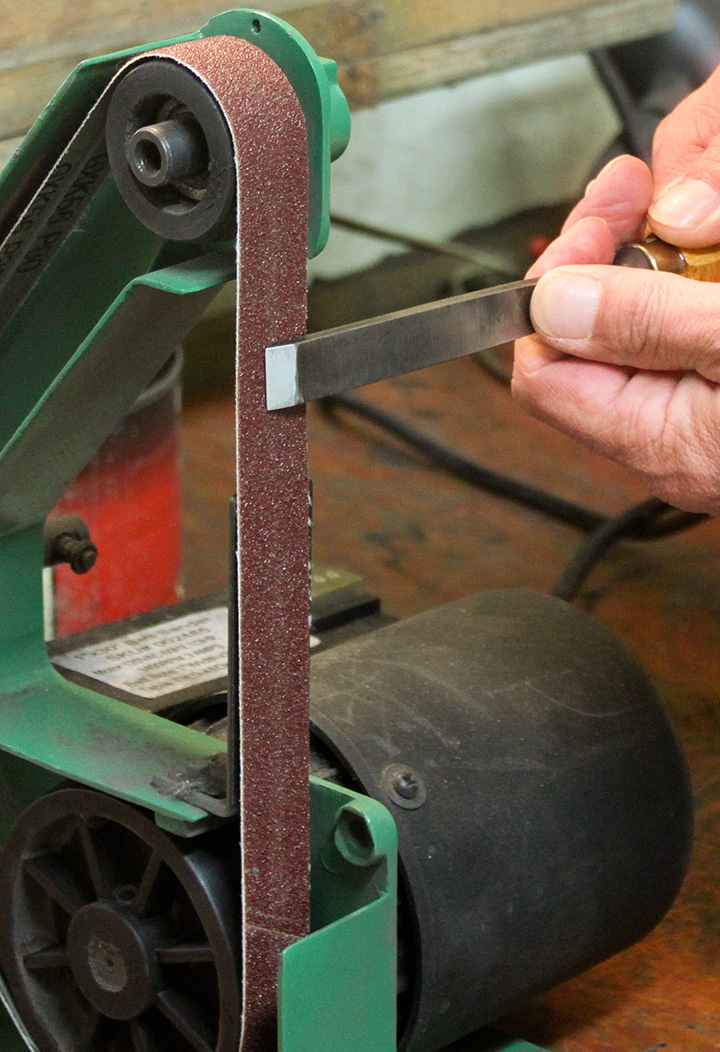 Chisel Sharpening
Hold the chisel perpendicular to the belt and position the entire bevel on the belt. Pull the chisel across the belt. Apply even pressure without pushing too hard. With a single-bevel chisel, when you feel a wire edge, the tool is ready to buff. For a double-bevel chisel, the process is similar to sharpening a knife—treat both sides the same until you create a wire edge.
V-Tool Sharpening
Use a two-step process to sharpen V-tools:
Step 1: The first step is to make sure the tool is square across the two wings. If necessary, use the sanding belt or a sharpening stone to square up the edges by holding the cutting edge flat against the belt. Then, make sure the wings are equal in thickness; use the sanding belt to remove excess metal if necessary. Finally, check the thickness of the metal at the apex of the V. If the metal is too thick in this area, you will end up with a hook and it will be difficult to sharpen. Use the belt sander to remove the excess metal at the apex of the V.
 Step 2: After preparing the V-tool, treat each wing like a single-bevel chisel. Hold the tool perpendicular to the belt and pull each wing of the tool across or down the belt until you get a wire edge on the inside of the tool. Watch the edge of the tool; when it no longer looks shiny, jam the tool into a piece of basswood to remove the wire edge and check for shiny spots. Sharpen until all of the shiny spots disappear. Note: I sharpen very small V-tools by hand using a diamond hone.
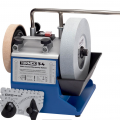
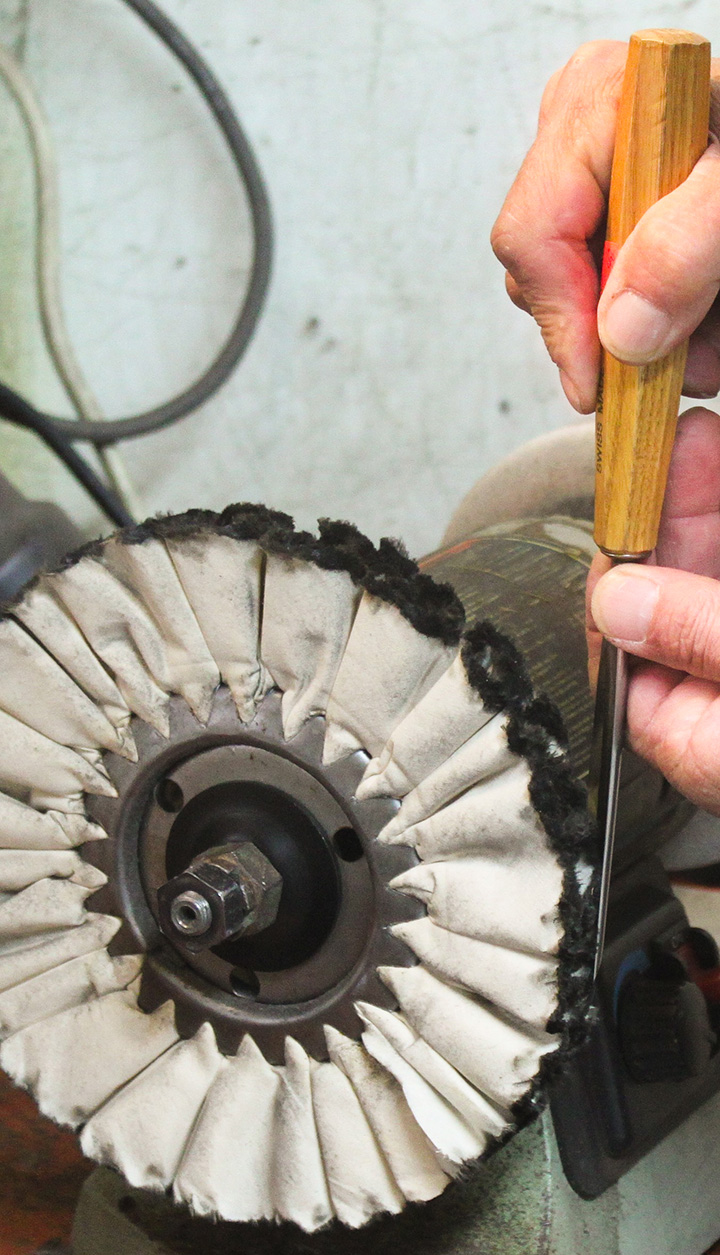
Buffing Tools
I use a multi-layer stiff cotton buffing wheel on a bench grinder to finish sharpening my tools. The layers of the cotton wheel provide a lot of air space and help reduce the heat, and the cotton buffing wheels also round the edge less than leather, rubber, felt, or paper wheels. Soft buffing wheels don’t work as well for me.
If you have a variable-speed grinder, set it for about 3400rpm. If your grinder is faster than 3400rpm, use a lighter touch. If your grinder is slower than 3400rpm, it will just take longer to buff your tools.
 Buffing compounds come in several different grades, similar to sandpaper grits, which range from the coarse black to the very fine green. I use the fine gold grade (which looks orange) or the very fine green grade. Buffing compounds are mixed with light grease that helps them stick to the wheel. While the compound will fly off a brand-new wheel, it will stick after a few applications. Once the wheel is fully charged, only add more compound if it takes longer to buff your tool.
A few basic tips apply to all tools. Position the tool so the wheel strikes and buffs the entire bevel of the tool. The wheel should always rotate away from the cutting edge. Look at the wheel from the front and imagine a clock face; I position the tool on the wheel at the 4:00 or 8:00 position, depending on which side of the tool I am buffing. Do not turn the tool edge into the wheel; if the edge catches in the wheel, it can pull the tool out of your hands. Keep both hands on the tool with your elbows locked at your sides. Like the sanding belt, if you hold the tool against the buffing wheel for too long, it can burn the edge. Test a freshly buffed tool by cutting a piece of basswood. If the cut is difficult to make or ragged, buff the tool again.
 Buffing a Gouge
Position the gouge against the wheel with the entire bevel touching the buffing wheel. You may need to tilt the gouge slightly downward to ensure the entire bevel touches the wheel. Rotate the gouge across the wheel so you can buff the entire bevel. Buff the outside a few times and then flip the gouge over and buff the inside. Hold the gouge straight upward along the outside of the wheel and carefully push the gouge into the outside of the wheel.
Buffing a Chisel
Buff a chisel similar to the way you buff a gouge. Pull
the chisel upward, making sure the entire bevel is buffed. Buff both sides of the chisel, even if it’s a single-bevel chisel.
Buffing a V-Tool
Because a V-tool is two chisels joined, treat each of the wings as a chisel. Then, position the point of the V on the wheel and rotate it from side to side to polish this tiny area. Buff the inside of the V-tool using the technique to buff the inside of a gouge. For small V-tools, pull a leather shoestring through the inside of the V to remove any wire edges. I test the V-tool by making S-shaped cuts on a piece of wood. The insides and the bottom of the cuts should be smooth.
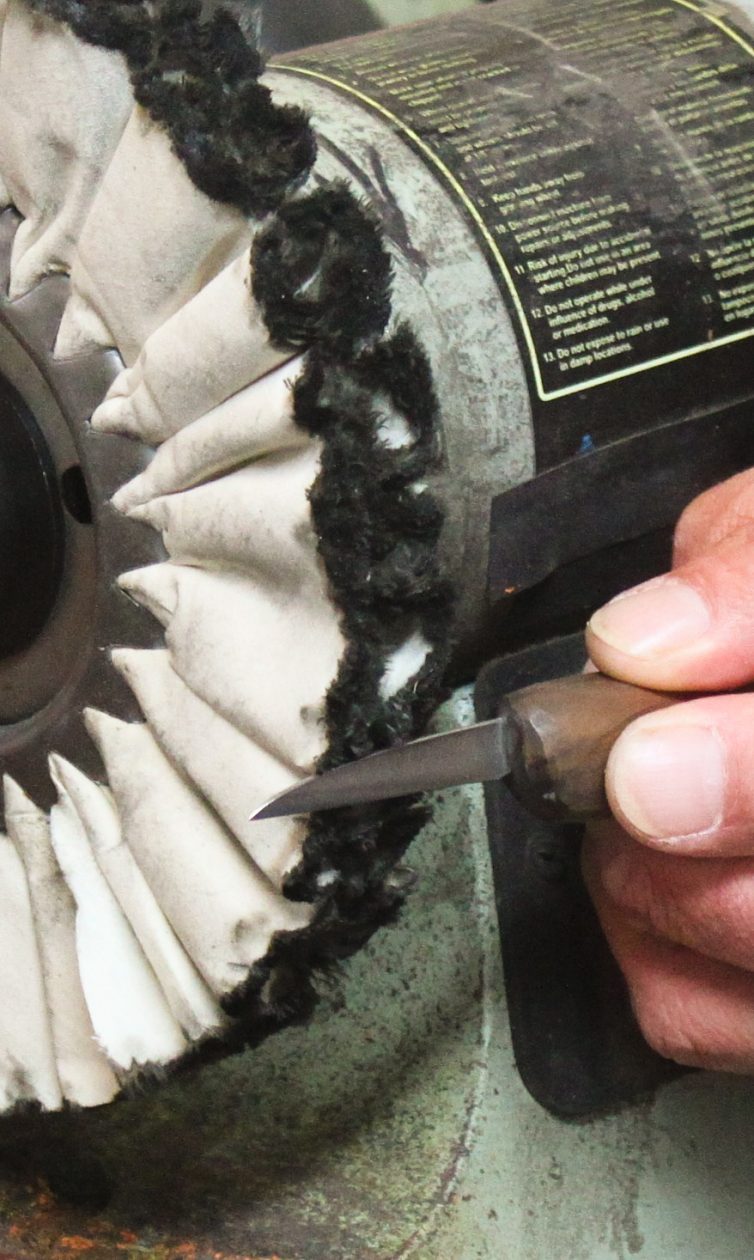 Buffing a Knife
Position the knife on the wheel with the tip of the knife pointing away from you. Move the knife back and forth a few times. Remove the knife, walk to the other side of the grinder, and use the same technique to buff the other side of the knife. Remember to position the knife so the wheel spins away from the cutting edge.
Keeping Tools Sharp
After sharpening your tools, you can use these buffing methods to keep your tools sharp. If a tool is not chipped or broken, simply buff it to maintain a razor-sharp edge. I use my buffing wheel to maintain all of my tools.