 By Cyndi Joslyn
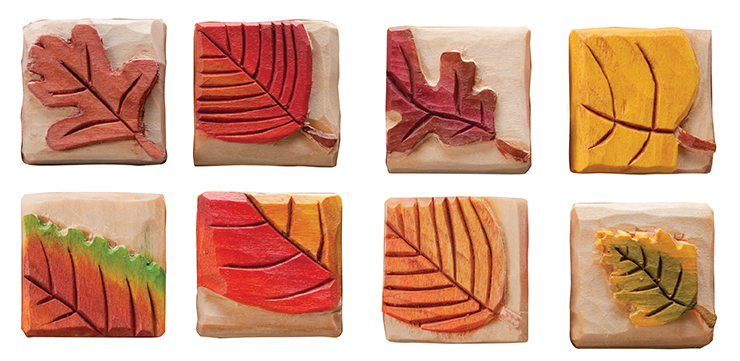
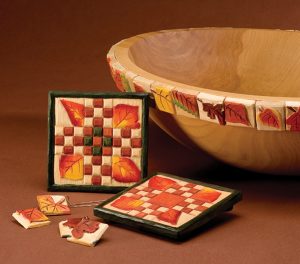
These little relief carvings are surprisingly simple to carve and paint. They make an ideal project for beginners and are a lovely diversion from more advanced projects.
I originally intended to use the tiles as a border on a turned wooden bowl, but the more I worked with the designs, the more ideas they inspired. Use individual tiles for earrings and pendants or glue a magnet to the back. I incorporated a checkerboard design with a few of the leaves to create festive fall coasters.
INSTRUCTIONS:
Transfer the pattern to the blank. Sandwich a piece of graphite paper between the pattern and the tile and trace the outline of the leaf onto the blank. The vein lines will be drawn in later.
Carve the inside curves of the leaf. Use a 3mm #11 gouge. The shape of the gouge conforms to the shape of the curved leaves in one stroke. Carve away approximately 1/8″ of wood. Score around the remaining edges of the leaf.
Remove the background. Carve back to the score line and recess the background around the leaf approximately 1/8″. Use a detail knife to carve off the saw marks on the edge of each tile and to slightly round the top edges.
Add texture to the face of the leaf. Use an 8mm #5 gouge to remove the flat surface and add a light texture. Then draw in the veins on the leaf with a marker.
Begin carving the center vein. Score along the center of the primary vein line with a detail knife. Remove a thin wedge of wood from one side of the score line. The wedge of wood should be approximately the same width as the marker line.
Finish carving the veins. Remove a thin wedge of wood from the other side of the center vein line with a detail knife. This process could be done with a V-tool, but the cuts from the detail knife give the vein lines more character. Then carve the remaining vein lines. Remove any fuzzies with a toothbrush.
Paint the leaf using acrylic paints. Seal the surface of the leaf after the paint has dried. Use a sealer created by mixing equal parts water-based varnish and water. To give an antiqued look mist one part burnt sienna with one part quinacridone crimson and two parts retarder medium.
Make a border for a bowl with the leaf tiles. Use a 12mm #5 gouge to carve a slight hollow on the back of each tile to conform to the curve of the bowl. Glue on the tiles with quick-grip adhesive. Choose a tile with a pattern that can be cropped for the last space. Place the top of the tile, with the design side toward the bowl, on the top rim of the bowl. Mark the width of the space. Then place the bottom of the same tile under the row of tiles and mark the width. Connect the marks and cut the tile. Dry fit the final tile, adjust the sides if necessary, then glue in place.
Finish the bowl with Watco Danish oil.
Attaching jewelry hardware. I start with 1/4″-thick tiles when making jewelry. Use a 1/16″-diameter drill bit to drill a hole in the corner of the tile. Use needle nose pliers to attach your jewelry hardware of choice. String together several tiles for a unique pendant or attach pin hardware or a magnet to the back.
MATERIALS:
Basswood, 45 each: 3/8″ x 11/8″ x 11/8″ (bowl border)
Basswood: 1/4″ x 11/8″ x 11/8″ (jewelry or magnet tile)
Basswood: 3/8″ x 4″ x 4″ (coaster)
Wooden bowl, unfinished: 15″ dia.
Graphite paper
Golden fluid acrylic paints: burnt sienna (#2020), quinacridone crimson (#2290), hansa yellow medium (#2190), napthol red medium (#2220), sap green (#2440)
Delta Ceramcoat satin interior varnish
Jo Sonja’s retarder medium
Watco natural Danish oil finish
Loew-Cornell #4300 shader brushes, sizes 4 and 6
Beacon Quick Grip all-purpose permanent adhesive
TOOLS:
Band saw, scroll saw, or coping saw
Detail knife
#5 gouges: 8mm, 12mm
#11 gouge: 3mm
Drill with 1/16″-diameter bit
Old toothbrush
Stylus
Scissors
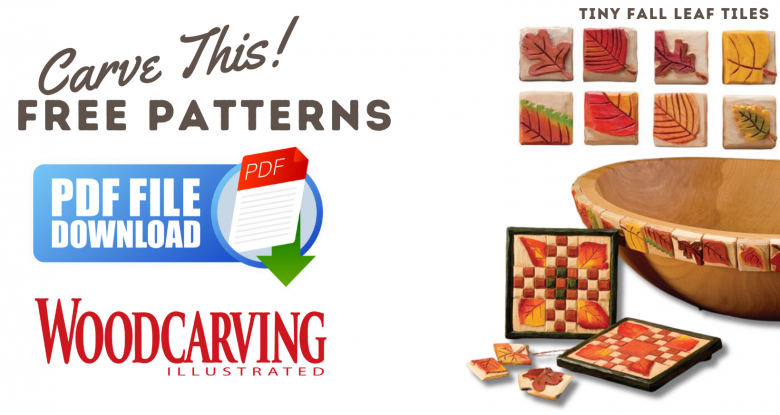
CLICK HERE to download the pattern for the leaf tiles.
CLICK HERE to download the pattern for the leaf coaster.