Tips for choosing the best branch to carve into a beautiful, personal walking stick
from Hand Carving Your Own Walking Stick by David Stehly
If you just need help hiking up a tough hill, pretty much any reasonably sturdy branch in woods will do the job. But if you want to carve a beautiful, personal walking stick, then you need to choose a little more carefully.
Tips for Choosing a Carvable Branch
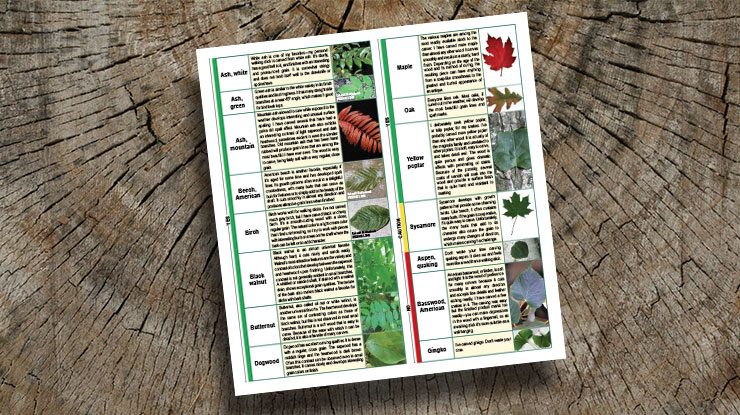
• Almost any kind of wood will work. As you carve more, you’ll learn what you like to carve. You’ll also become familiar with the varieties that grow in your neck of the woods. To help you get started, though, here is a chart of the trees I have carved and my notes about their suitability as both carving projects and walking sticks: CLICK HERE to download the chart.
 • Look for a reasonably straight stick that is at least 1″ (2.5cm) in diameter. It should be slightly larger around than is comfortable to hold, so you can carve off some of the wood and still have a stick substantial enough to support you while you’re walking. You want a branch with enough wood at the top to provide carving stock, but that has a slender enough shaft that it won’t be hard to reduce it to a suitable diameter.
• If you are an average-sized adult, you’ll need a stick that’s about 55″ (1.4m) long. If you’re 6′ (1.5m) or taller, aim for a 58″- to 60″ (1.47m to 1.5m)-long stick. Bend your arm at a 45° angle—that’s where you want to carve the handle so you can grasp the stick naturally.
• That said, if you are harvesting green wood, cut the piece longer than you will use. Both ends are likely to split or crack in the curing process, so you will have to remove them before you begin carving.
• Harvest above and below side branches to prevent cracking or splitting of the shaft (the grain variations around the branch areas often halt the split). You can cut off the branch sections after the piece has cured sufficiently. Or, you can work the side branches into the design. You can use a branch at the top for a bird beak, a nose, or even the extended head of a snake.
• To make sure there is enough carving stock at the top of a branch to make a design, leave a piece of the bole on the end. The bole is the part of the trunk the branch grows from. You can also make use of a burl, which is a bulging outgrowth in a tree. It can be carved or worked into an attractive ball grip.
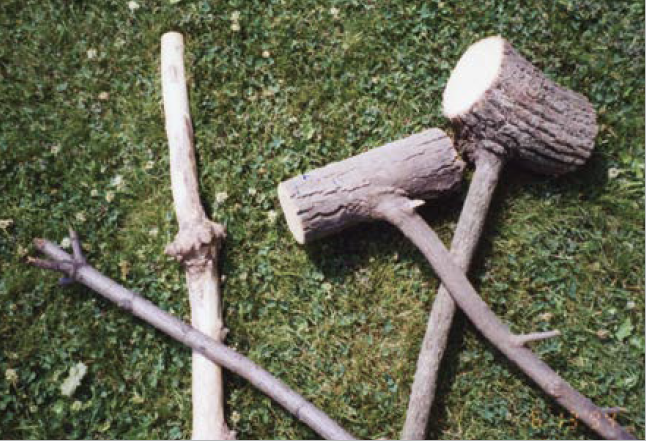
Tools for Cutting Branches
Chances are, the perfect stick isn’t going to be lying by the path, waiting for you. You may need to cut it from a larger fallen tree or harvest a sapling. Please be sure you have the permission of the property owner before you cut a live tree.
 • For the routine harvesting of small sticks, you need:
Bow saw
Small pruning shears
Long-handled pruning shears
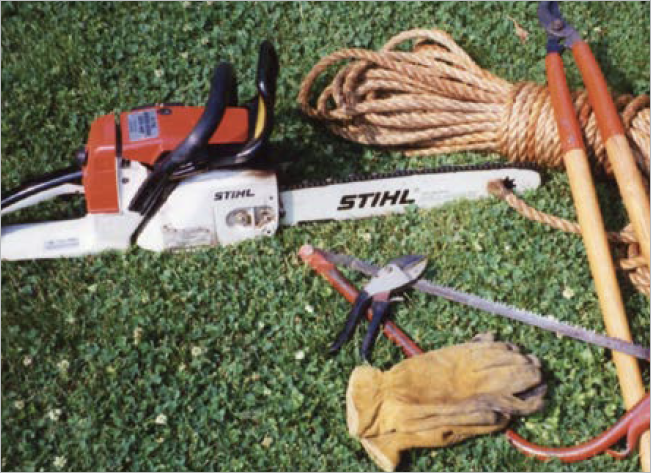
• For harvesting a whole tree, I use:
Chain saw (Never use a chain saw alone.)
Goggles, hearing protection, and a hard hat
Tough work gloves
Length of stout rope
When Can You Carve It?
Although you can carry your stick immediately, it won’t necessarily be ready to carve. Much like you don’t burn green wood, you don’t carve it, either. Green wood is very likely to split and twist as it dries, which will ruin your carving.
A branch cut from a fallen tree might be dry enough to carve; cut into it to see. The wood should be dry, clean, and hard. It might have small cracks at the ends. The bark may be loose. When you bang two pieces together, they should give off a high, ringing tone, not a dull thud.
A freshly harvested sapling or tree branch will need several months to a year to dry enough that it won’t split when you carve it. Toss your sticks in a pile and let them cure. Check them every few months, discarding those that have badly warped or split. Check the pieces occasionally to see if they are dry enough to carve.