 Simple cuts add texture to this happy fellow
by Jim Villars
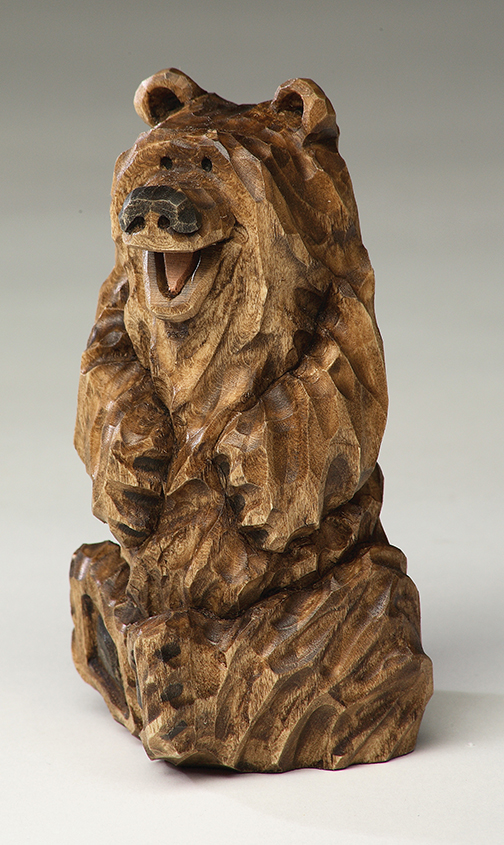
When I started getting requests for handcarved bears, I carved them using models and patterns. Those first attempts were so bad that the fireplace rejected them. I decided to create my own version, depicting a bear how I thought it should look. His silly attitude and scruffy fur make him a fun project to carve.
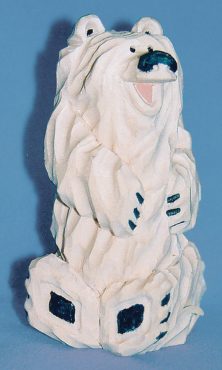
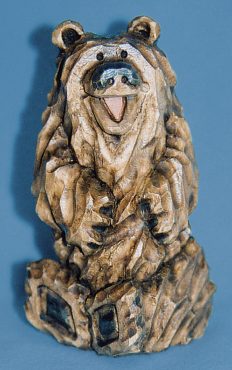
This bear has lots of personality, and with a little imagination, you can create numerous variations. If you paint him white, he becomes a polar bear. Paint him black, and he’s a black bear. It is also easy to switch him up a bit by changing his pose. While my bear turns at the hips, you can also turn his head. It’s simple to carve the different poses if you keep track of the spine and use that as your center line. If you change the shape of his eyes, making them oval, egg-shaped, or square instead of round, his whole attitude changes. You can even carve a holiday bear by adding a Santa hat for a festive, seasonal touch.
This fellow can be carved from nearly any wood; I suggest basswood, aspen, or sugar pine. Always use a carving glove for safety. A glove was omitted for this article for photographic purposes only.
Carving the Bear
|
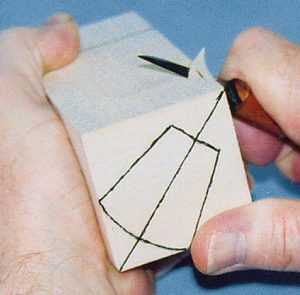
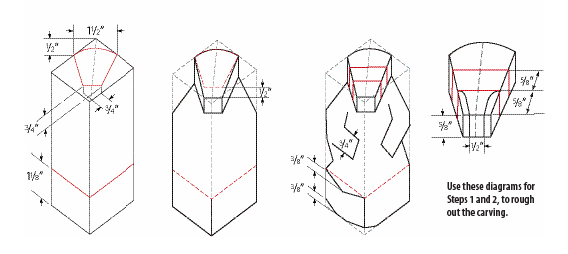
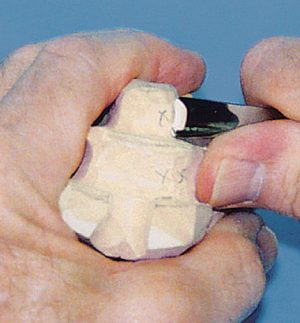
Step 1: Draw in the major landmarks. Sketch in the top of the head and a line for the feet about 11/8″ up from the bottom. Use the pattern as a guide. Then use a knife to taper from the feet line to the lines marked on the top of the head.
|
|
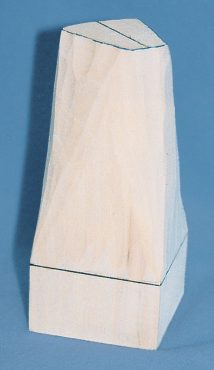
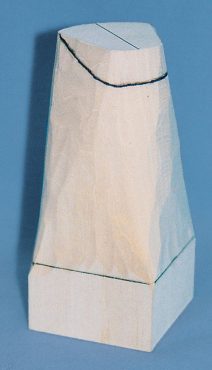
| Step 2: Carve the slope for the top of the head. Sketch in the angle and carve the section to shape. Then sketch on the major landmarks—the lines for the head, arms, feet, legs, and tail. |
|
| Step 3: Rough out the elements. Use a 13mm #9 gouge to relieve the areas around the head, arms, feet, legs, and tail. Relieve the area under the feet with the same tool. |
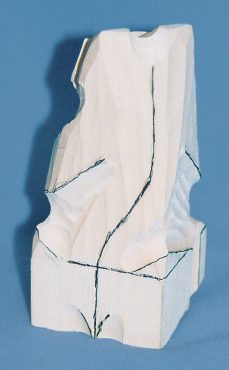
| Step 4: Define the arms, feet, legs, and tail. Deepen the lines you just carved with a 6mm V-tool. Redraw your reference lines as necessary. Then draw in the curved spine. |
| Step 5: Clean up the head. Use a 2mm #9 gouge and a 7mm #5 gouge to clean up the areas in front of the ears, eyes, top of the head, and the nose. |
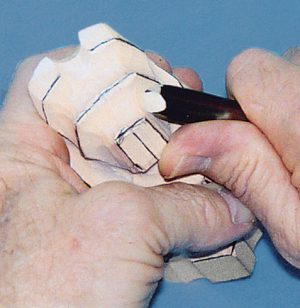
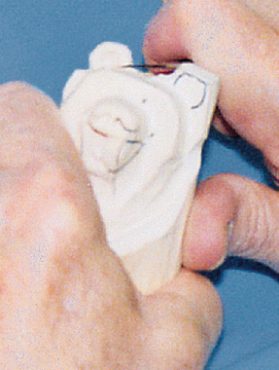
| Step 6: Draw in the ears, eyes, nose, and open mouth. Carve the ears to shape, and relieve the inside with a 7mm #9 gouge. |
|
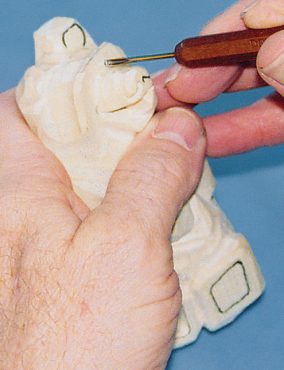
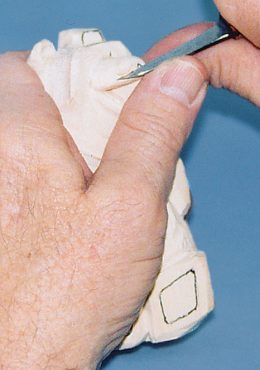
Step 7: Carve the eyes. Twist a 2mm #9 gouge in a circle to remove a small plug for the eyes. Relieve the area under the nose on both sides. Use a 2mm #9 gouge and a knife.
|
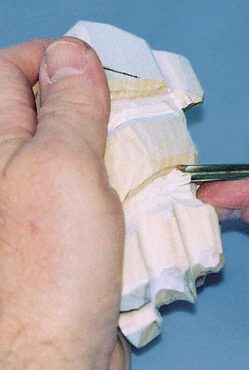
| Step 8: Carve the open mouth. Use a knife to make incremental cuts until you achieve the proper opening. Then outline his tongue with a 4mm V-tool. |
|
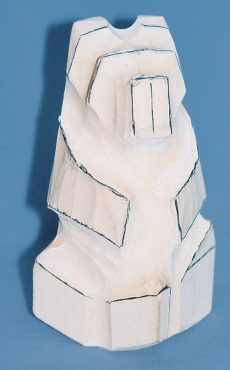
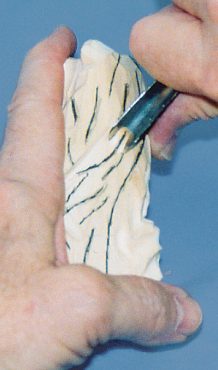
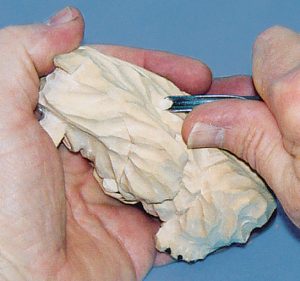
Step 9: Draw in the major locks of hair. Carve in these locks with a 13mm #9 gouge. Then use a 7mm #9 gouge to define the locks and blend them together.
|
|
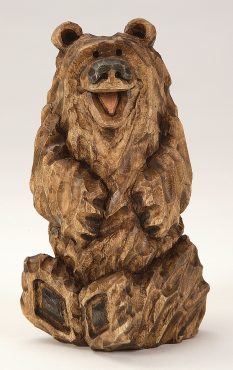
Step 10: Finish the bear. Paint the inside base of the ears, the eyes, nose, claws, and foot pads black. Paint the tongue a flesh color. Then apply a mixture of 50% light and 50% dark Briwax with an old, stiff paintbrush. Wipe the wax off with a rag. Buff it with a shoe brush. Note: You may need to melt the Briwax before mixing.
|
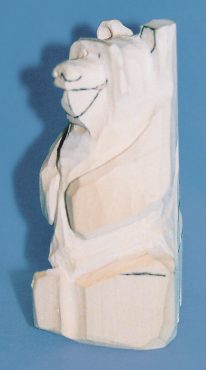
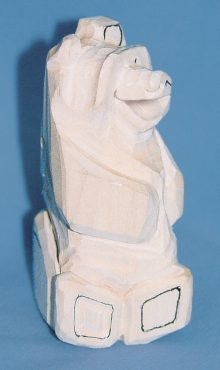
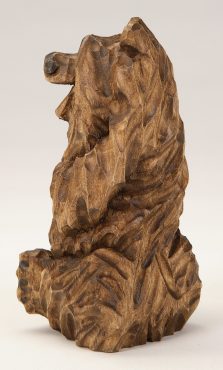
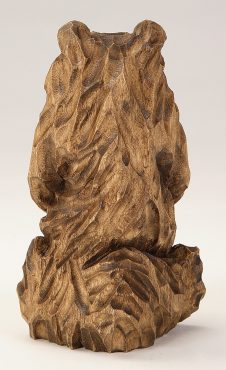
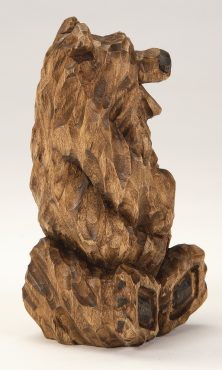
Reference Photos
Materials:
- 2″ x 2″ x 41/2″ basswood or wood of choice
- Black paint
- Flesh-colored paint
- Mixture of 50% dark Briwax and 50% light Briwax
- Mineral spirits (to clean up Briwax)
- Assorted paintbrushes
- Finishing rags
- Shoe-buffing brush
Tools:
- Carving knife of choice
- #9 gouges: 13mm, 7mm, and 2mm
- #5 gouge: 7mm
- V-tools: 6mm, 4mm
Patterns
Click here to download the patterns.
About the Author
 Jim Villars has been carving for more than 30 years. He is spending his retirement with his wife, Kay, in Louisville, Colo. His carvings range from 2″ to 4″ tall. He sells his carvings at local craft and carving shows.
For more fun scroll saw projects, subscribe to Woodcarving Illustrated magazine. To receive patterns, articles, and updates in your e-mail inbox, subscribe to our FREE newsletter.