Add texture and designs to your carving with these simple tools
by Roger Schroeder
This article was first published in issue 46 of Woodcarving Illustrated.
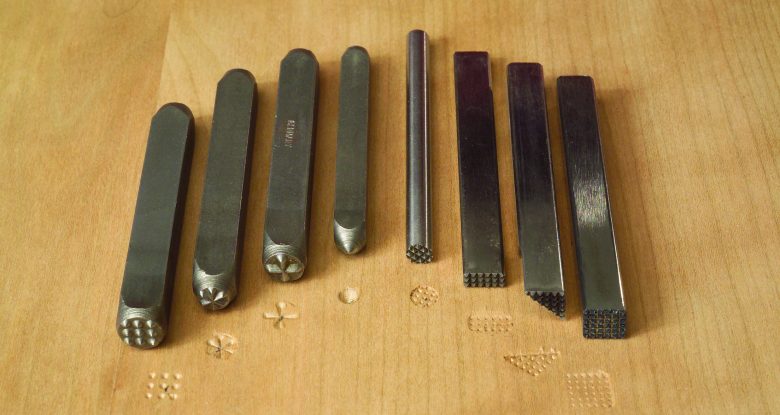
Essentially, a woodcarver’s punch is a steel texturing tool with a pattern engraved on its tip. Just when woodcarvers started to use them is unknown, although examples of punched backgrounds are found that date well into the last millennium.
Common designs consist of a single dot, a series of dots, an asterisk, or a cross shape. But don’t be surprised to find letters, acorns, hearts, anchors, stars, and crescent moons, among others.
To use it, place the punch perpendicular to the surface of the wood and strike it with a hammer. It’s as simple as that.
Aside from the notion of a textured contrast, there are other reasons for using a punch. For one, it disguises a ragged background. Some species of wood, especially when relief carved, simply defy clean cuts where the grain changes. When hard-to-remove splinters show up in small crevices, the pros recommend you find a punch that fits in the space and compress the wood.
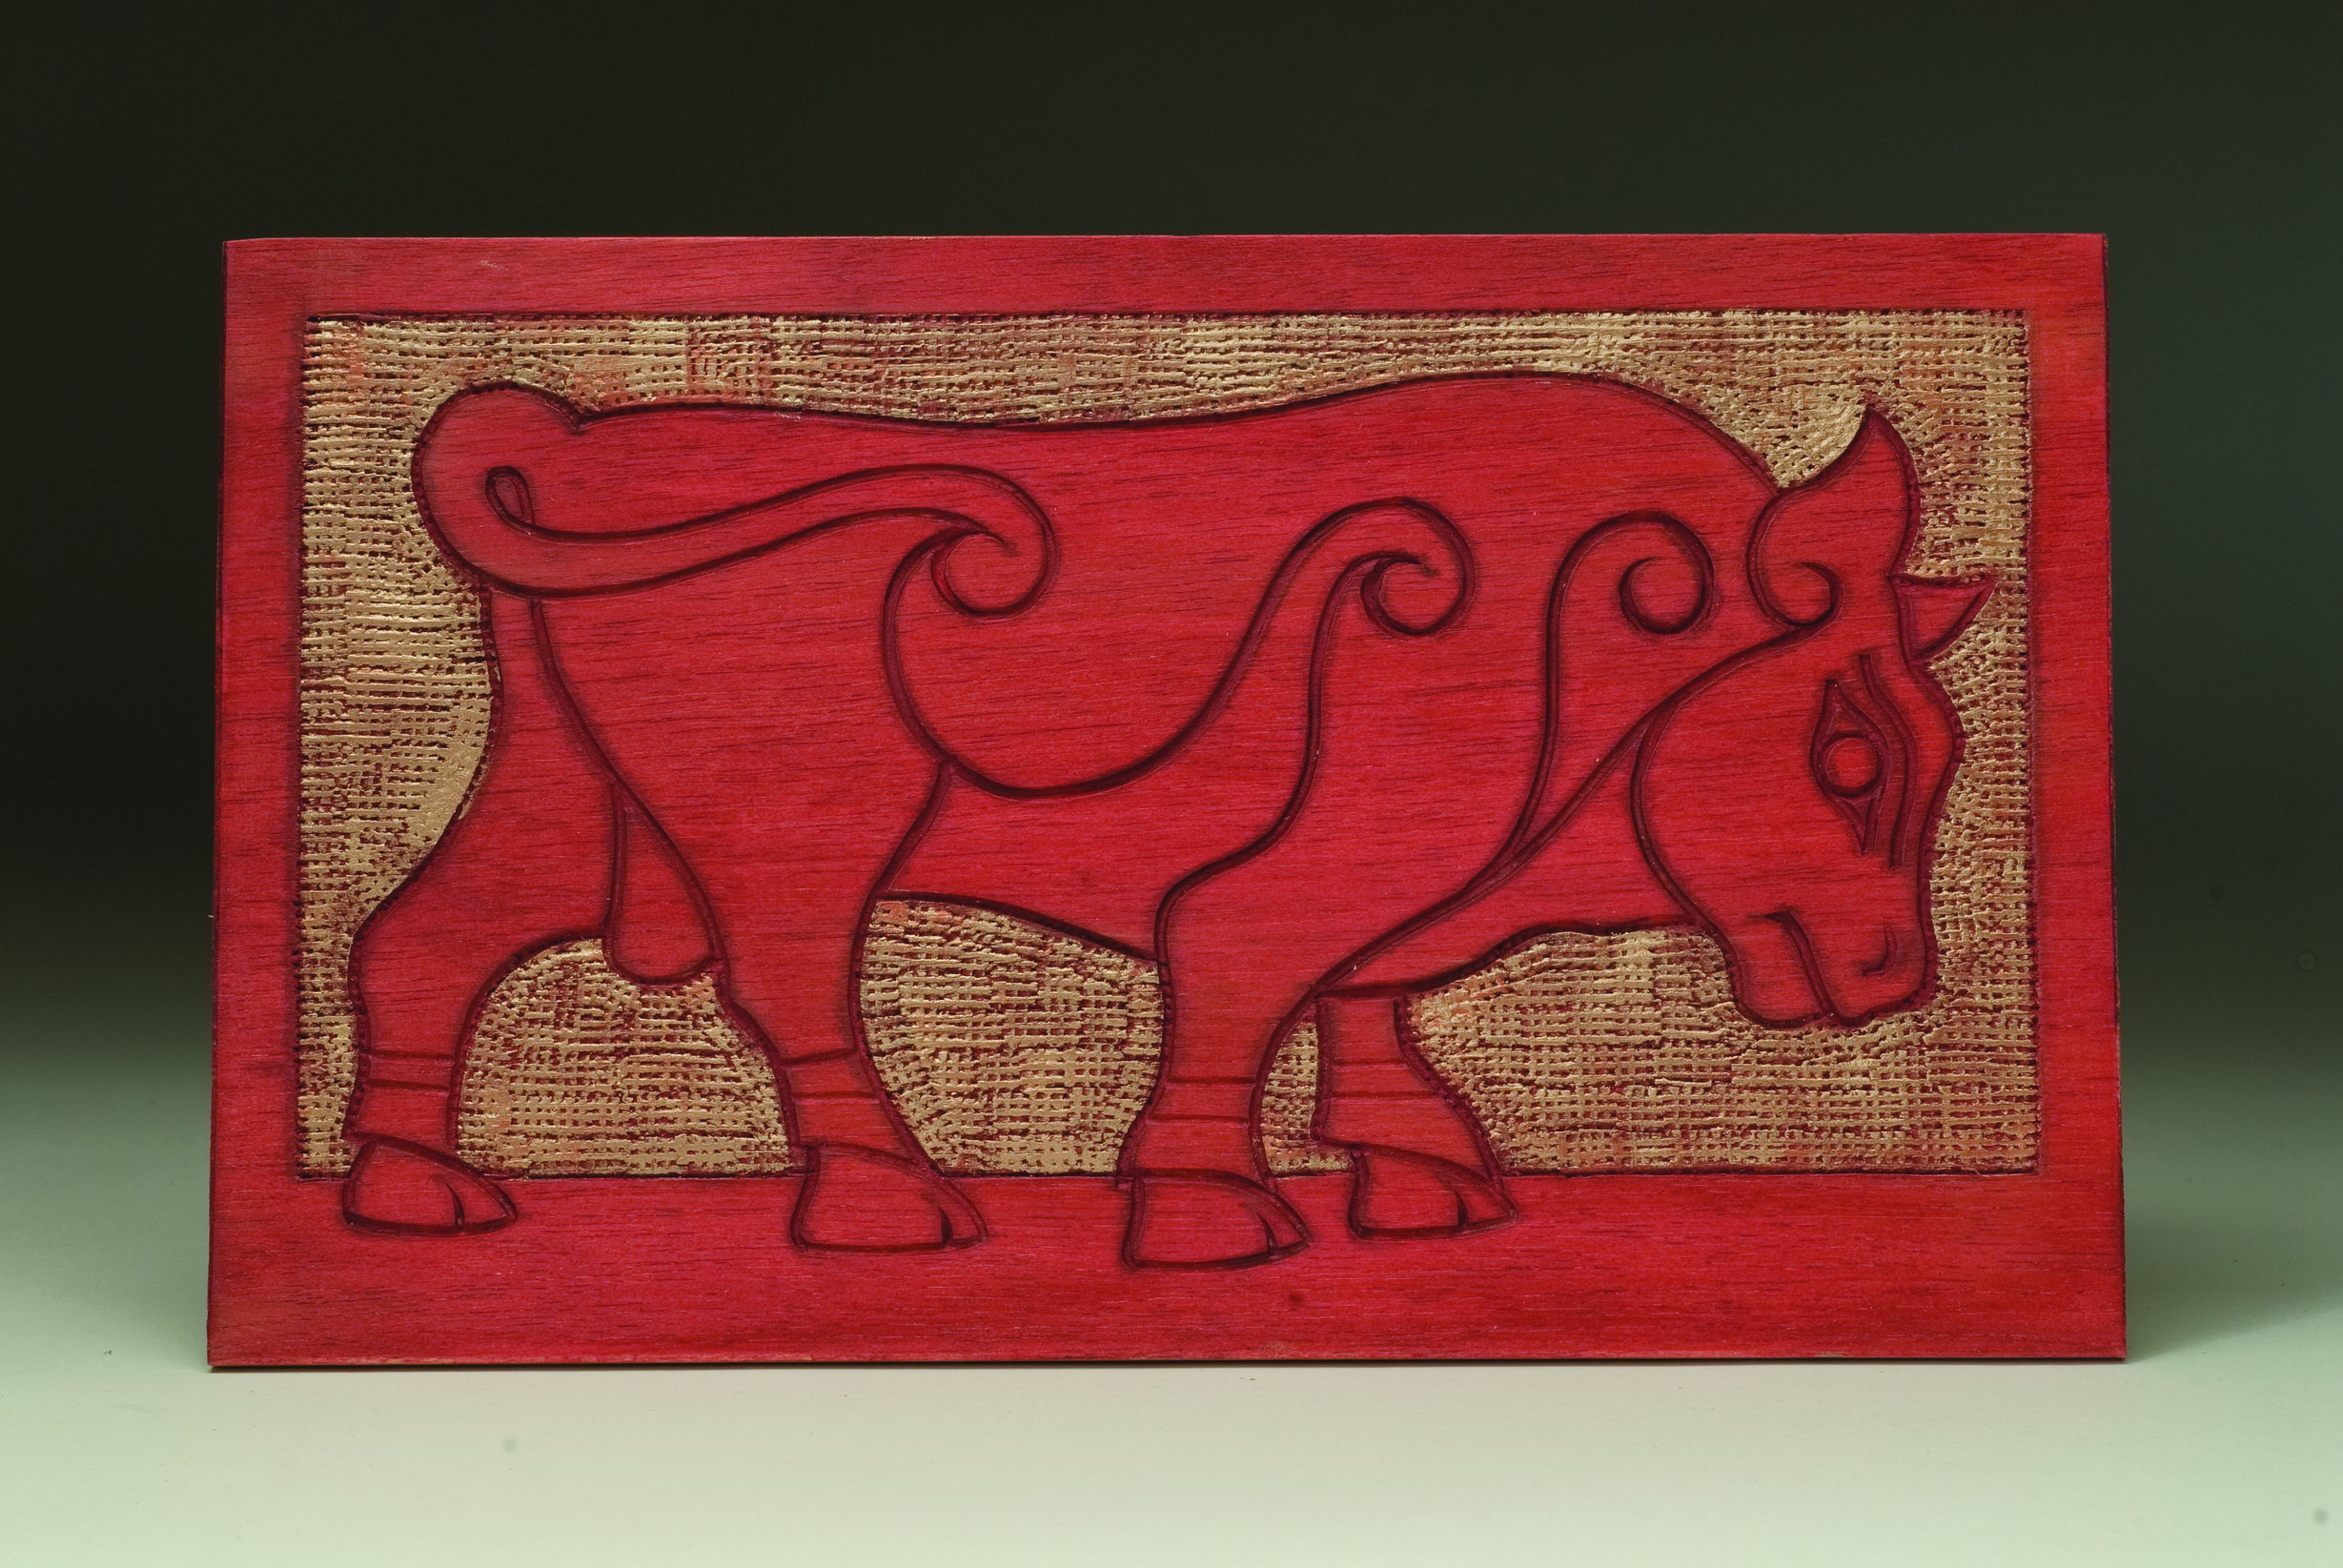
Chris Pye creates a textured background with a simple punch.
Punches for Convex Effects
Instead of the design standing proud of the surface on a punch, the design can be recessed on the punch to create a convex shape on the wood. Eye punches were designed to compress the background so a round or oval mound is left. Punches can also be used to make scales and buttons on clothing.
One clever use of a punch is raising bumps. This technique is perfect for creating bumps on a frog. Give it a try using these easy steps and some basic shop materials:
- Hunt up a piece of scrap basswood and a 10-penny nail.
- Tap the head of the nail on the surface of the scrap.
- Sand the punch mark until it has nearly disappeared.
- Put a few drops of boiling water on the compressed area and wait for a bump to appear.
When the walls of wood cells are disturbed, as in compression, they swell when wet. It’s a trick furniture restorers use to remove dents.
Making a Punch
Dozens of different punches are available at reasonable prices. If you just can’t find that pattern, mound, or indentation you’ve always wanted, try making the tool. Large 16-penny nails offer a lot of steel on which you can engrave a design using files or rotary bits. Another material to consider is steel mending plates, available at most hardware or discount stores. Created to join two pieces of wood or to strengthen a wood joint, the typical plate measures 5⁄8″ by 3″ and is 3⁄32“ thick. It’s readily hammered and the steel is soft enough to file a design into. I’ve created patterns that simulate zippers, stitches, and weaving.
A simple circular punch can be made from a length of copper tubing. However, you should have a bevel on either the outside or inside, depending on the effect you want. An eye punch for a caricature might warrant an outside bevel while a bird requires an inside bevel. Put the piece of tubing into a drill press and hold a small reamer to the inside as it rotates at low speed to quickly form an inside bevel. To achieve an outside bevel, hold a diamond hone to the spinning end of the tubing. For an oval shape, gently crimp the end with a pair of pliers.
Experiment
Not every carving is going to require texturing. Much, in fact, can be achieved with a knife or other traditional hand tools. But for some novel effects on a figure, or just some pleasing contrasts on your next relief carving, give punches a try.
About the Author
Roger Schroeder is the founding editor of Woodcarving Illustrated. Roger and his wife, Sheila, live in Amityville, N.Y.
Discuss this material on the Woodcarving Illustrated forums.