Make custom rotary-tool sanders from inexpensive hardware
By Bill Kinnear
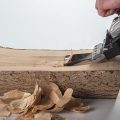
Throughout my woodworking years, I have been continually frustrated with the sanding accessories that are available, so I set out to develop a cheap system that would work under different applications. The sanders I designed are inexpensive and easy to make. You can make a bunch at one time in different sizes and grits or customize them to fit your current project. With a small, fine-grit screw sander, you can carve and sand the finest details.
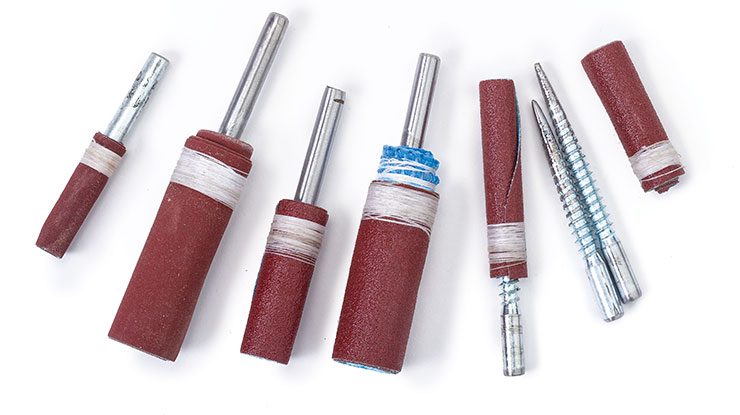
I make sanders from metal rods, bolts, and screws. The technique is similar for all of them, so I’ll demonstrate with a piece of metal rod and add a cushion. The cushion allows you to get a smooth finish without sanding away fine details. Without the cushion, you can use the sander to carve or sand sharp edges.
 |
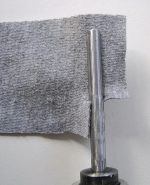 |
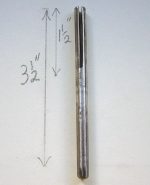
| 1: Prepare the rod. Cut a 1/4″ (6mm)-diameter rod to size and clamp it in a vise. Cut a 1 1/2″ (38mm)-long slot down the center of the rod with a hacksaw or rotary tool with a cutoff wheel. Clamp the rod in the rotary tool handpiece and lock the shaft. | 2: Attach the rag to the rod. Use the template to cut the sandpaper and rag to shape. Place the tab of the rag into the slot in the rod so 1/8″ to 1/4″ (3mm to 6mm) protrudes past the end of the rod. Wind the rag snugly around the rod while keeping the end even. Stop when you have approximately 2″ (51mm) of rag left. |
 |
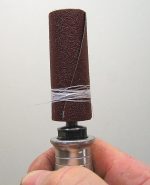 |
| 3: Attach the sandpaper. Position the sandpaper, grit down, so it overlaps the unwrapped piece of cloth. Wind the sandpaper with the cloth around the rod tightly, keeping the end straight as you wrap. |
4: Lock the sandpaper in place. When you have wound all of the sandpaper onto the rod, hold it in place with your right thumb as you wind thread onto the bottom of the sandpaper approximately a dozen times. I carefully use the rotation of the tool, but you can do it by hand. Dab the thread with glue to hold it in place. |
CLICK HERE to download the Templates.
Changing the Sandpaper
When the sandpaper gets beat up, cut the thread and undo the sandpaper from the cloth. Then, reverse the sandpaper, recut the ends, wrap it back up, add new thread and glue, and continue sanding. When the sandpaper is worn out on both sides, cut the thread, remove the sandpaper, and replace it with a new piece. Do not throw the worn piece away, because there will be enough perfectly good sandpaper left in the center portion to make one or more of the small sanders that will fit onto a deck screw shaft.
About the Cushion
I have experimented with various materials to act as a cushion under the sandpaper and found that ordinary rags work just as well as anything else. The more material you wrap onto the rod before you put the sandpaper on, the softer the sander will be. Craft stores sell foam sheets that also work; experiment with different materials to find the hardness that will suit your project.
Making a Hard Sander
Use the hard sander template to cut the sandpaper. Insert the tab of sandpaper into the slot, wrap the sandpaper around the rod, and lock it in place with glued thread.
Materials & Tools
Materials
• Metal rod, 1/4″ (6mm) dia.: 3 3/4″ (95mm) long
• Shop rag, 2″ wide and up to 12″ long (51mm x 305mm)
• Flexible cloth-backed sandpaper (grit of choice): 2″ x 6″ (51mm x 152mm)
• Glue
• Thread: 6′ (1524mm) long
Tools
• Hacksaw or rotary tool with cutoff wheel
• Rotary tool handpiece
About the Author
Bill Keanner is a self-taught woodcarver who has spent more than 30 years expanding and improving his carving talents in the Crowsnest Pass in southern Alberta, Canada. The few times he has traveled to the city to compete in carving competitions, Bill has been rewarded with coveted blue ribbons for bird and cane carvings.
 Want more power carving?
Check out the Power Carving Manual, Updated and Expanded Second Edition
Step-by-step projects and expert advice from today’s top power carvers will take your carving to the next level with the speed and control of power tools.
Available for $19.99 plus S&H from Fox Chapel Publishing, 1970 Broad St., East Petersburg, PA 17520, 800-457-9112, FoxChapelPublishing.com.