This cool character makes a great beginner project
By Janet Bolyard
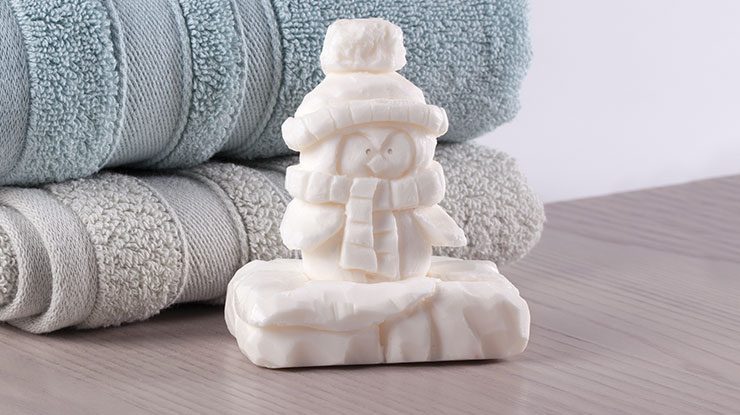
Here’s a good project to introduce you to caricature-style carving. This aquatic bird will look adorable near a bath, sink, or shelf—even on a windowsill.
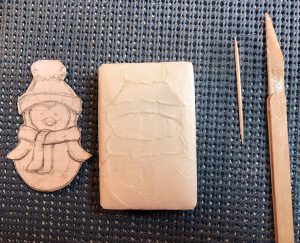
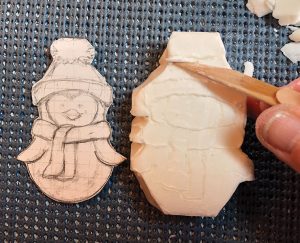
Getting StartedPrepare your soap and center your template. Hold it steady on the soap bar as you outline. Mark out the rough details of the pattern. You will add the eyes, beak, scarf, and stocking cap details near the end of project. |
 |
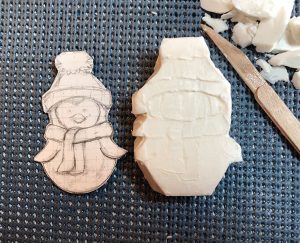
Step 1Rough out the penguin’s body. Make a stop cut along the outer lines of the pattern, applying gentle pressure to prevent chipout. Be sure your stop cuts are completely vertical! Then cut away excess soap. |
 |
Step 2Carve the stocking cap. Beginning at the top, make a stop cut on the bottom of the stocking cap tassel. Holding your knife at a 45-degree angle, cut along the bottom of the stop cut. This creates a shadow. The broader the angle, the deeper the shadow will be, and the more dimension the carving will have. Cutting at a 65-degree angle also creates a good amount of depth and dimension. |
 |
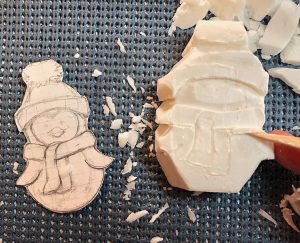
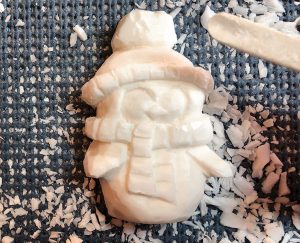
Step 3Shape the scarf. Make a stop cut, and then a rough-out cut going toward the stop cut. The second cut is very important because it differentiates the levels. I always have my go-by to help me stay on track with the design. As I carve, I rotate my soap—this gives me better control of my tool cuts. |
 |
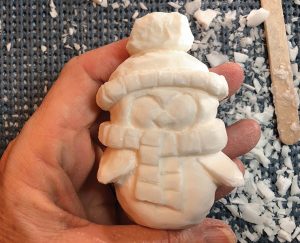
Step 4Round out the stocking cap. Carve the edge lines of the stocking cap into the sides of the soap. Check the backside of the soap to be sure everything lines up and has balance. Trim the stocking cap tassel back so it looks more centered atop the penguin’s head. Shape the tassel by rounding off any square edges from the rough-out cuts. Periodically, stop to review your carving. Here you see there are still a lot of square edges, so more finessing is needed. |
 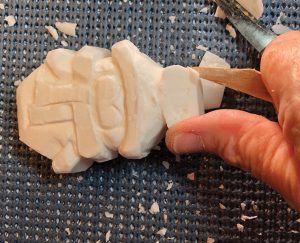 |
Step 5Carve the wings. Use the “push-thumb” technique on the penguin’s wing. This part of the carving is delicate because there is undercutting under the wing which takes away some of the foundation the wing stands on. Then cut the wing sides back. |
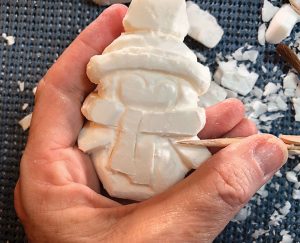 |
Step 6Add stocking cap, scarf, and facial details. Use a small gouge to texture the tassel. With the detail knife, detail the rim of the stocking hat and scarf lines. Smooth the penguin’s face with the knife, gently scraping the surface. Shape the beak with light stop cuts. You may have to redo the stop cuts to create more depth where you feel it’s needed. Make sure to have your tools clean and sharp when carving facial details. |
 |
Step 7Smooth over the entire carving. Smooth the soap surface with the wet-sanding technique. Let dry. |
 |
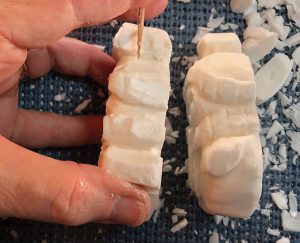
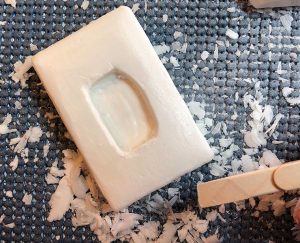
Step 8Carve out the penguin’s home. Center the penguin on top of the second bar and outline around the bottom. Then make a stop cut along the outline and use your chisel to chisel out soap to make a hole for him to fit snugly in. |
 |
|
MATERIALS • Ivory soap, 2 each • Water • Acrylic paints: assorted |
TOOLS • Knife: detail • Marking tool of choice • Gouge: small • Chisel of choice • Paintbrushes: assorted |
| About the Author |
|
Janet Bolyard has been woodcarving since age 18 and has turned her hobby into a profession. She works from her studio in Gilbert, Ariz., creating a wide selection of carvings. She is an instructor at the Southwest School of Woodworking in Phoenix and teaches around the country. Find more of Janet’s work at janetleecarving.com. |
 |
Get the Whittling 2022 Issue Purchase the IssueFor more articles like this, subscribe to Woodcarving Illustrated magazine. Magazine SubscriptionPlus! Get digital mini magazines in your e-mail between printed issues.
|