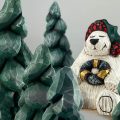
Quick-carve holiday gift allows you to experiment with making different faces
By Larry Green
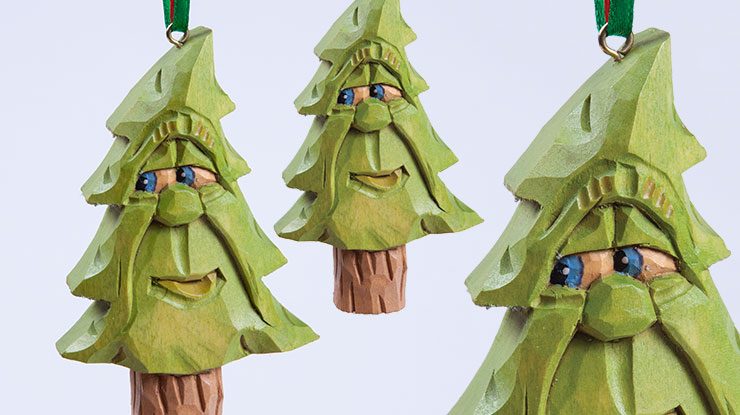
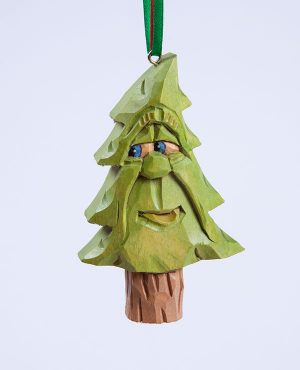
This jovial little caricature really looks great hanging on a Christmas tree. The variety of expressions you could carve for him is endless. Carve one or a forest of ornaments and create on the go by making your own personal carving desk.
Carving the TreeTrace the pattern onto the wood and cut the outline. Taper the boughs on the front and remove any saw marks with a carving knife. Mark the bottom of the nose and the smile lines. Make stop cuts along the lines and carve up to the stop cuts to create a flat surface for the mouth. Carve the slope of the nose and the eye sockets. Then, carve the details. Use a carving knife, micro gouges, and V-tools to carve and texture the face and branches. Make a stop cut where the trunk joins the tree, and carve back to the stop cut to separate the trunk from the tree. Round the trunk and add the bark texture with the V-tool. |
Painting the TreeScrub the carving with a toothbrush and dish soap, rinse, and let dry. Paint the tree with thin washes of acrylic paint. When the paint is dry, apply a few light coats of clear Deft or Krylon matte finish and let it dry. I use Floyd Rhadigan’s method of antiquing the carving. Mix equal parts of Watco natural finishing wax and Watco dark finishing wax. Apply the mixture to the entire carving with a large round brush. Blot the excess with paper towels and allow it to dry. Then, buff it with clean paper towels. Note: Dispose of the paper towels carefully; the boiled linseed oil in the wax can cause the paper to spontaneously combust. Finish the ornament by adding a screw eye on the top. |
 |
Materials• Basswood, 3/4″ (1.9cm) thick: 2 1/2″ x 3 3/4″ (6.4cm x 9.5cm) • Acrylic paint: black, blue jay, camel, golden brown, leaf green, sprout, white • Clear matte finish such as Deft or Krylon • Finishing wax such as Watco: natural, dark • Screw eye |
Tools• Carving knives: bench, detail • V-tool, 60°: 1/8″ (3mm) • Micro gouges: 2mm, 3mm, and 5mm • #8 gouge: 1/4″ (6mm) • Paintbrush: large round |
| About the Author |
|
Larry Green started carving in 1970 and has written six woodcarving project books with artist Mike Altman. He has worked part-time in the woodcarving shop at Dollywood Theme Park. Larry is a member of the Southern Highland Craft Guild and was selected as an Indiana Artisan. He teaches a weeklong class at John Campbell Folk School. You can contact him at lgreen@sent.com. |
 |
Get the Winter 2022 Issue Purchase the IssueFor more articles like this, subscribe to Woodcarving Illustrated magazine. Magazine SubscriptionPlus! Get digital mini magazines in your e-mail between printed issues.
|