Fantasy Wizard
Customize this caricature wizard by changing the staff and paint colors
By Don Dearolf
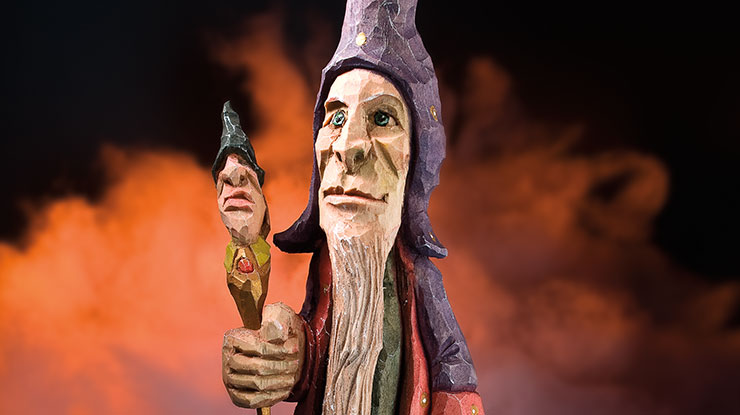
After the Harry Potter books and movies came out, I was inspired to carve a wizard. That took a back seat to some of my other projects, but when The Hobbit: An Unexpected Journey came out, I picked up the idea and ran with it. Instead of giving my wizard a simple staff, I decided to jazz him up with an animated scepter. You can make the carving your own by carving a staff, a scepter, or even a wand. Make the wizard friendly or spooky by changing the paint colors to create your own magical character.
CarvingI use a variety of hand tools to carve the wizard, ranging from large, flat gouges to tiny micro gouges. The carving will turn out better, and you will learn more, if you use the tools you are most comfortable carving with. To learn more about creating head and body proportions on human figures, check out The Rule of Three. To drill the hole in the hand for the scepter, it’s possible to use a drill and 1/8″ (3mm)-diameter bit, but I just use a 1/8″ (3mm) micro gouge. In the time it takes to find the drill and bit, I can drill through the hand with the gouge. |
PaintingI usually mix my own colors; I can tell when someone has painted a carving using colors straight out of the bottle, and I think it looks a bit boring. For this piece, I use light washes of paint to build up the colors slowly. I tend to use the same color for a few elements in the same carving to help tie everything together. For the exposed flesh, I mix naphthol red light with chromium oxide green. For the hat and robes, I mix naphthol red light with ultramarine blue. For the robe trim and cuffs, I mix naphthol red light with burnt umber. For the visible inside of the robe and for the scepter’s hat, I mix Payne’s gray with cadmium yellow light. For the scepter’s body and the spots on the robe, I use pale gold. When the gold is dry, add dots of titanium white. For the shoe, I use raw sienna. Paint the eye with full-strength mars black and allow it to dry. Paint a circle of full-strength chromium oxide green for the iris and allow that to dry. Paint the pupil with mars black, allowing a bit of the iris to remain visible. Add a titanium white highlight dot. When the piece is fully dry, dry-brush titanium white over the whole piece to highlight the tool marks. |
|
| Materials
• Basswood, 2 3/4″ (7cm) thick: wizard, 2 3/4″ x 8 1/2″ (7cm x 21.6cm) • Basswood, 1/2″ (1.3cm) thick: scepter, 1/2″ x 4″ (1.3cm x 10.2cm) • Acrylic paints, such as Liquitex®: burnt umber, cadmium yellow light, chromium oxide green, Mars black, naphthol red light, pale gold, Payne’s gray, raw sienna, titanium white, ultramarine blue |
Tools
• Knives: carving, detail • #3 gouge: 3/4″ (19mm) • #6 gouge: 1/2″ (13mm) • V-tool: 1/4″ (6mm) •Micro gouges: 1/8″ (3mm), 3/16″ (5mm) • Drill with bit: 1/8″ (3mm)-diameter (optional) • Paintbrushes: assorted
|
| About the Author |
|
Don Dearolf painted for several years before taking up carving in 1994 after his brother Dave took him to the Lancaster County Woodcarvers Show. Don loves to carve and share patterns, blanks, and rough outs with others. Don lives in Lancaster, Pa., with his wife, Sue, and daughter, Kate. |
 |
Get the Fall 2022 Issue [button link=”https://www.foxchapelpublishing.com/magazines/woodcarving-illustrated-issue-100-fall-2022.html” bg_color=”#ff0000″]Purchase the Issue[/button] For more articles like this, subscribe to Woodcarving Illustrated magazine. [button link=”https://www.foxchapelpublishing.com/wood-carving-illustrated-subscription.html” bg_color=”#ff0000″]Magazine Subscription[/button] Plus! Get digital mini magazines in your e-mail between printed issues.
[button link=”https://woodcarving.zeeframes.com/enews/” bg_color=”#ff0000″]Subscribe to Strop Talk[/button]
|

Get the Latest Issue
For more articles like this, subscribe to Woodcarving Illustrated magazine.
Plus! Get digital mini magazines in your e-mail between printed issues.


