Catch and Release
 By Gary Fenton
Not only does it make a great gift for that angler on your list, but it’s also a great way to texturing carvings with just a few tools. After the carving is roughed-out, the details and texturing is done with only three tools.
Carving the Bear and Fish
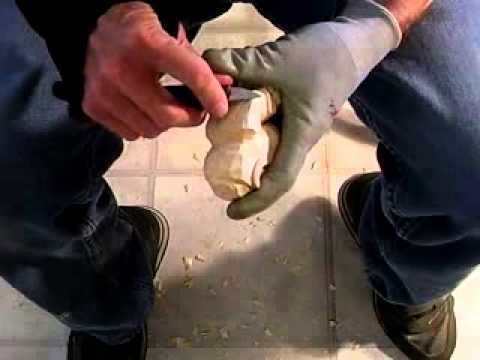
Step 1: Cut out the blank. I use a band saw with a 1/4″-wide blade and 6 teeth-per-inch. Cut out the front view. Then use either masking tape or hot-melt glue to re-attach the cut-off pieces in order to cut out the side view. I leave the wood between the legs intact initially so that I can put a carver’s screw into it. This will hold the wood securely to the bench during the roughing-out stage.
Step 2: Round and rough-out the piece. I use a #8 20mm gouge, a #6 10mm gouge, a #9 10mm gouge, a carving knife, and a 60° V-tool. Don’t hesitate to remove the wood quickly.
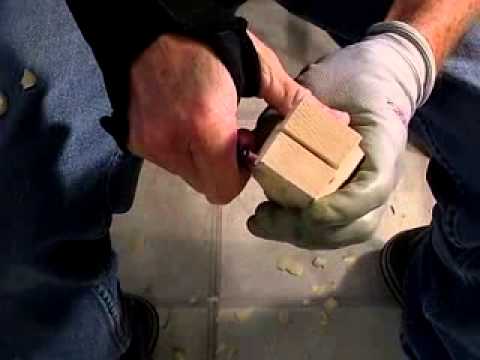
Step 3: Cut out the material from between the bear’s legs. I use the band saw.
Step 4: Finish rounding the legs. I use a #6 10mm gouge.
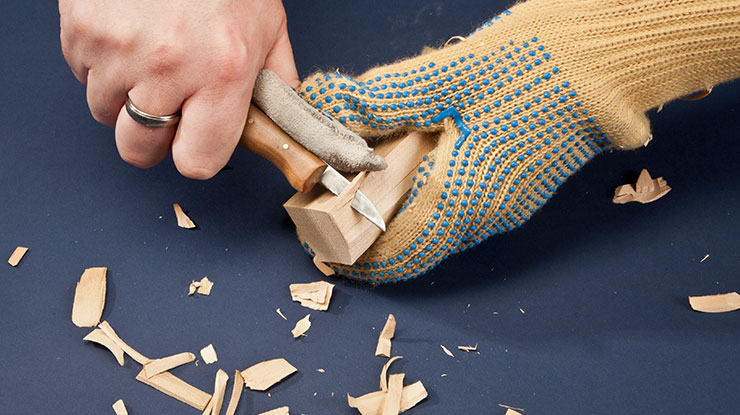
Step 5: Carve in the fur. I use a #6 3mm palm gouge for the fur on the body. For the finer fur on the head, I use a small V-tool.
Step 6: Cut in claws. Use the knife to give the suggestion of claws, since this is a caricature.
Step 7: Detail the fish. Leave the fish smooth, but use a small V-tool to carve in the fins, gills, and mouth.
Step 8: Carve in the eyes. Use the carving knife. Bear eyes are smaller proportionately than human eyes, and they are closer to the bridge of the nose.
Materials:
3 1/2″ x 3 1/2″ x 7″ basswood
Deft Clear Gloss Wood Finish
Oil paints: brown, Chinese white, yellow ochre, viridian green, and scarlet red.
Delta Ceramcoat Paint: White and Black
Tools:
#8 20mm gouge
#9 10mm gouge
60° V-tool
#6 10 mm gouge
#6 3mm gouge
Small v-tool of choice
Carving knife of choice
Band saw (optional)

Get the Latest Issue
For more articles like this, subscribe to Woodcarving Illustrated magazine.
Plus! Get digital mini magazines in your e-mail between printed issues.