A stress-free beginner’s guide to choosing tools
by Bob Duncan
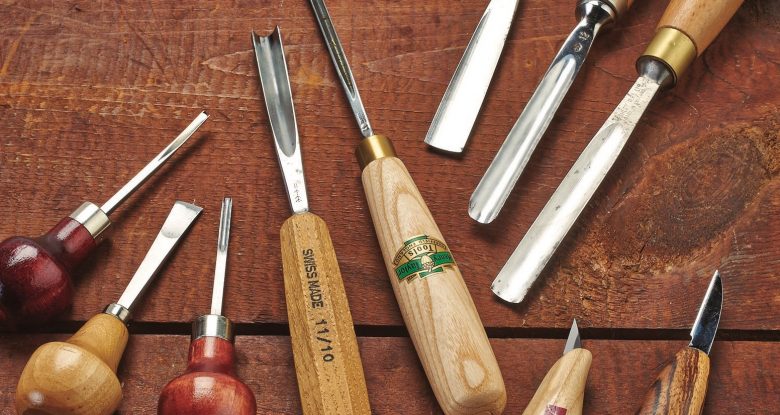
Beginning carvers often buy a set of carving tools and end up with an assortment of tools they will never use. Instead of paying for tools that don’t fit your needs, buy tools à la carte and create your own ideal collection. Our guide to the most useful gouges for general carving will help you get started.
Knives
Many European carvers use only gouges, chisels, and V-tools, but most American carvers add knives to their kits. While there are all sorts of shapes and sizes, I suggest a beginner start with a general carving knife and a detail knife.
General Carving Knife. This is the workhorse of knives. You can do most knife carving with this tool. Choose one with a blade that is 1 1/2″ to 2″ (28mm to 51mm) long. I prefer a shorter blade because it gives me more control. While many blade shapes are available, I suggest choosing a knife with a straight cutting edge that is parallel to the handle. This makes it easier to keep track of where the tip of the knife is, which prevents you from inadvertently cutting too deeply or in the wrong area.
Detail Knife. A detail knife has a smaller blade than a general carving knife and is designed to fit into tighter areas. I don’t use a detail knife very often, but when you need it, you need it. Some detail knives feature a longer blade that comes to a sharp point, but I prefer a short blade (less than 1″, or 25mm) that comes to a tight point at the end. Again, for beginners, stick with a knife with a straight cutting edge that is parallel to the handle.
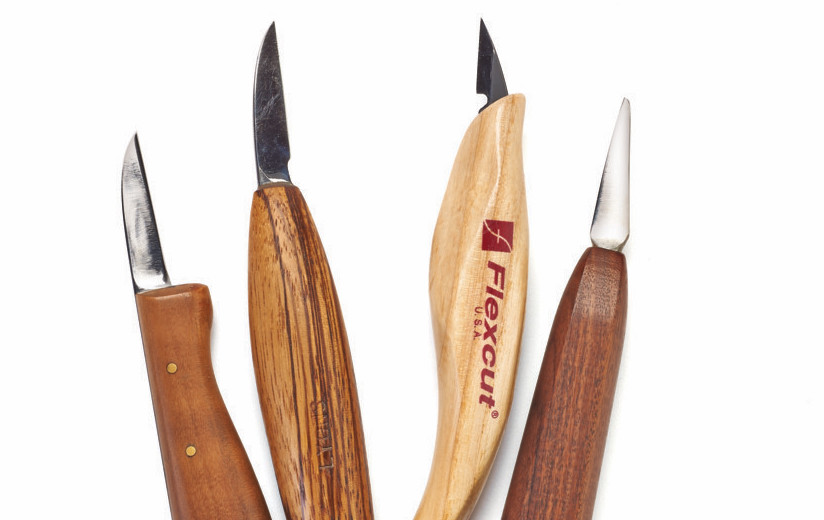
Examples of general carving knives (left) and detail knives (right).
Gouges
A gouge is basically a chisel with the cutting edge bent into a curve. Gouges are designed to carve grooves without the corners of the tool digging into the wood. This serves a few purposes. Gouges remove excess wood quickly, especially from a flat surface, where the corners of a flat chisel would dig in and get stuck. It also allows you to stop-cut around round objects. Finally, gouges allow you to carve precise grooves and trenches.
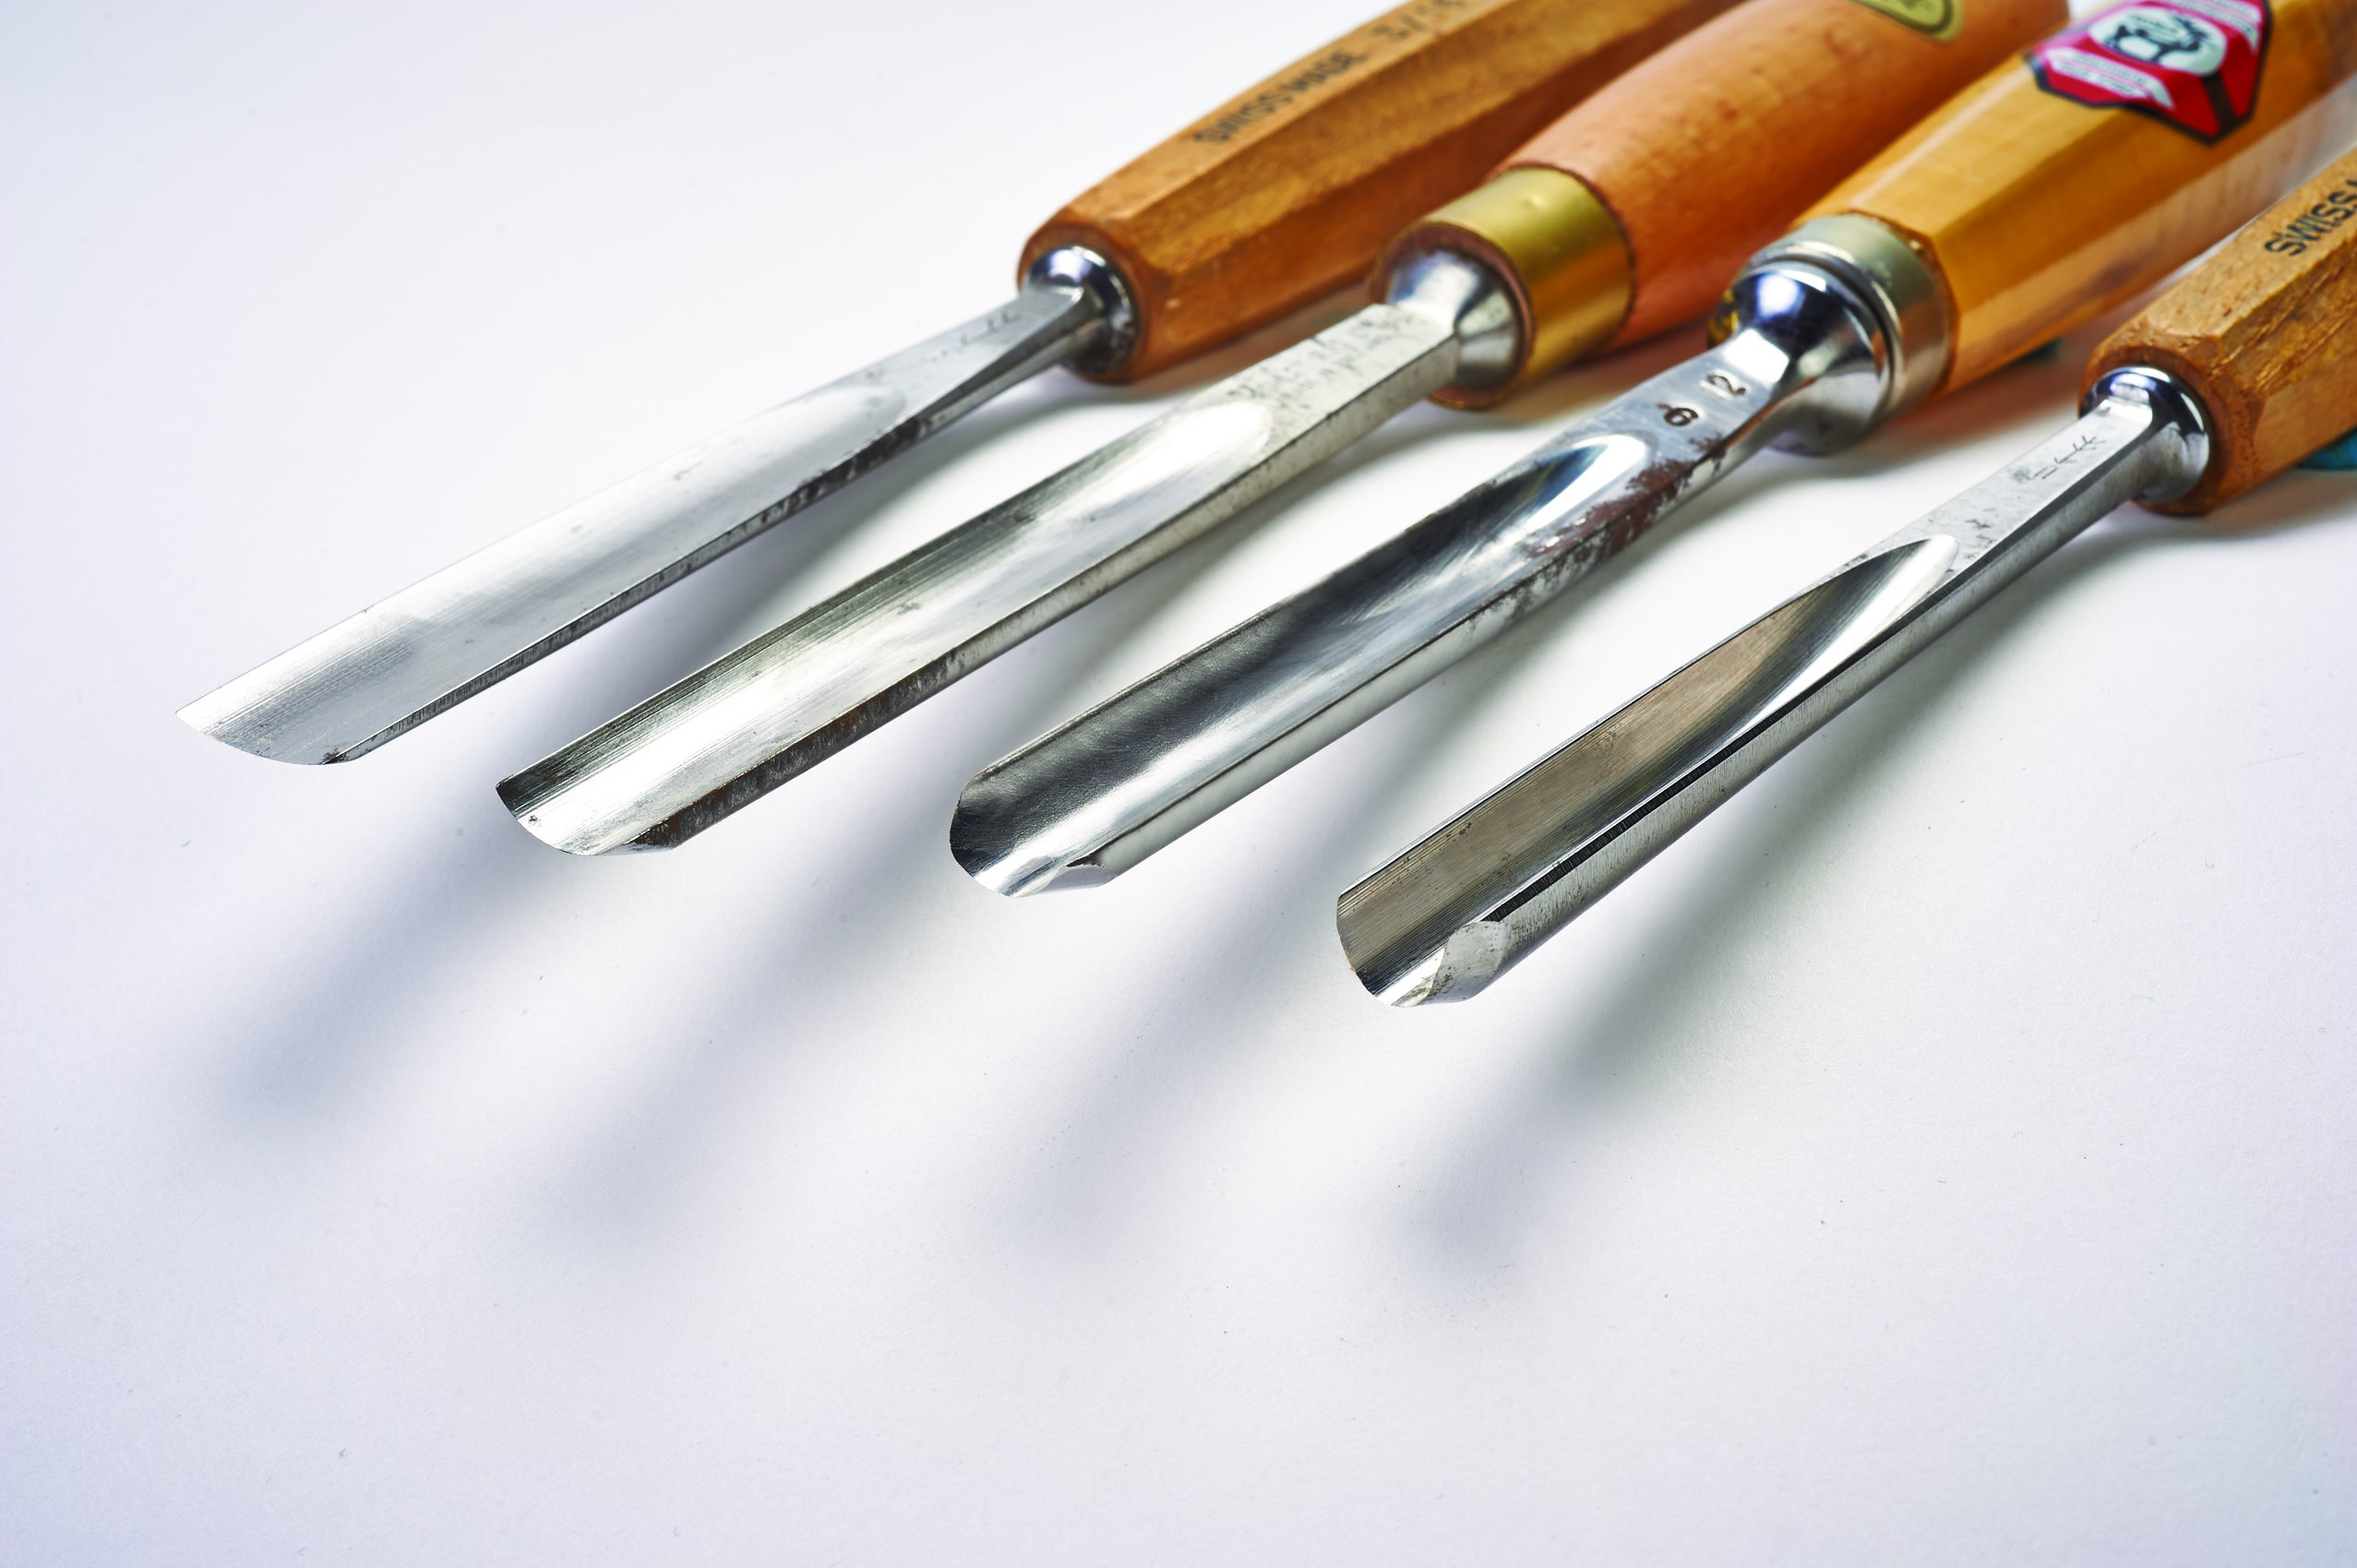
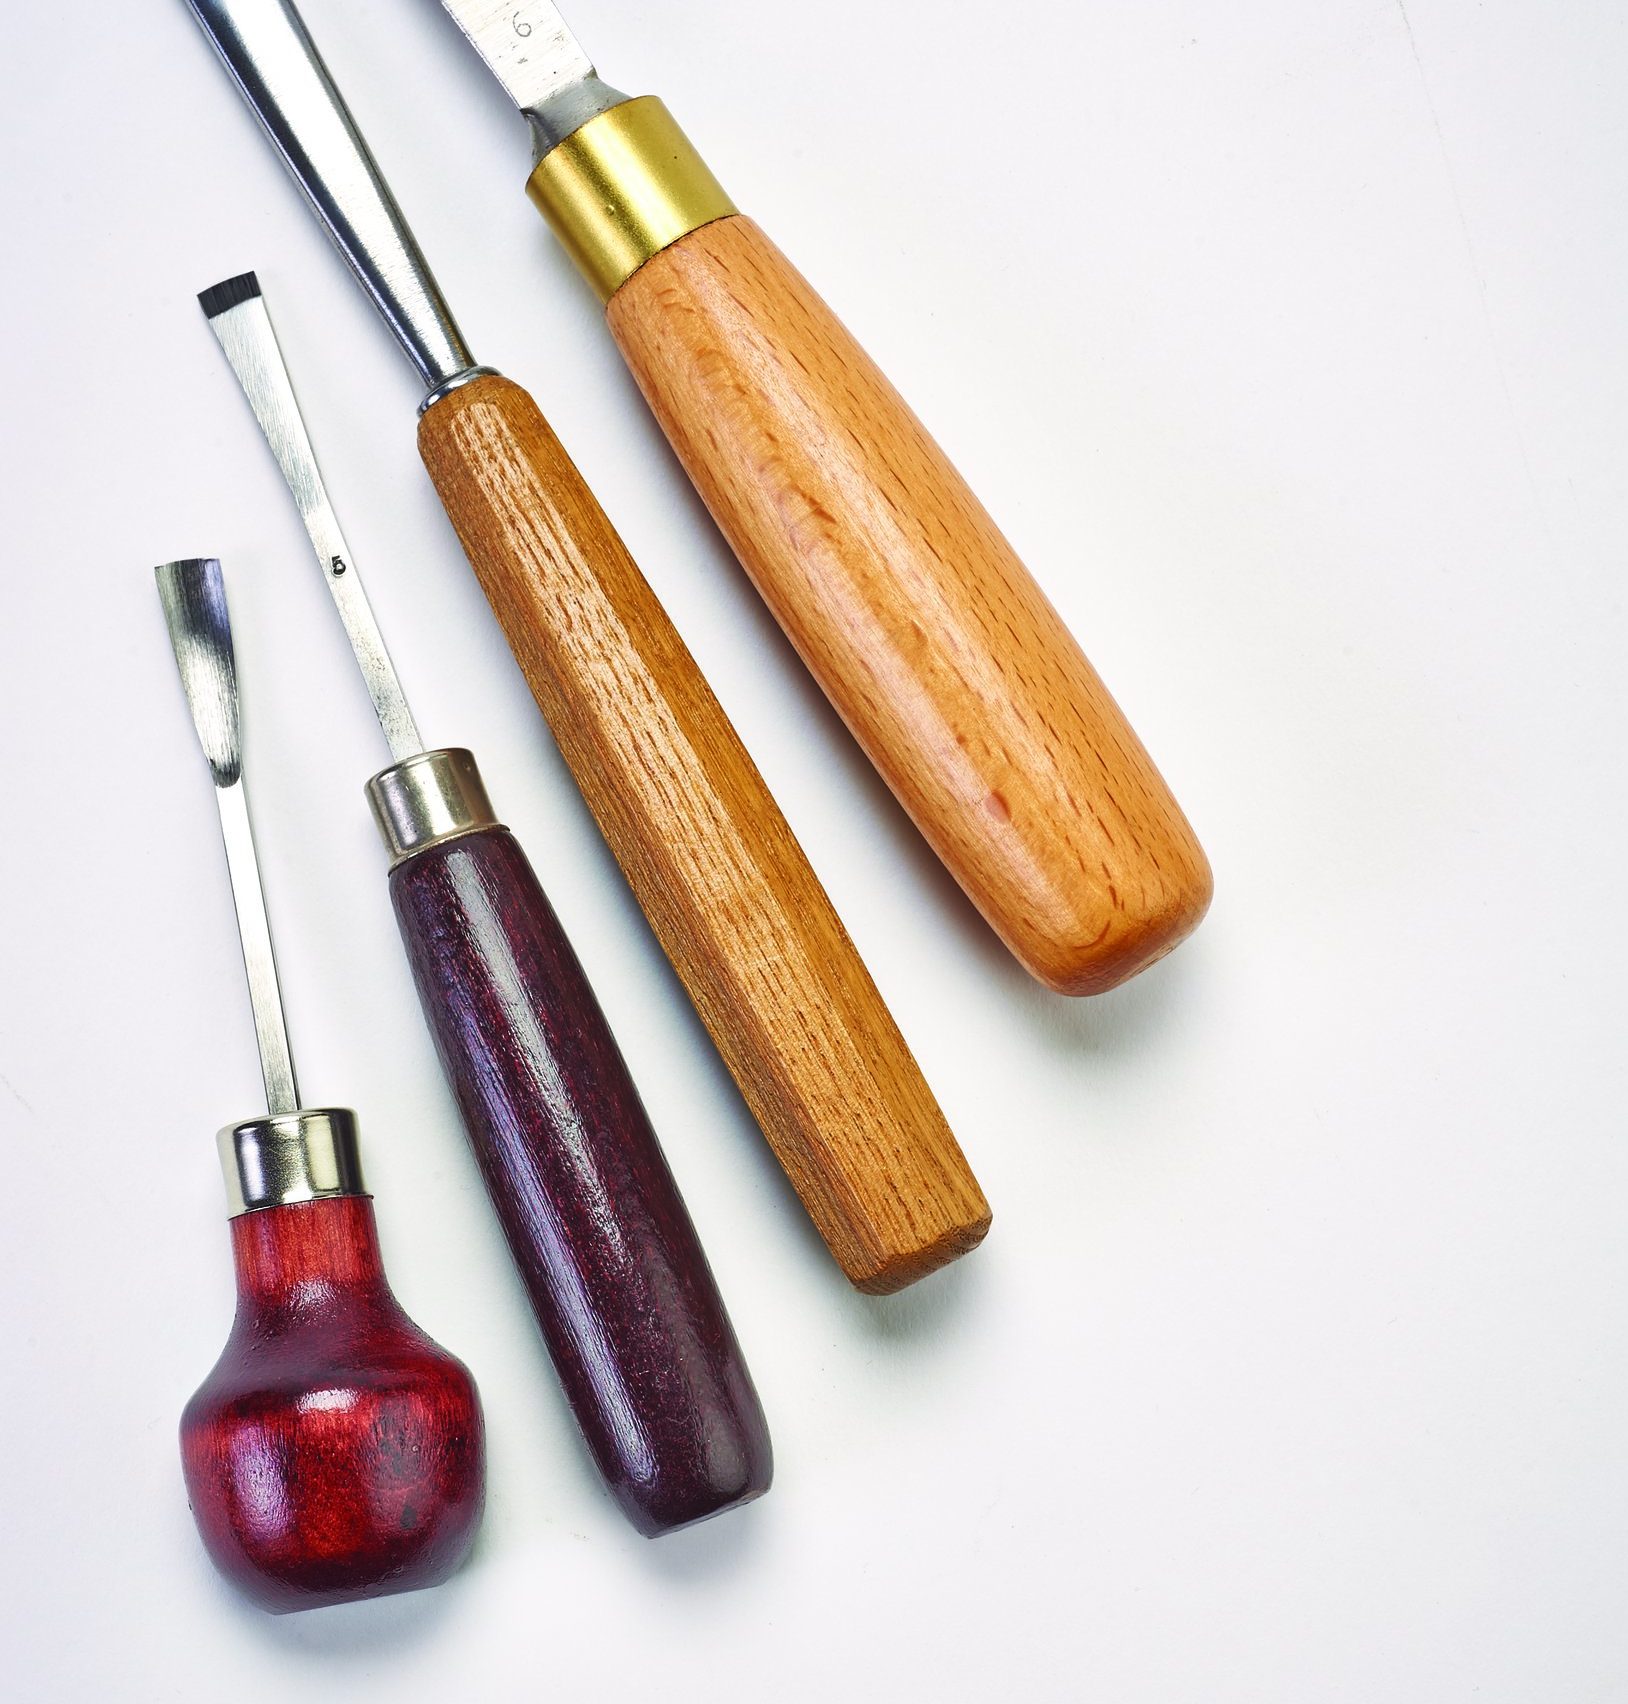
The higher the sweep number, the greater the curve. Shown here, left to right, are a #3, a #6, a #9, and a #11.
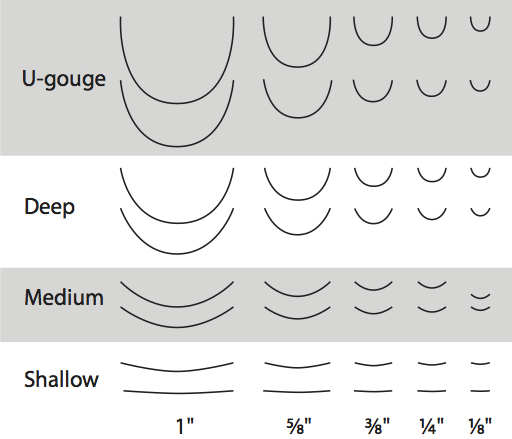
Size and Sweep. Manufacturers and vendors refer to gouges by the size and the sweep. To determine the size of a gouge, measure across its widest part. Note that many gouges are measured in metric units not inches.
The sweep is the curve of the gouge. There are two general systems to identify the sweep, but there are also variations between manufacturers. Because many gouges are shaped or finished by hand, there can be subtle variations even among the same manufacturer.
Regardless of the identification system, the lower the sweep number is, the more shallow the curve of the gouge is. In general, sweeps that range from #2 to #4 are considered shallow gouges, #5 to #7 are medium gouges, and #8 to #9 are deep gouges. Generally, #10 and #11 gouges are the U-shaped gouges, which are also called veiners. These are the deepest gouges.
Gouge Handles and Shafts. Gouges also come in several different handle configurations. Straight handles and palm handles are intended to be used with just your hands. These tools typically have shorter handles and shafts than do other gouges, which make them more comfortable to use with a single hand, as on a hand-held carving. The shape of these tools is a personal preference; I have and use both.
The next larger handles are called intermediate tools. These gouges have longer handles and shafts than do palm tools, so they are large enough to use with two hands or with a mallet but are still comfortable to use with one hand on a hand-held carving. While intermediate tools are versatile, the handles are not as comfortable for me because I have long fingers and large hands.
Full-size tools have the longest and largest handles and shafts. They are designed to be used with two hands or with a mallet on a carving clamped to a bench. As the size of the tool increases, so does the power required to force it through the wood. Therefore, large tools remove wood quickly, but are not useful for smaller carvings because they will break the blank.
Choosing Gouges. For your beginning kit, I suggest buying a smaller and a larger gouge in each general sweep category (shallow, medium, deep, and veiners). The exact sweep is not critical; if an author suggests using a #5 gouge, you can often substitute a #4 or a #6. The size depends on the kind of carving you plan to do. For hand-held carvings, I suggest 1/8″ (3mm)- and 3/8″ (10mm)-wide tools. For intermediate size carvings, go with a 1/4″ (6mm) and 5/8″ (16mm). For large carvings, choose a 1/4″ (6mm) to 3/8″ (10mm) and a 7/8″ (22mm) to 1″ (25mm).
From left to right: Palm handle, straight handle, intermediate handle, full-size handle.
Using Gouges. I use deep gouges and veiners to remove a lot of wood quickly. I use medium gouges to remove some of the large grooves from the deep gouges and veiners, and I use shallow gouges to smooth surfaces. Use the medium and shallow gouges upside down to round sharp corners. When stabbing in a stop cut, I’ll often reach for a medium gouge first. If you don’t have a medium gouge with a sweep that matches the curve you need, you can use a small shallow gouge and make multiple stabs around the curve. You can often use the corner of a shallow gouge to slice wood like a knife.
V-tools
Like a gouge, a V-tool is used to carve grooves. However, a V-tool has two straight cutting edges joined in the center, rather than the curved profile of a gouge. Therefore, the V-tool cuts a sharp V-shaped groove. It is useful for outlining elements in a carving and for adding hair and fur texture.

V-tools join two straight cutting edges to create a V shape.
Size and Angle. V-tools are identified by size and angle. There are three common angles: 45°, 60°, and 90°. I think the 60° V-tool, with its intermediate angle, is the most versatile.
The size refers to the distance between the wings of the V at the top; sizes range from 1/16″ (2mm) to
3/4″ (19mm). Tools of the same angle but different sizes (as illustrated at right) cut grooves that are the same at the bottom, narrowest point. However, larger tools can cut more deeply than smaller tools, and they can cut V trenches that are wider at the top.
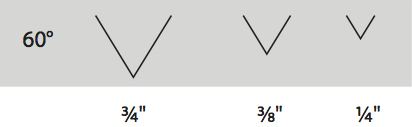
Like gouges, V-tools are available in a variety of shapes and sizes, but the 60° V-tool is the most versatile.
Choosing a V-tool. Choose a V-tool sized between the two gouges in your kit; so, if your gouges are 1/8″ (3mm) and 3/8″ (10mm), choose a 1/4″ (6mm) V-tool. You can make lighter cuts with a larger V-tool to create fine grooves, but you can’t make deeper or wider cuts with a small V-tool. Conversely, it is difficult to fit a large V-tool into a tight area. Choosing a V-tool somewhere in the middle gives you the best of both worlds.
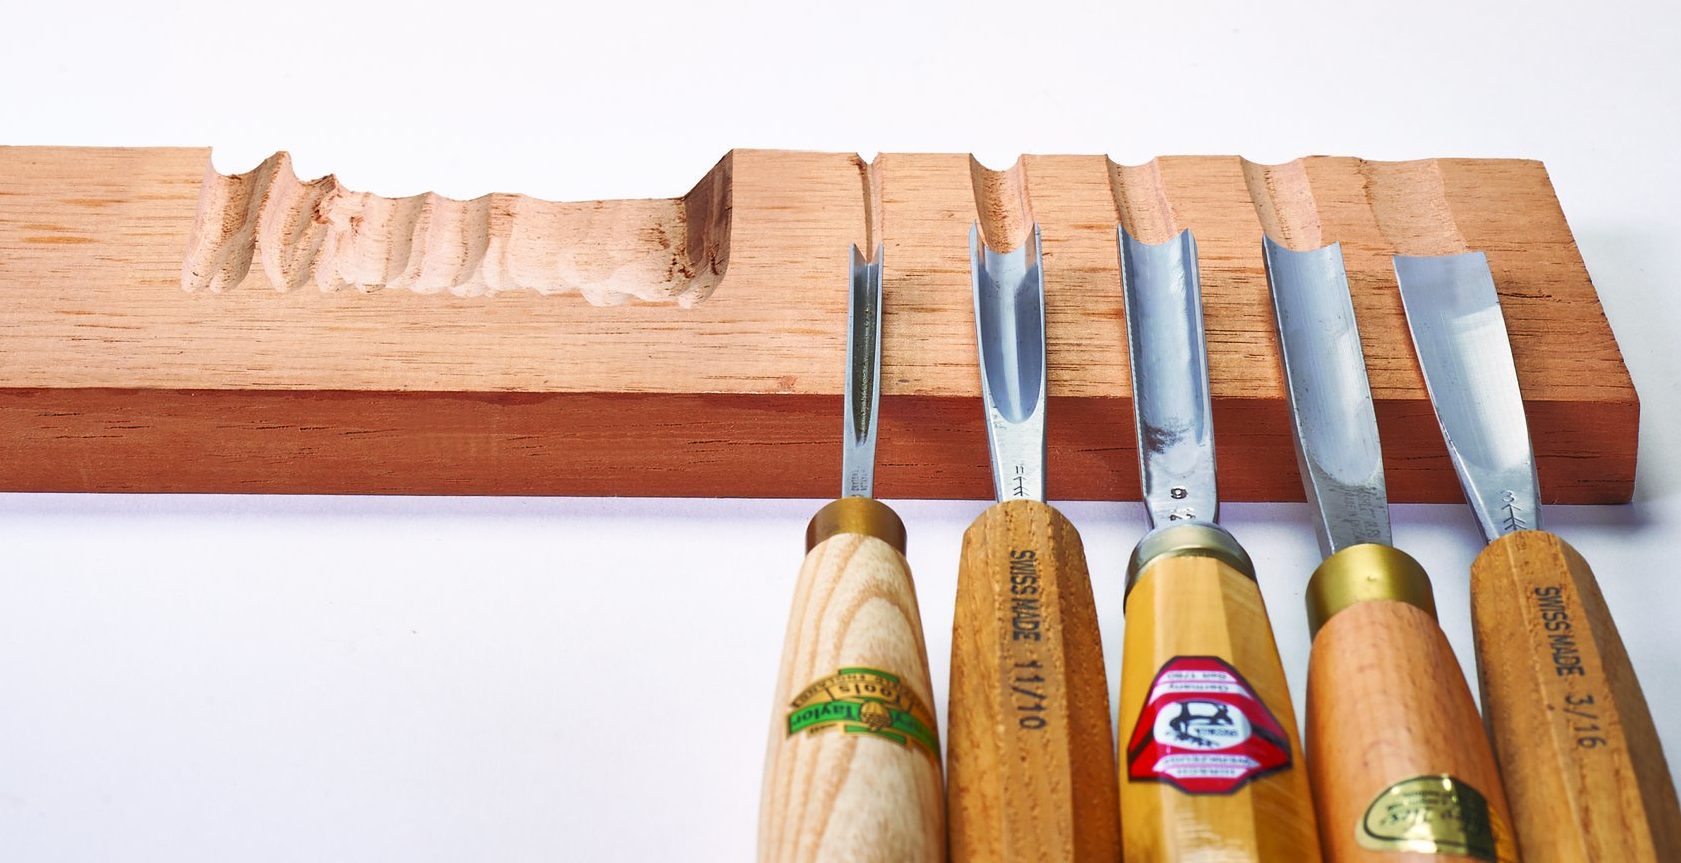
At right, you can see the cuts made by a 60° V-tool, and by deep, medium, and shallow U-shaped gouges as well. Above, you can see the progression of roughing out starting with a U-shaped gouge, progressing to a deep gouge, a medium gouge, and smoothing the surface with a shallow gouge.
Shopping List
- Carving knife with 1 1/2″ (38mm)-long blade
- Detail knife
Small Carvings
- #2 to #4 gouge, shallow: 1/8″ (3mm), 3/8″ (10mm)
- #5 to #7 gouge, medium: 1/8″ (3mm), 3/8″ (10mm)
- #8 to #9 gouge, deep: 1/8″ (3mm), 3/8″ (10mm)
- #10 to #11 gouge, U-shaped: 1/8″ (3mm), 3/8″ (10mm)
- 60° V-tool: 1/4″ (6mm)
Intermediate Sized Carvings
- #2 to #4 gouge, shallow: 1/4″ (6mm), 5/8″ (16mm)
- #5 to #7 gouge, medium: 1/4″ (6mm), 5/8″ (16mm)
- #8 to #9 gouge, deep: 1/4″ (6mm), 5/8″ (16mm)
- #10 to #11 U-shaped gouge: 1/4″ (6mm), 5/8″ (16mm)
- 60° V-tool: 3/8″ (10mm)
Large Carvings
- #2 to #4 gouge, shallow: 3/8″ (10mm), 1″ (25mm)
- #5 to #7 gouge, medium: 3/8″ (10mm), 1″ (25mm)
- #8 to #9 gouge, deep: 3/8″ (10mm), 1″ (25mm)
- #10 to #11 gouge, U-shaped: 3/8″ (10mm), 1″ (25mm)
- 60° V-tool: 3/4″ (19mm)
 This article was first published in Woodcarving Illustrated Spring 2015 (Issue 70).
Discuss this material on the Woodcarving Illustrated forums.