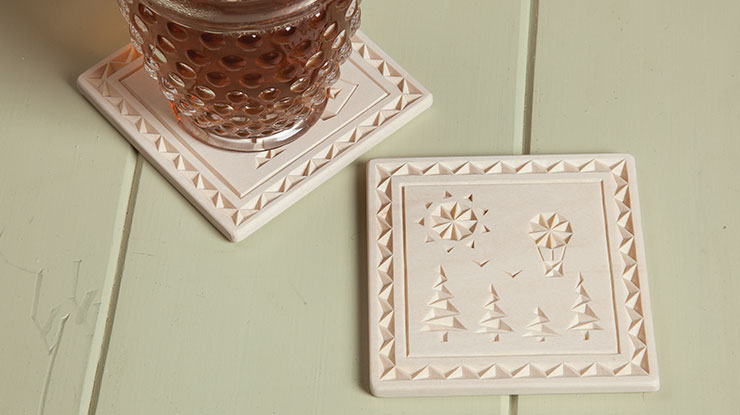
Chip-Carving a Summer Scene
You won’t want to cover these coaster-sized designs
By Roman Chernikov
I love chip carving, and I like experimenting with patterns. For a fresh new look, I used traditional chips to create two summer scenes. I use the tiles as coasters, but they would also make great decorations for a memorabilia box or key holder. If you want a more colorful finish, learn how to add stain to make the chip details pop!
Making a CoasterCut the squares to size. Transfer the patterns to the blanks using a hot tool with a laser print or graphite transfer paper. Strop your knife. I use simple three-corner chips with straight edges to carve these scenes. Refer to the photos to keep track of where the deepest part of the chip should be. Apply several light coats of acrylic spray finish or apply an oil finish, such as walnut, tung, or boiled linseed oil. |
 |
TIPWarming UpCarve several chips on a practice board before you start the project. This helps to ensure that your hand position is correct and your knife is sharp. Draw your own practice board or buy a preprinted board.
|
 |
|
MATERIALS • Basswood, at least 1/4″ (6mm) thick: 4″ (10.2cm) square • Graphite transfer paper (optional) • Finish, such as clear acrylic spray, walnut, tung, or boiled linseed oil |
TOOLS • Chip-carving knife • Hot tool (to transfer pattern, optional) • Paintbrushes |
| About the Author |
|
Roman Chernikov is a software engineer who has been carving as a hobby since 2013. He lives near San Francisco and attends the Santa Clara Valley Carvers Club. For more of his work, visit readNtry.com. |

Get the Latest Issue
For more articles like this, subscribe to Woodcarving Illustrated magazine.
Plus! Get digital mini magazines in your e-mail between printed issues.