 Amazing details in miniature carvings
By Bob Shamey
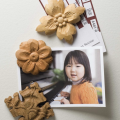
I love to carve virtually anything, but the palette for my work that I love the most is cherry pits. I love to eat cherries to get at the pit; I then continue to suck on the pits to get them completely clean. You can carve them the next day or whenever you want.
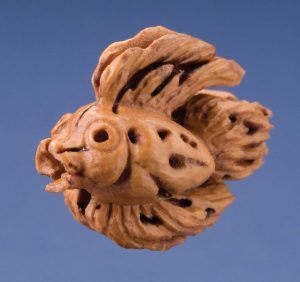
I carve a variety of pits including (from largest to smallest) peach, apricot, plum, olive, sweet cherry, wild cherry, and pin cherry. The smallest seed that I found to carve is the tiny pit inside the red berries that come from the dogwood tree.
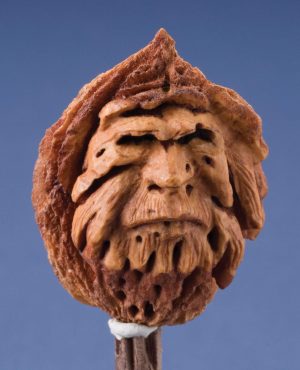
My favorite pit to carve is the sweet cherry pit. These pits are just the right size for me to feel comfortable carving—and what I love to carve is faces. Pits are perfect to carve faces in. As no two faces are alike, neither are pits. So I have a new base for a new face or personality with each new pit—there’s a whole little person lurking inside every one of them! Now I’m searching for something smaller than a dogwood seed that is hard enough and thick enough to carve!
 Tips for Pit Carving
Be sure to clean all the pulp off the seeds. I usually suck on them for 5 to 10 minutes. If you leave any pulp to dry on the seeds, it is nearly impossible to remove. If you don’t want to suck on the seeds, be sure to clean them off well.
The age of the pit doesn’t matter.
You can carve them as soon as they are dry. They will carve as easily the day after you clean them as they will after years in storage.
I use a Foredom flexible shaft tool and small dental burs that I get from dentist friends. Use larger burs for larger pits. Pits can be carved with just about any sharp tool—the old timers used to carve peach pits with pocket knives.
 For fine details, or to sign and date your carving, use a knife-point graver (usually used for engraving or jewelry-making). I hold all my pits in my fingers—even down to the smallest dogwood seed.
To finish the carvings, I dip them in Deft polyurethane. Deft doesn’t seem to fill in all the fine lines and details. Then apply a wood stain, such as Minwax Cherry Stain, to bring out the detail. It is possible to paint the pits, but I think they look better with a natural finish.
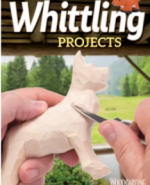 For further information on quick carving projects read 20-Minute Whittling Projects by Tom Hindes. You will learn the quick-cut method for whittling expressive little figures from wood in just 20 minutes or less, with step-by-step projects for wizards, Santas, gnomes, and more. The book is available from www.foxchapelpublishing.com for $12.99 plus S&H.
 This article originally appeared in Woodcarving Illustrated Summer 2006 (Issue 35).