

Define any style of eye with four simple V-cuts
By Harold Enlow
Photography by Scott Kreiner
Eyes add expression and character to a carving. Many folks struggle with carving eyes, so they paint the eyes on their carvings. But this often requires the entire carving to be painted. Because I use a natural finish on many of my carvings, I prefer to carve the eyes.
While the shape of the eye may change depending on the emotion you are portraying, the general technique is the same. I use the same four V-tool cuts to shape every eye. The same cuts are made in the same order regardless of whether I’m carving a happy or angry eye. The shape or placement of the cuts is what determines the expression.
 |
 |
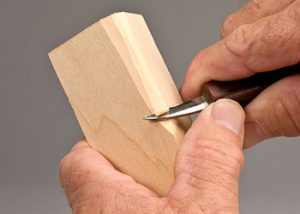
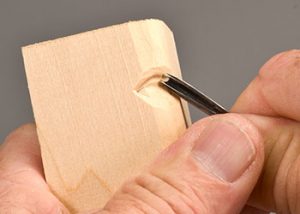
| Step 1: Round the corner of the blank using a carving knife. Faces and eyes are not flat, so it’s best to start with a rounded blank. |
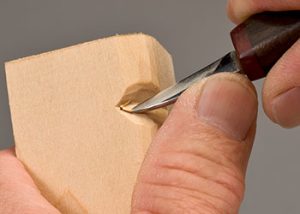
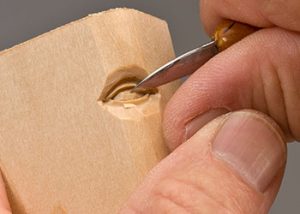
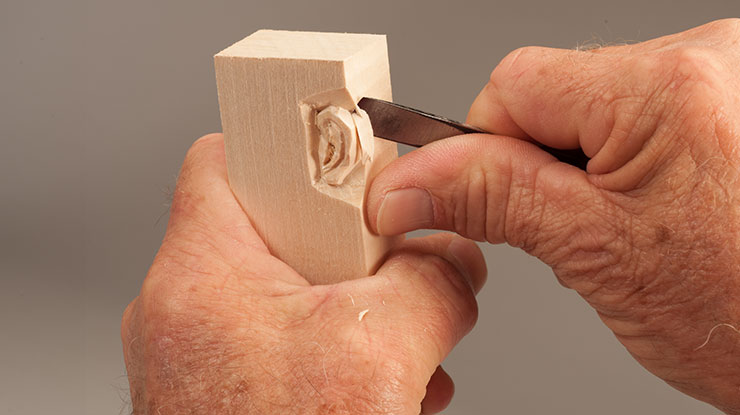
Step 2: Make a semi-circular stop cut with a carving knife to outline the brow line. Cut deeper at the rounded corner and shallower as you approach the sides. Carve up to the stop cut to create the eye socket. Repeat the process until you have a fairly deep eye socket. |
 |
 |
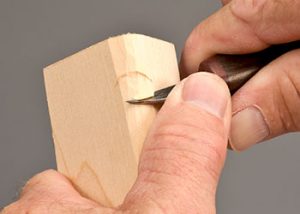
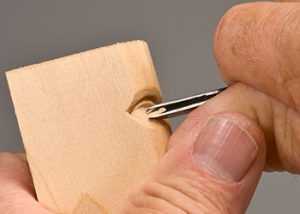
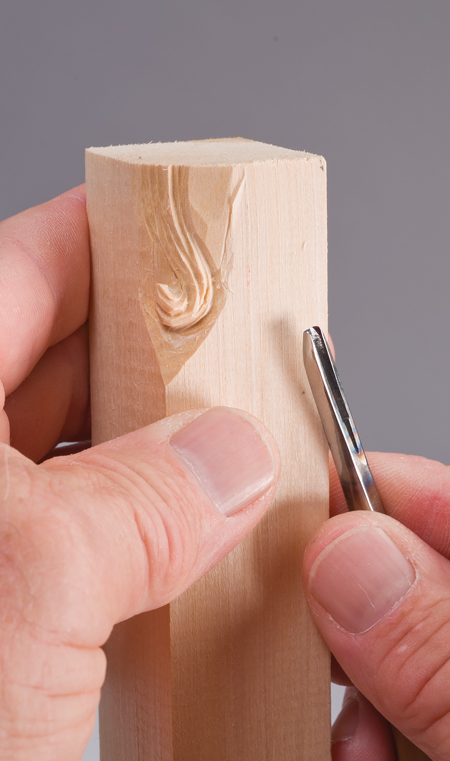
| Step 3: Rough in the eyeball. Remove a triangular chip of wood from the inside and outside corners of the eye with a carving knife. This helps you begin to round the eyeball. | Step 4: Carve the upper eyelid. Make the first V-tool cut along the inside crease of the top eyelid. Use a sharp 1/8″ (3mm) V-tool. This separates the upper eyelid from the eye socket and the brow line. |
 |
 |
|
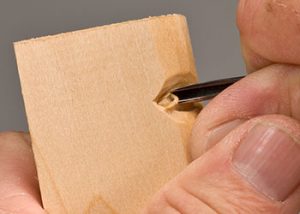
Step 5: Carve the lower eyelid. Use a sharp 1/8″ (3mm) V-tool to make the second V-tool cut along the inside crease of the bottom eyelid. This separates the lower eyelid from the bottom of the eye socket and the top of the cheek. |
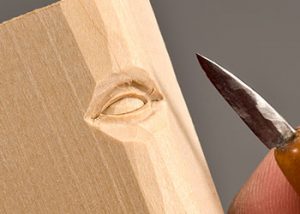
Step 6: Refine the upper eyelid. Make the third V-tool cut along the bottom edge of the top eyelid. Position the wing of the V-tool perpendicular to the eyeball. This separates the upper eyelid from the eyeball. |
 |
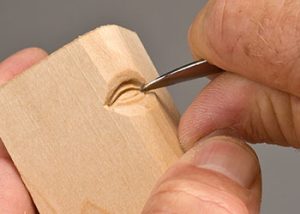 |
| Step 7: Refine the lower eyelid. Use the same V-tool to carve along the top edge of the lower eyelid, making the fourth V-tool cut. Position the wing of the V-tool perpendicular to the eyeball. This separates the lower eyelid from the eyeball. |
Step 8: Finish the eyelids. Use a detail knife to make a stop cut along the bottom of the upper eyelid, separating it from the eyeball. Then, use the same knife to thin the lower eyelid slightly so the upper eyelid overlaps the lower eyelid at the outside corner. |
 |
 |
|
Step 9: Round the eyeball. Make a stop cut along the top of the bottom eyelid with a detail knife. Use the same knife to cut up to the stop cut along the upper eyelid and down to the stop cut along the lower eyelid, rounding the eyeball into these stop cuts. |
Step 10: Decide how to finish the eye. Make sure the upper eyelid sticks out more than the lower eyelid. If you plan to paint the eye, you are done carving. If you plan to apply a natural finish, carve the iris and pupil. |
 |
 |
|
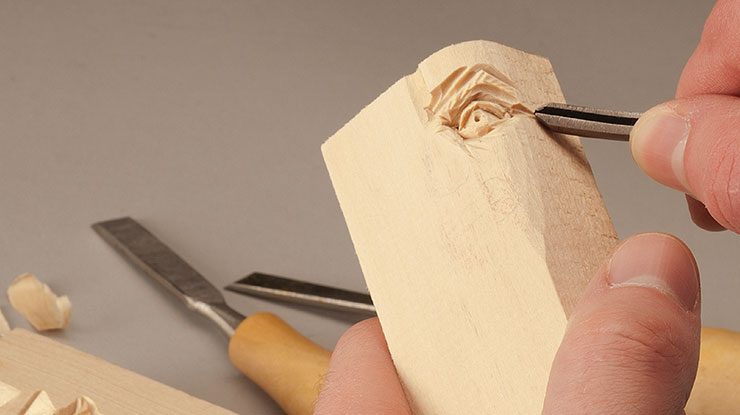
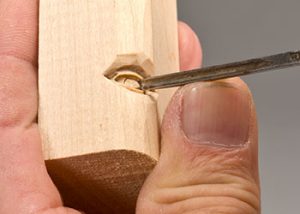
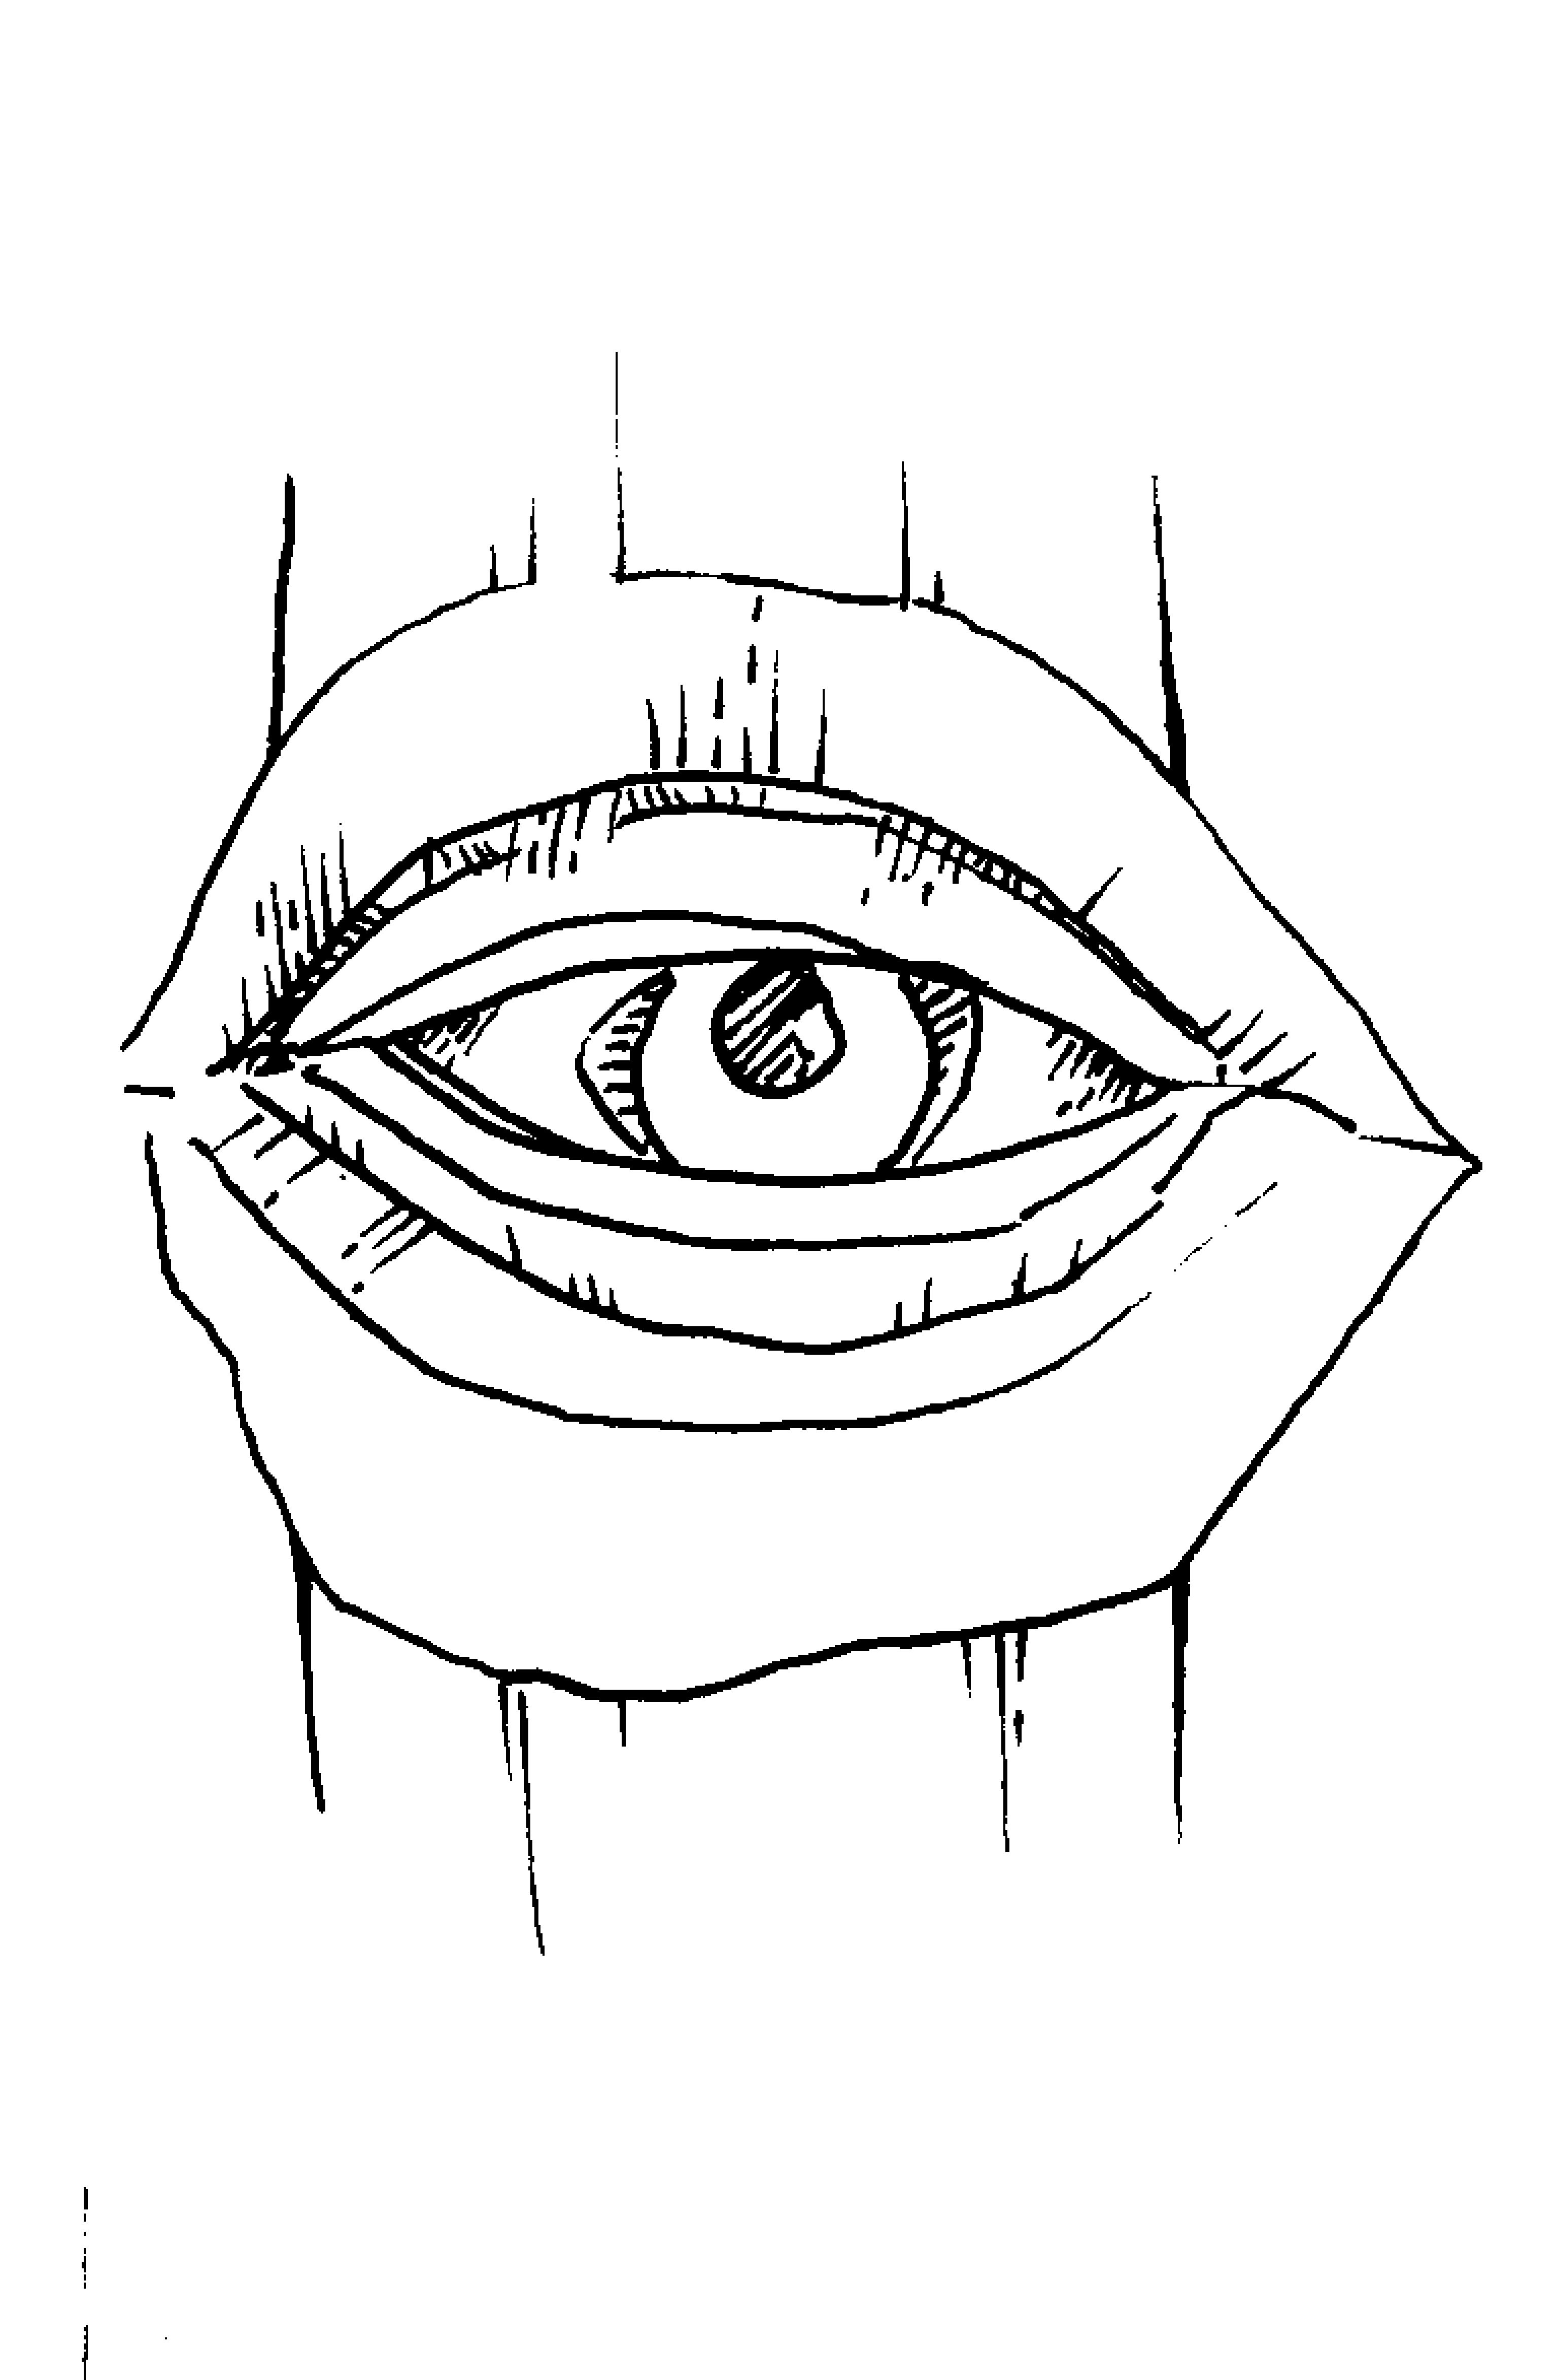
Step 11: Carve the iris. Use a 1/16″ (2mm) #6 gouge to make a stop cut around the iris. The eyelids hide a portion of the iris unless you are creating a surprised or scared expression. Recess the iris area slightly with the same tool to create a little shadow. Clean up the iris with a detail knife and micro gouge. |
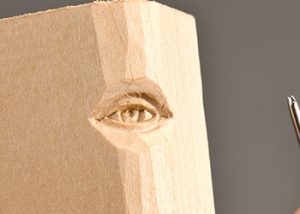
Step 13: Carve the pupil. Stab in the pupil with a micro veiner. The whole pupil shows under the upper eyelid. Carve out the pupil using a micro veiner and clean up the pupil with a detail knife. The goal is to create a deep shadow. |
CLICK HERE to download a pattern drawing of the eye.
Materials & Tools
MATERIALS:
• Basswood blank
TOOLS:
• Detail knife
• 1/8″ (3mm) V-tool
• 1/16″ (2mm) #6 gouge
• Micro veiner
 For more great information on carving facial features, see Carving Faces Workbook by Harold Enlow. Pull up a seat next to Harold’s carving bench as he teaches you how to carve faces with life and expression while sharing decades of carving tips and techniques.
Available for $19.95 plus S&H from Fox Chapel Publishing, www.FoxChapelPublishing.com.


