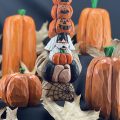
Have fun carving a variety of facial expressions on these cute gourds
By Kevin Johnson
My family enjoys picking pumpkins every fall at a local farm. Each of us explores different themes to carve on our pumpkin. I like to carve silly faces, while my kids like cartoon characters. We then take our carved pumpkins to a pumpkin walk that raises money for our local hiking trail. Hearing people laugh as they walk by is a highlight of the evening. Have fun carving this pumpkin stack and feel free to add your own touch to the project. When the carving starts to make you smile, you’ll know you’re on the right path!
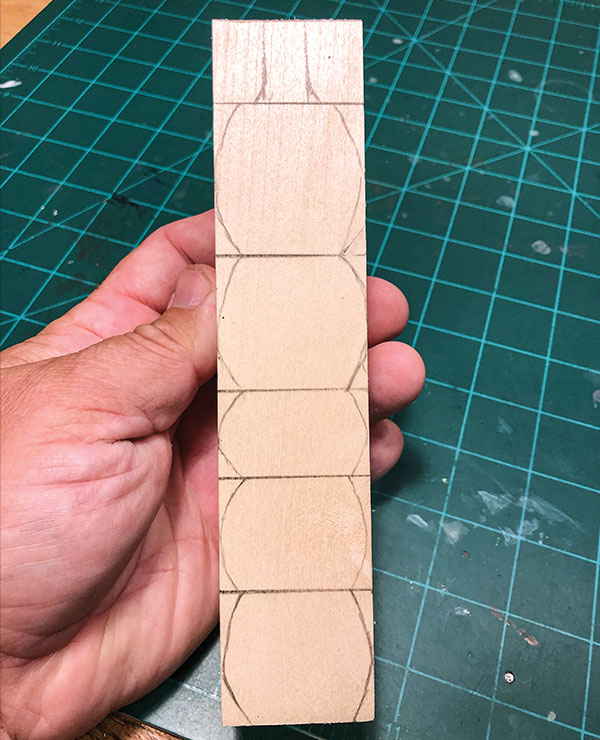
Getting StartedRoughly sketch the pattern onto the wood with the grain running vertically. You can use a saw to cut out around the top pumpkin stem. |
 |
TIP: Clean EraserHi-polymer erasers do not leave colored eraser marks on carvings. They are typically white in color. |
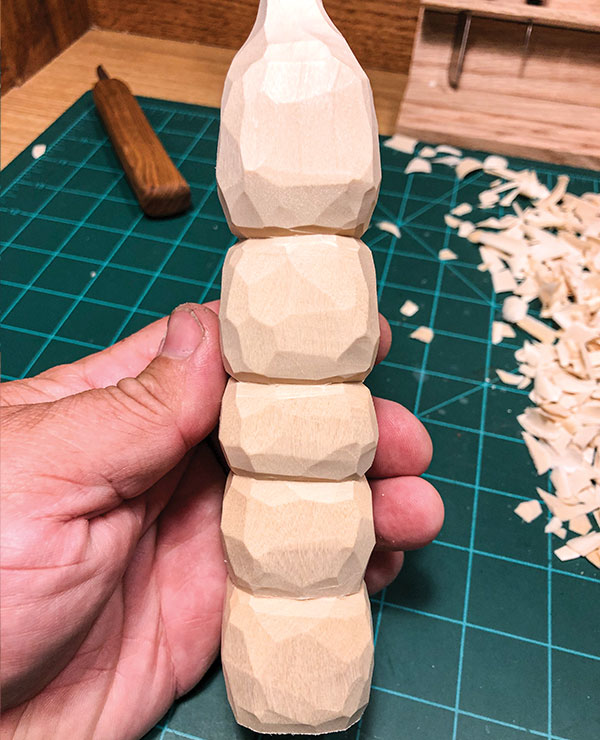
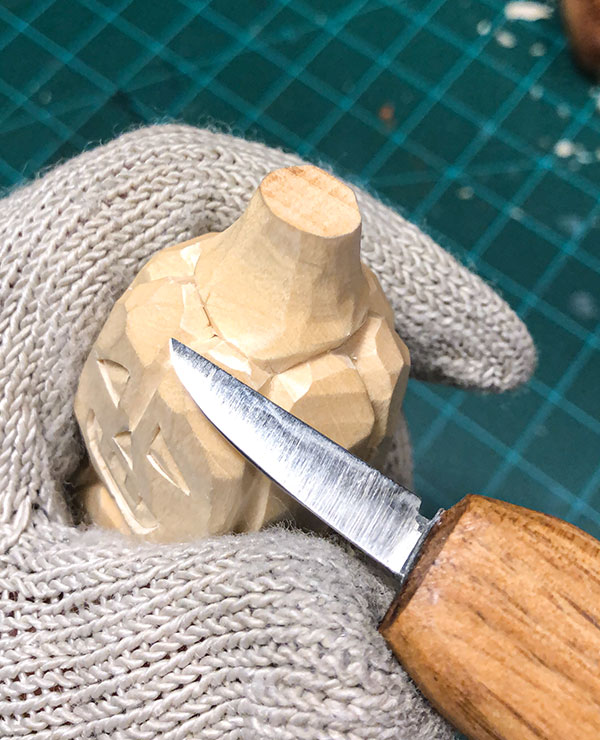
Step 1Round each pumpkin. Cut the corners down first, and then round the pumpkins using a rough out knife. Carve the slightly lopsided shape of a pumpkin and not a perfect circle. |
 |
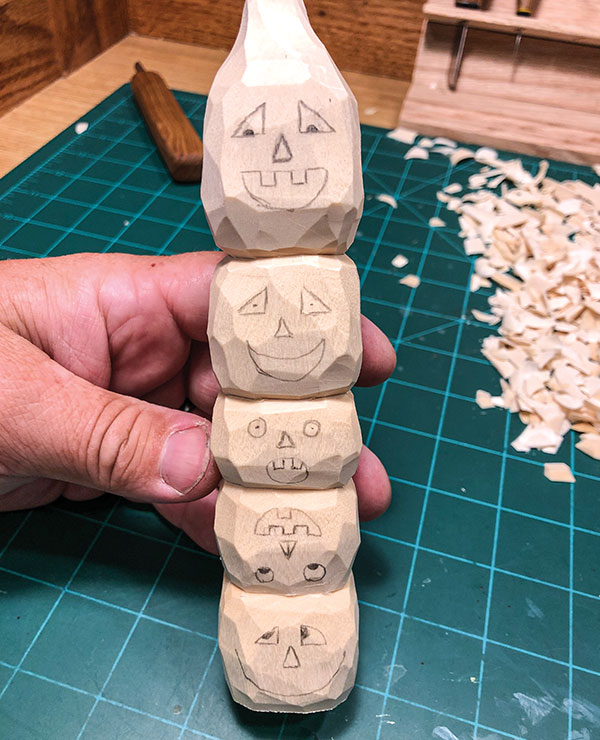
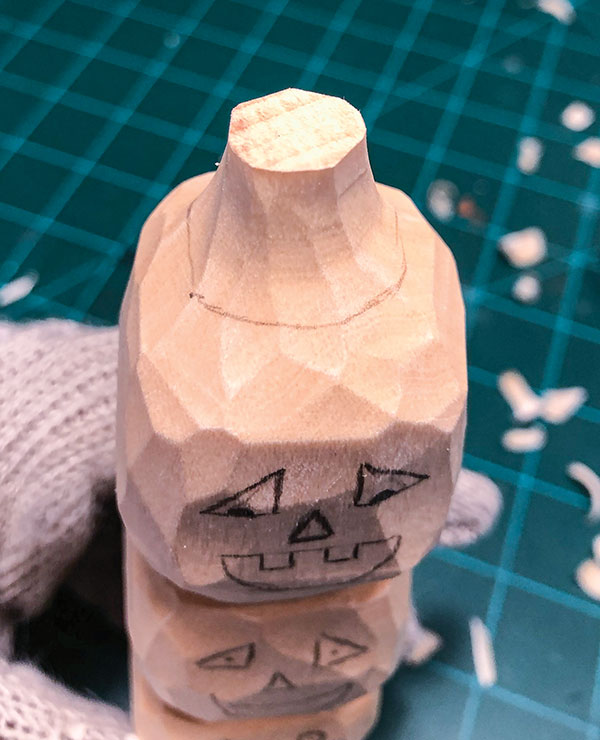
Step 2Draw the faces. Use a pencil to draw faces on the pumpkins. Make sure you are happy with your faces before carving them. If you need to make corrections and erase pencil marks, use a Hi-polymer eraser. |
 |
Step 3Carve the pumpkin stem. Carve the basic shape of the pumpkin stem. Once you have the basic shape of the stem, draw a circle where you want the stem to stop. |
 |
 |
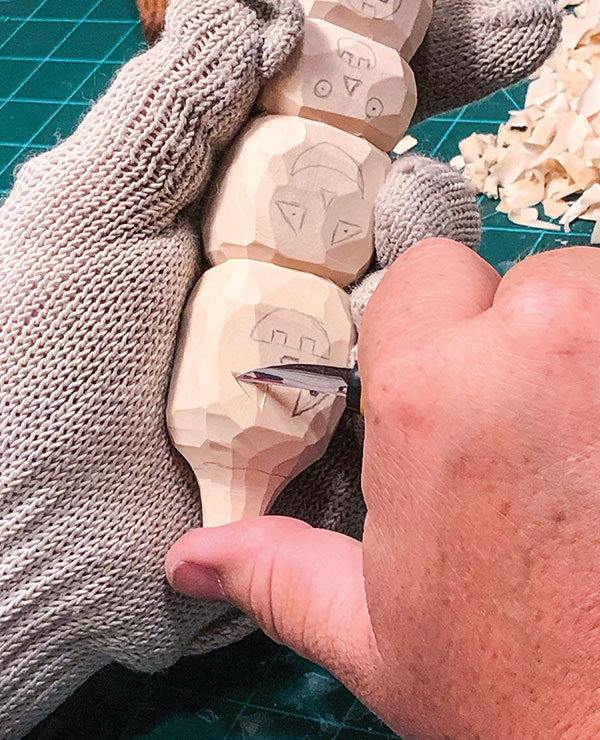
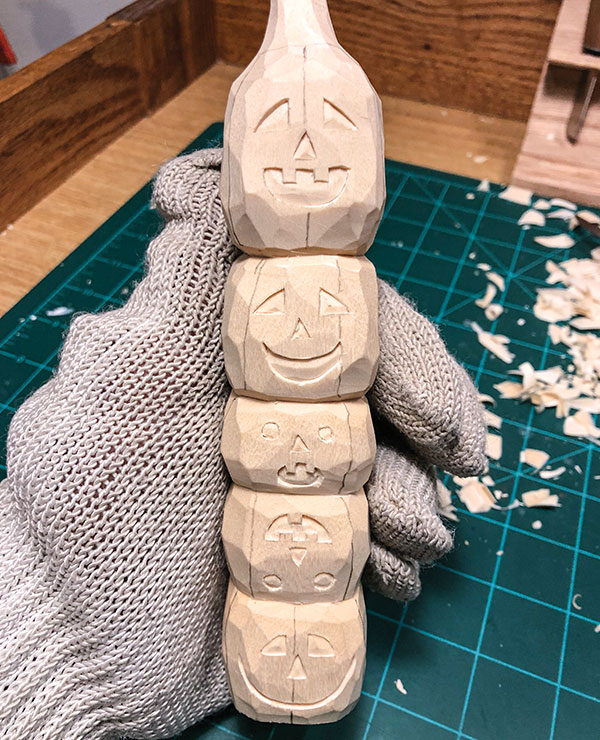
Step 4Carve the pumpkin faces. Start cutting out the pumpkin faces with a detail knife. Take your time and be precise with your cuts. I like to do a chip-style cut for the eyes and noses. For the bottom pumpkin, use a V-gouge for his smile. |
 |
Step 5Mark the pumpkin seams. Make sure you stagger the seams as you go from pumpkin to pumpkin. |
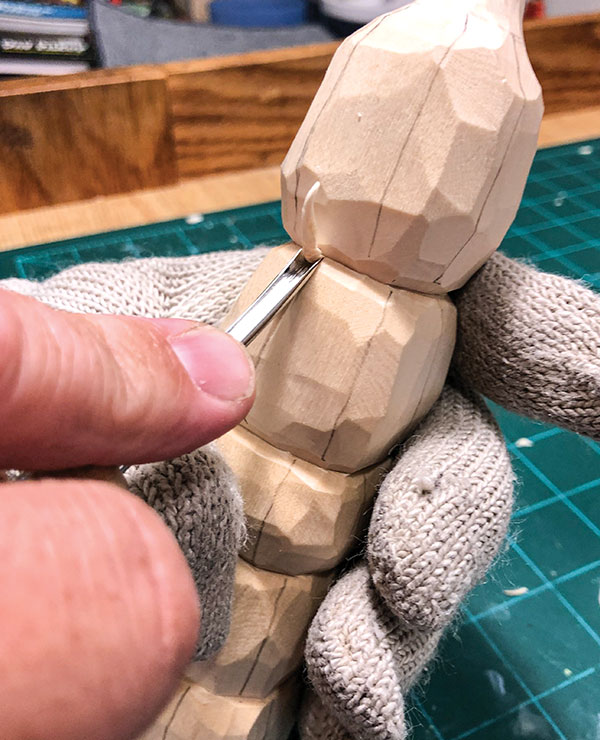 |
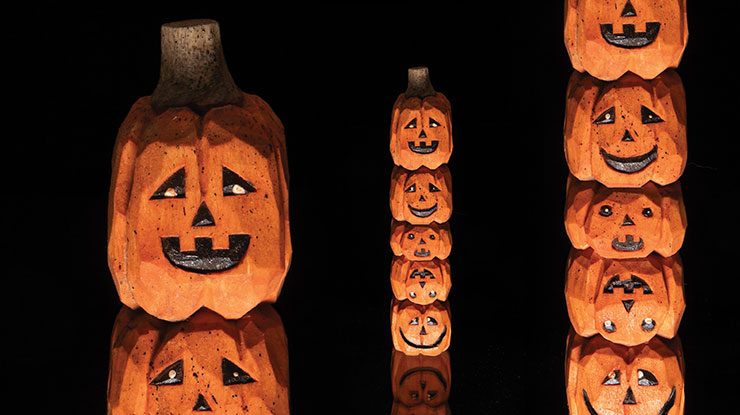
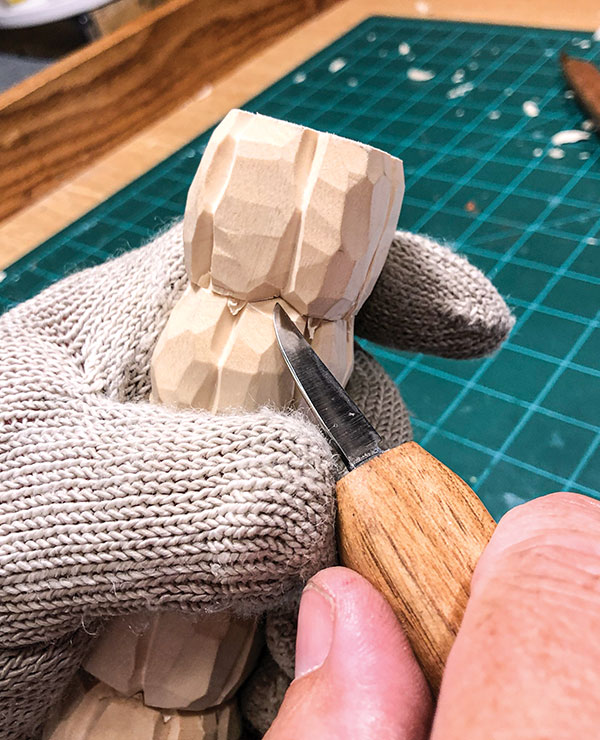
Step 6Cut the pumpkin seams. Use the V-gouge to create crisp, deep shadow areas to the desired depth you want. Make sure you stop at the bottom of the stem on the top pumpkin. Use the detail knife to round the sides of the seams for a more organic look. Do a chip-style cut with your detail knife wherever the seams meet a pumpkin. Make the cuts so the pumpkins look like they are sitting on each other. Turn the carving upside down as needed to make these cuts easier. |
 |
Step 7Finish the pumpkin stem. Use the detail knife to separate the stem from the top pumpkin. Use the lead image as a reference on how to place your cuts. Finish carving the stem details. Look over the carving and clean up your cuts. Remove any pencil marks. |
 |
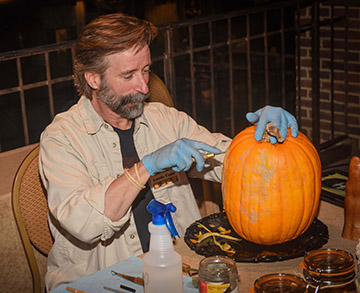
Painting and FinishingBrush walnut oil onto the carving. After a few minutes, wipe off any extra oil with a paper towel. Do not brush oil onto the bottom of the carving. This helps prevent the oil from getting on anything you set the carving on. Allow the carving to dry for a day. Note: Always dispose of oil-soaked rags according to the manufacturer’s instructions, as they can spontaneously combust. Paint the pumpkins with burnt orange, using a 4:1 water-to-paint ratio. Paint the pumpkin faces with lamp black. Paint the stem burnt umber, using a 4:1 water-to-paint ratio. Then double the water in the burnt umber and blend the stem into the pumpkin. Use titanium white to paint the eyes. When the eyes are dry, use the watered-down burnt orange and lightly paint over the faces. This gives them a nice orange hue. Dip a stiff-bristled brush in the lamp black. With your thumb on the bristles, spray black paint droplets on your carving. Try this technique first on a piece of paper to practice. Let the carving dry for a day, and then spray with a clear matte finishing spray. |
|
MATERIALS • Basswood, 1 ½” (3.8cm) square: 6 ¾” (17.1cm) high • Pencil • Hi-polymer eraser • Oil: walnut • Paper towels • Acrylic paints, such as DecoArt®: burnt orange, lamp black; such as Folk Art®: burnt umber, titanium white • Finish, such as Krylon® Flat Crystal Clear |
TOOLS • Scroll saw (optional) • Knives: rough out, detail • V-gouge: ¼” (6mm) • Paintbrushes: assorted |
| About the Author |
|
Kevin Johnson lives in York, Pa., with his wife Jen and their two children. He has been carving for nine years and is a member of the Conewago Carvers |
 |
Get the Fall 2023 Issue Purchase the IssueFor more articles like this, subscribe to Woodcarving Illustrated magazine. Magazine SubscriptionPlus! Get digital mini magazines in your e-mail between printed issues.
|