How—and why—to attach a project to a carving arm
By Laverne “Sid” Sidler
Using a carving arm has real advantages. You will reduce the risk of cutting yourself; have both hands free to control the tool, resulting in higher-quality results; be able to position the work to make difficult areas more accessible; and simply be more comfortable while carving. Plus, a person who only has the use of one hand can still carve by using a carving arm.
To use the carving arm effectively, you need to know how to attach your blanks to it. The goal is to make the work piece easy to position and to provide the best access for carving tools. You should be able to adjust the carving arm up and down and rotate the blank on the carving arm. Once you feel comfortable using your carver’s arm, attach your next blank to it and carve yourself a Happy Santa caricature.
Mounting a Carving DirectlyTo attach a large carving to the arm, use a carver’s screw. Drill a pilot hole into the bottom of the blank and thread the carver’s screw into the hole. Carver’s screws are available from most carving supply stores. For small carvings, you can use a common hanger bolt in lieu of a carver’s screw. Hanger bolts, which have a machine-thread bolt on one end and a lag screw on the other end, are often sold in the plumbing area of hardware stores. I suggest a 5/16″-dia. by To attach the hanger bolt to the blank, drill a 3/16″ (5mm)-dia. pilot hole in the bottom of the carving, and thread the lag part of the bolt into the hole. The hanger bolt should protrude at least 2-3/8″ (60mm) so you can attach the piece to the carving arm. |
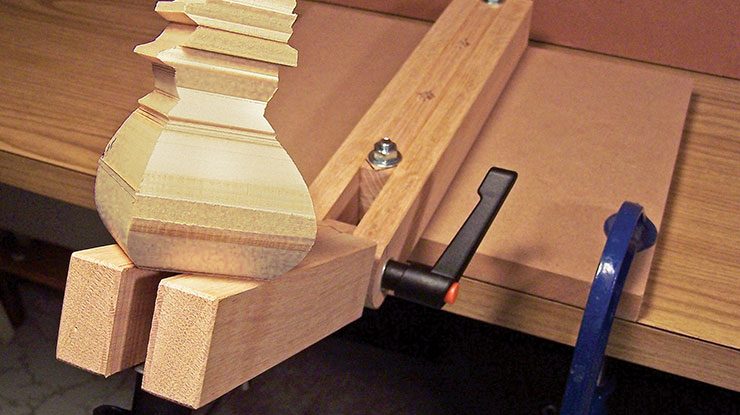
Twist a carver’s screw or hanger bolt into the bottom of the carving. |
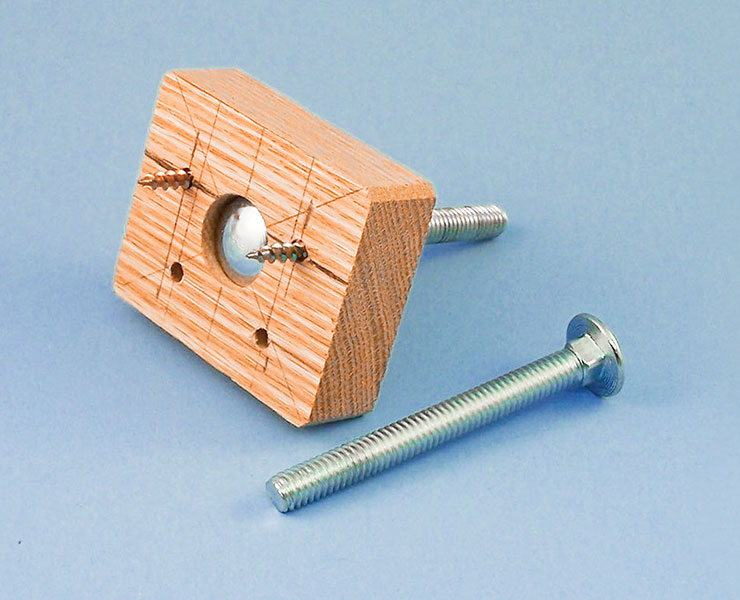
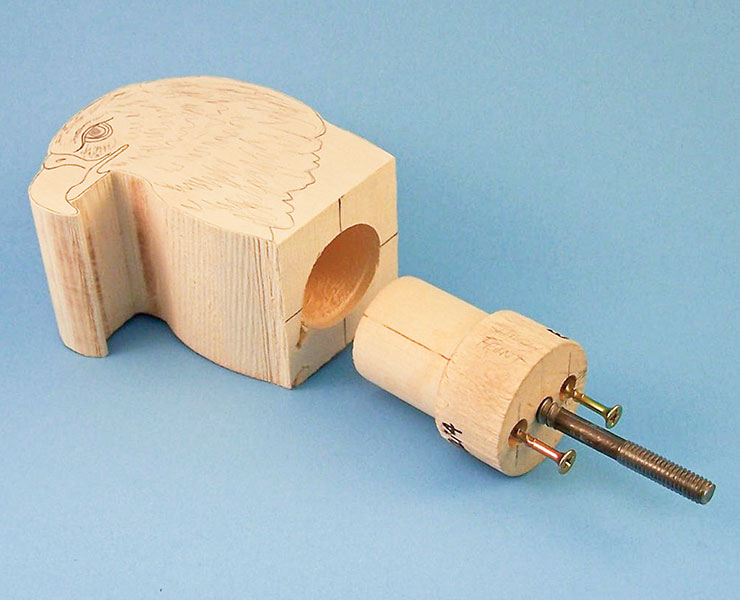
Using a Mounting Block or PlugIt can be difficult to use a carver’s screw with some projects, such as relief carvings or figures without bases. To mount carvings like this, I use a carriage bolt attached to a temporary mounting block. To mount a relief carving, choose a piece of 3/4″ (19mm)-thick wood that is large enough to insert at least four wood screws into the relief carving. Position the screws in areas that will not protrude into the finished carving. Drill and countersink the holes for the screws in the bottom of the mounting block. Drill and counter-bore the hole for the carriage bolt in the center of the top of the mounting block. Drive the carriage bolt through the hole and then screw the mounting block to the relief carving. For an in-the-round carving that doesn’t have a base, such as a human or animal figure, choose a 3/4″ (19mm)-thick piece of wood big enough for the figure to stand on. Determine where the feet will be located and drill and countersink holes positioned so the screws will go into the feet and legs. Drill a hole for the carriage bolt in the center of the mounting block. To ensure the carriage bolt sits below the surface of the mounting block, counter-bore a shallow hole the same size as the head of the carriage bolt in the top of the mounting block and drive the carriage bolt down through the hole. Use wood screws to attach the carving to the mounting block. For hollow items, like cane heads, make a plug that fits into the blank. Drill a pilot hole in the plug and insert the lag end of a hanger bolt into the hole. Use wood screws to attach the plug to the blank. When the carving is finished, back out the wood screws to free the carving from the plug. |
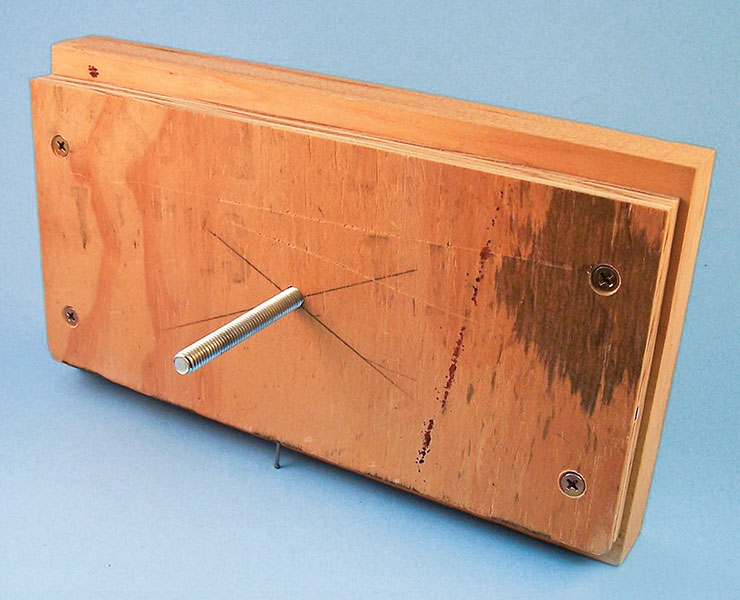
Use a mounting block to attach a relief carving to a carving arm.
Use a mounting block for an in-the-round carving that does not have a base.
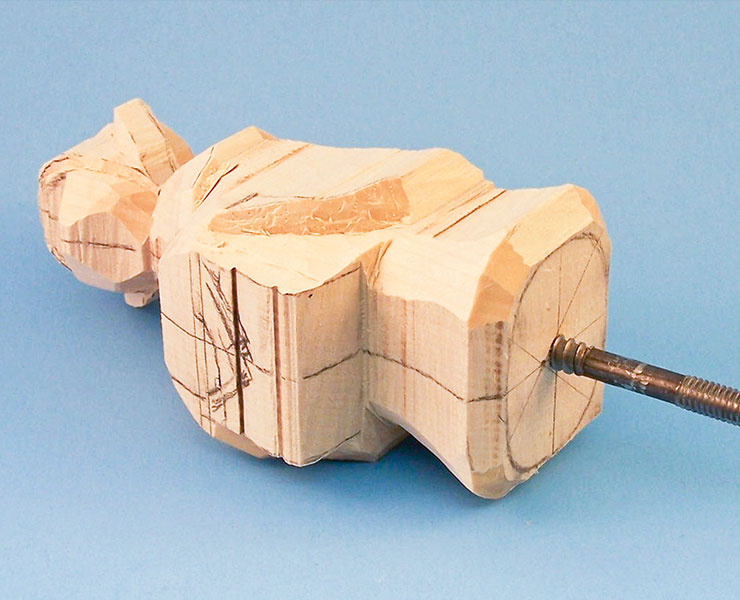
When you can’t drill into the blank, create a plug. |
Choosing a HandleOnce you have attached a carver’s screw or bolt to the blank or mounting block, you can use either a commercial or a shop-made handle to mount the blank to the carving arm. To use a commercial handle, place a 5/16″ (8mm)-dia. fender washer onto the carver’s screw or bolt and then add a 5/16″-16 five-star knob. To make a handle, sketch the shape as pictured. Drill a 1/2″ (13mm)- dia. by 5/8″ (16mm) deep hole in the inner curve and then drill a 5/16″ (8mm) hole all the way through. Cut around the perimeter of the handle. Install a 5/16″-16 threaded insert into the larger hole. Thread a fender washer onto the carver’s screw or bolt and loosely twist on your shop-made handle. |
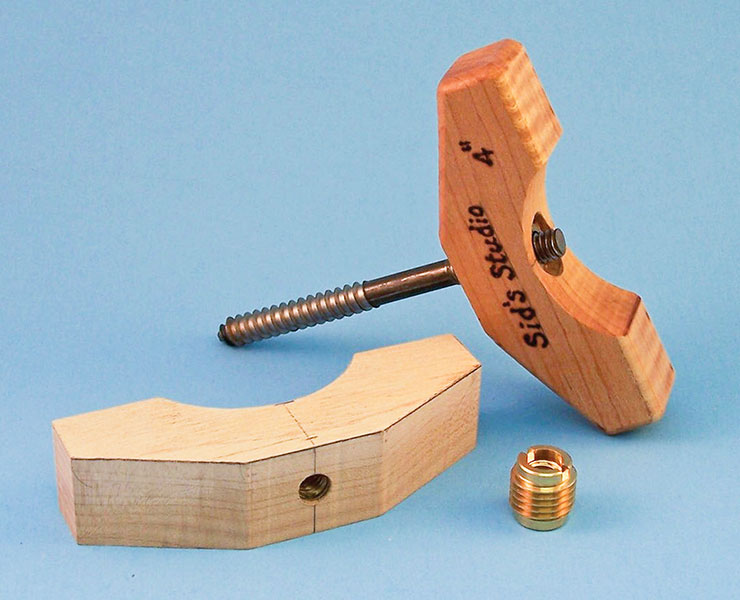
Buy a handle or make your own. |
Using a Carving ArmKeep the handle loose enough that you can slide the bolt through the slot in the carving arm. Make sure the fender washer is against the handle and tighten until the carving is held securely. To rotate the carving as you work, simply loosen the handle or knob. Be sure to re-tighten the handle before working again. |
Use a handle to attach the mounting block to the carving arm. |
| About the Author |
|
LaVerne “Sid” Sidler was a woodworker for more than 50 years and an award-winning woodcarver for over 40 years. |
 |
Get the Winter 2023 Issue Purchase the IssueFor more articles like this, subscribe to Woodcarving Illustrated magazine. Magazine SubscriptionPlus! Get digital mini magazines in your e-mail between printed issues.
|