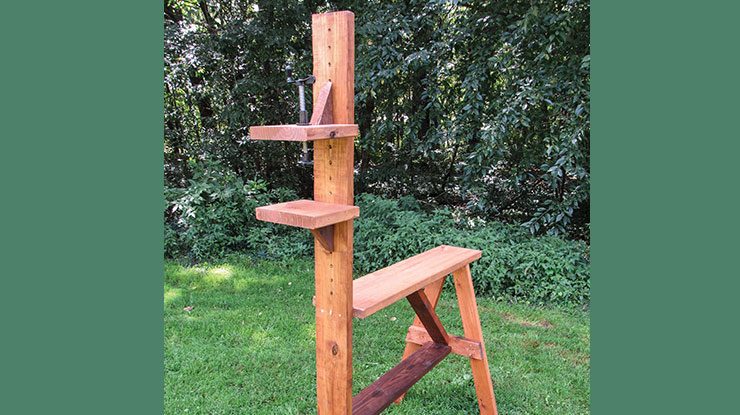
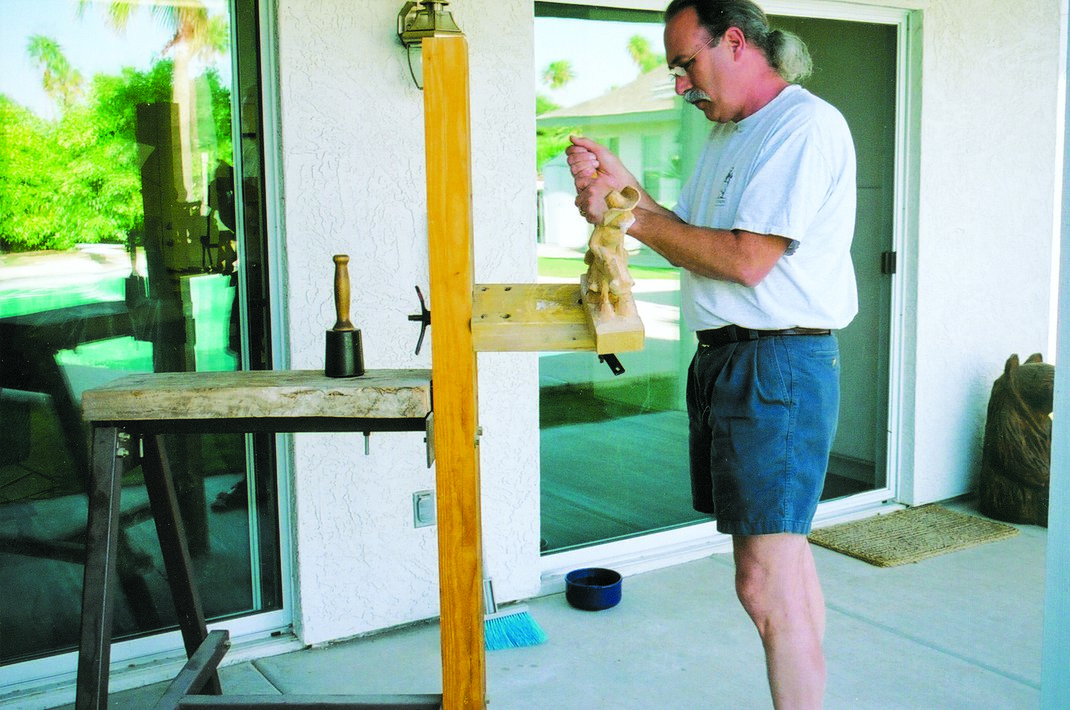
Shop-made holding fixture allows you to carve anything outdoors
By Ralph Beam
Illustrations by Paul Modlin
I wanted to carve outside in nice weather but needed a way to secure the blanks in a unit light enough to move from the yard to the garage. I read an article about shop-made holding devices by Roger Schroeder in Woodcarving Illustrated Summer 2006 (Issue 35) that described a carver’s frame made by John and Nancy Burke that fit my needs. The Burkes made their frame from steel and large pieces of wood that made it too heavy to move around. I used the basic concept of the Burke frame to make a smaller one out of lighter construction-grade wood that can be secured to the ground with tent stakes.
This carver’s frame offers several options for securing work for in-the-round or relief carving. It has an added shoulder vise screw device to secure pieces vertically. The screw can also be flipped around to secure pieces to the bench. Use hanger bolts with washers and wing nuts or carver’s screws through the table, or attach a board to the vertical board for an in-the-round piece. This lets you rotate the piece to change your carving angle. Use clamps to hold flat relief-carving blanks to the table. Like any carving bench, you can add holes for bench dogs and clamps to secure work or to hold tools. You can clamp walking sticks or longer pieces of wood directly to the vertical board. After creating your carver’s frame, try carving a rustic wooden cup or a dozen!
Getting StartedCut the stock to length using the parts list and diagrams as guides. I use a miter saw. Several pieces have angles cut on the ends; use the drawings to make sure you angle the ends properly. Drill the holes marked on the drawings. Then, apply a waterproofing finish to the pieces. This allows you to leave the main structure of the frame outside; I suggest you bring the press screw and any other metal hardware inside. |
| TIP: Screwing in Hanger Bolts
To screw in hanger bolts, tighten two nuts against each other. Use a wrench on the top nut to turn the hanger bolt into the table. |
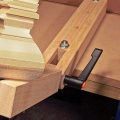
Assembling the FrameUse the assembly drawings as guides to assemble the stand. Drive the table bolts (P) about 3 1/2″ (89mm) into the edge of the press screw mount (H) and clamping tables (I, J) (see Tip). To make it easy to drive the screws at an angle through the table brace (C) into the back table (G), drill pilot holes slightly smaller than the diameter of the screws. Follow the manufacturer’s instructions to mount the press screw. |
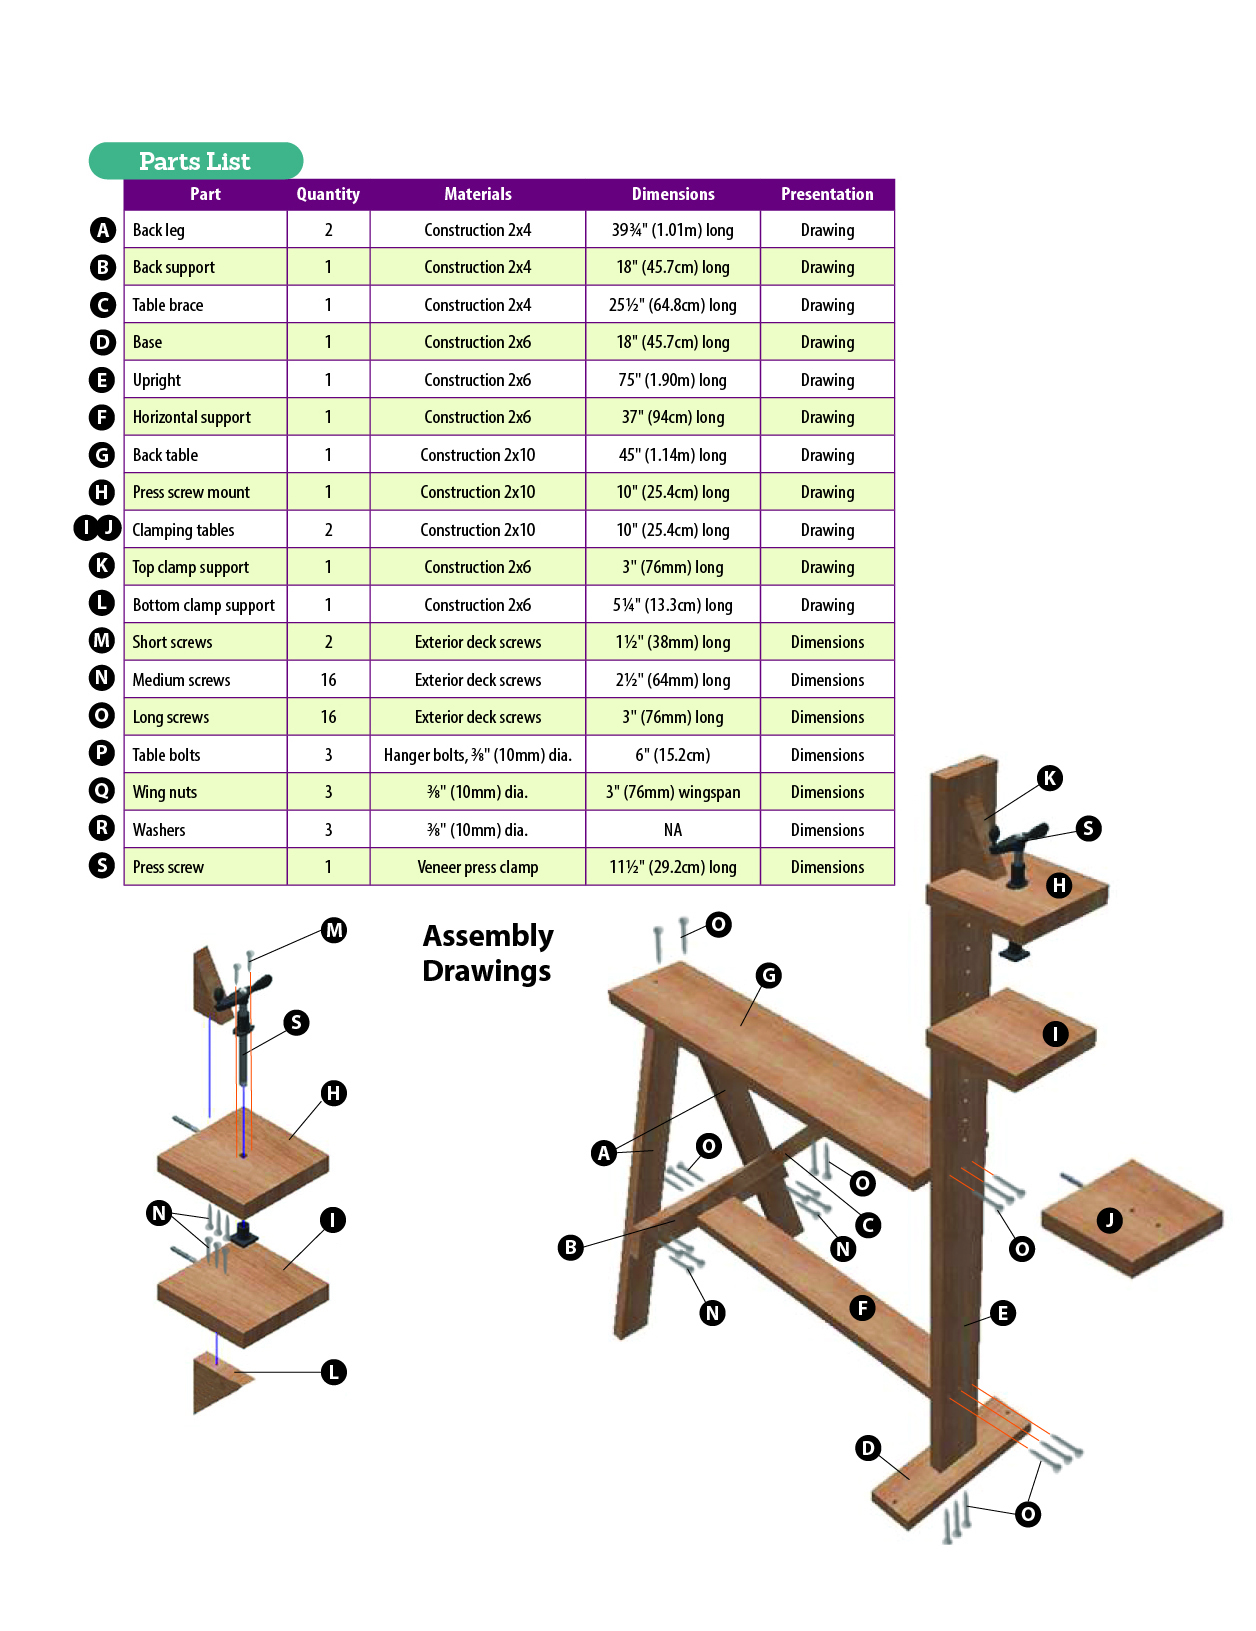 |
Using the FrameSecure the frame to the ground using heavy-duty shepherd-crook-shaped tent stakes. To use the press screw, insert the table screw through the hole of your choice in the upright and lock it in place with the wing nut. Use the size of the carving to determine where to position the clamping table, and lock it in place with the wing nut. Then, secure the carving with the press screw. Use the other clamping table with a hanger bolt or carving screw to secure an in-the-round carving. Use the back table to secure in-the-round carvings or relief carvings using the press screw mounted on the other side of the upright or with ordinary clamps. |
|
|
MATERIALS • Construction 2x4s: 2 each, 8′ (2.44m) long • Construction 2x6s: 2 each, 8′ (2.44m) long • Construction 2×10: 8′ (2.44m) long • Shoulder vise screw: 9″ (22.9cm) long (see Special Sources below) • Hanger bolts, 3/8″ (10mm) dia.: 3 each, 6″ (15.2cm) long • Wing nuts, 3/8″ (10mm) dia.: 3 each, with 3″ (76mm) wingspan • Washers, 3/8″ (10mm) inside dia.: 3 each, 1 1/2″ (38mm) outer dia. • Exterior deck screws: 1 1/2″ (38mm) long, 2 1/2″ (64mm) long, 3″ (76mm) long • Shepherd-crook-shaped tent stakes: 2 each |
TOOLS • Saws: miter, circular • Hand drill with bits: 5/16″ (8mm), 3/8″ (10mm), 7/8″ (22mm) dia. • Level |
|
SPECIAL SOURCES An 11 1/2″ (29.2cm)-long veneer press clamp (part number D2893) is available for $16.50 from Grizzly Industrial, grizzly.com, and other online retailers. Hanger bolts and wing nuts are available for $1.93 each (bolts) and $6.88 each (wing nuts) from MSC, MSCDirect.com. |
| About the Author |
|
Ralph Beam is a retired high school earth science teacher who lives in Mishawaka, Ind., with his wife Kay. |
 |
Get the Summer 2023 Issue Purchase the IssueFor more articles like this, subscribe to Woodcarving Illustrated magazine. Magazine SubscriptionPlus! Get digital mini magazines in your e-mail between printed issues.
|