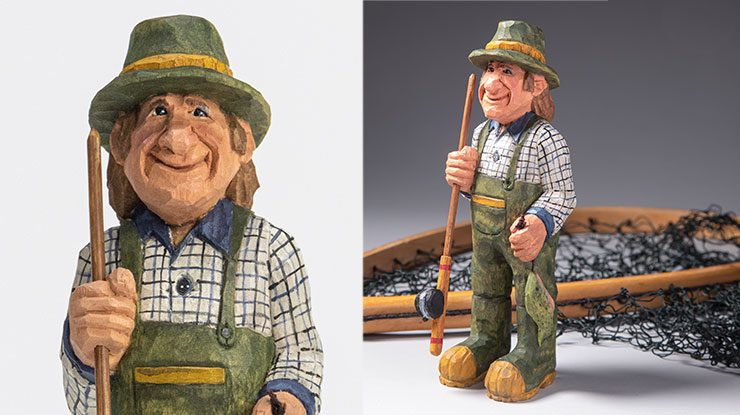
Find in depth instructions on how to carve this happy caricature fisherman
By Jim Hiser
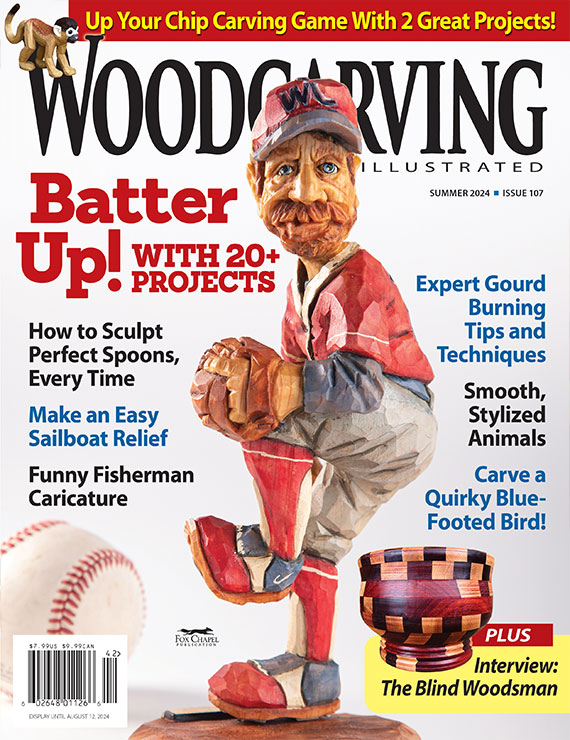
If you are looking for more detailed directions on how to carve Jim Hiser’s “Angling for Fun” project in our summer issue (#107), check out the step-by-step instructions below.
Roughing OutStep 1Rough out the shape. Use a 5/8″ (16mm) soft V-tool or carving knife to start blocking out the figure by removing wood around the arms and hands. Keep them larger than needed to allow for adjustments later. |
 |
Step 2Refine the basic shape. With the carving knife, round the corners of the blank to make it easier to hold. Then start rounding the legs and boots. |
 |
Step 3Block in the head. Use the carving knife and 5/8″ (16mm) soft V-tool to start blocking in the face and hat. I like to work on these at the same time. |
 |
Step 4Define the face and add details. Mark out the width of the face and use the carving knife to taper it to an approximate angle of 45°. Note: Move the centerline of the face slightly which will turn the head from the centerline of the body, giving the carving a little more interest. Cut in the brow line using a 1/4″ (6mm) #9 gouge. Then use the carving knife to cut in the bottom of the nose. Draw in the sideburns and ears. |
 |
 |
Step 5Shape the neck. Use the carving knife to create the neck area. Work back and forth on each side for symmetry. |
 |
Step 6Carve the nose. Use the carving knife to cut in the wings of the nose and the smile lines to start the mouth mound. Then set the angle of the nose. |
 |
Step 7Define the mouth. Round the mouth mound with the carving knife, and then draw the mouth. Make a stop cut along the sketched mouth and remove a small amount of wood below the upper lip. Use the 1/4″ (6mm) #9 gouge to cut in the lower lip and shape the chin area. Carve the nostrils with the gouge turned backward. Then use the carving knife to create the eyes. |
 |
 |
TIP: GETTING NOSYTo carve the nostrils symmetrically, I draw a line across the nose, and then use that as a starting point. This way, there’s a good chance that both nostrils will be the same height. |
Step 8Add head details. Carve the ears and sideburns. Then use the 1/4″ (6mm) #9 gouge to carve the hair. |
 |
Step 9Refine the body. Referring to the patterns and photo of the finished project, start carving the rest of the body, shaping the arms, hands, and legs. This is a good time to look over your carving to make sure you are satisfied with it before adding the details. |
 |
 |
Adding DetailsStep 10Draw the clothing. Refer to the pattern to sketch the chest waders, pocket, and the shirt collar and sleeves. |
 |
Step 11Carve the boots. Shape the waders with the carving knife and cut in the sole. Then use a 1/8″ (3mm) #9 gouge to make grooves along the soles for treads. If you look at waders, the boots join the legs forming one piece, so I cut a shallow line around the top of the boots to show where they join. |
 |
 |
Step 12Add the pocket. Outline the chest portion of the waders with the 1/8″ (3mm) 60° V-tool, removing sharp lines. Then cut in the collar and straps. Carve the buttons on the shirt and sleeves. Add some folds to the waders, using the knife and a 1/2″ (13mm) #5 gouge. |
 |
Carving the AccessoriesStep 13Carve the reel. Draw the outline of the reel and carve the reel and handle shape. Sketch in the reel and outline it with the 1/4″ (6mm) 60° V-tool. Round the handle with the knife. Shape the reel and cut grooves in the center to give the illusion that it has fishing line on it. Drill a hole in the top part of the handle, and then insert the piece of bamboo skewer for the pole. Carve the skewer as necessary for fit and affix it in place with wood glue.
|
 |
Step 14Carve the fish. Draw the outline of the fish on the blank and carve the profile of the fish. Sketch a curved center line on the top of the fish, and then sketch the outside lines for the width. Shape the fish to the lines, removing sharp edges. |
 |
Step 15Detail the fish. Sketch the top and bottom fins and outline. Use the 1/8″ (3mm) 60° V-tool to refine the shape. Sketch in the gills and lower fin, and then outline with the V-tool and smooth over the sharp lines. Carve the mouth slightly open so you can drill a small hole and insert a string so the fisherman can hold the fish. |
 |
|
MATERIALS • Wood, such as basswood, 2-1/2″ (6.4cm) square: fisherman, 6″ (15.2cm) long • Wood, such as basswood, 3/8″ (1cm) square: fish, 1-3/8″ (3.5cm) long • Wood, such as basswood, 3/8″ (1cm) square: reel, 1-3/4″ (4.4cm) long • Bamboo skewer: fishing pole, 3-1/4″ (8.3cm) long • Marker: black • Acrylic paint, such as Americana®: black, burnt sienna, dark forest, light buttermilk, tomato red, uniform blue; such as Anita’s™: chocolate brown; such as Ceramcoat®: coral, leaf green, medium flesh, silver, yellow ochre • Boiled linseed oil • Mineral spirits • Finish, such as spray lacquer • Glue: cyanoacrylate (CA), wood • Cord or string |
TOOLS • Carving knife • #5 gouge: 1/2″ (13mm) • #9 gouges: 1/8″ (3mm), 1/4″ (6mm) • V-tools: 1/8″ (3mm), 1/4″ (6mm) 60° • Soft V-tool: 5/8″ (16mm) • Drill with bit: 1/16″ (2mm)-dia. • Paintbrushes: assorted • Dish soap, such as Dawn® • Stiff brush |
| About the Author |
|
Jim Hiser lives in Carlisle, Pa. and started carving in 2000. He is a Member and Past President of the Caricature Carvers of America. He is also a member of the West Shore Woodcarvers and Lancaster County Wood Carvers. |
 |
Get the Summer 2024 Issue Purchase the IssueFor more articles like this, subscribe to Woodcarving Illustrated magazine. Magazine SubscriptionPlus! Get digital mini magazines in your e-mail between printed issues.
|