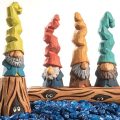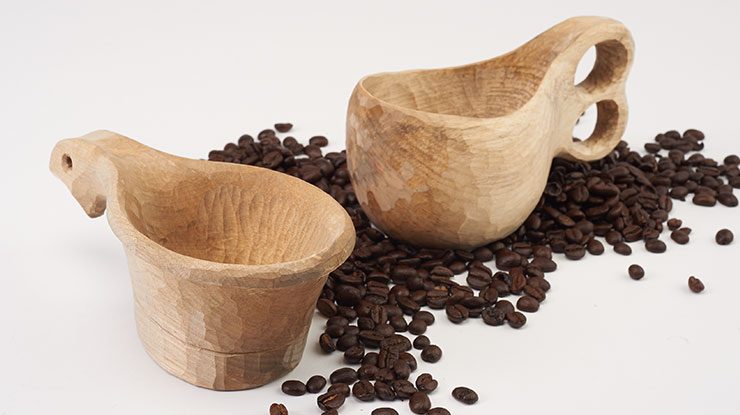
Rustic cup is traditional, functional, and sensible
By Rick Wiebe
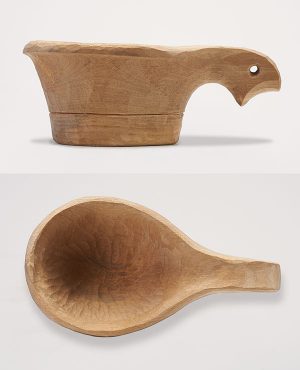
I carved my first wooden cup (called a kuksa in Finland and a kasa in Sweden) 30 years ago on a backpacking trip in the northern Canadian Rockies. The cup, which I made for a friend who had lost a plastic one, was pretty crude, but it was steeped in history. French Canadian canoe men who made their living in the fur trade during the 1600s and 1700s were called “voyageurs.” They carved their own cups from birch burls, and one cup lasted a lifetime for them. There are advantages to wooden cups. Recent scientific studies indicate that wood has antibacterial properties, which makes it more hygienic than plastic. Also, you will have a hard time burning your lips on a wooden mug. If you wish to carve your wooden cup outside, try building a carver’s frame to be able to carve any project in your own backyard!
Getting StartedWhile a birch burl can be difficult to carve, it would be the most durable and crack-resistant material for a cup. Because burls are hard to find, I carve my cups from regular birch. Softer varieties of maple, as well as alder, willow, or even tulip poplar, will also work. Make sure that the piece you choose is from one side of the center of a log. Do not have any pith (the very center of the tree) in the blank, or the cup will crack. Orient the blank so the bottom of the cup is toward the center of the log. I usually use green wood for this and keep the blank in a plastic bag between carving sessions to keep it from drying out until I finish carving. Then, I keep the cup in a paper bag to allow it to dry slowly. Using this technique, I have never had a cup crack. Trace the pattern onto the blank and rough out the cup. I roughed out this blank on a band saw, but I have also roughed out several with an axe and bush saw. Then, draw a centerline on the blank. Sketch the inside hollow of the cup. Note that this project can be carved with a pocketknife, but using additional tools (if available) makes it easier. |
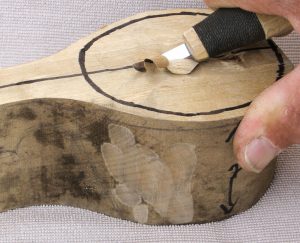 |
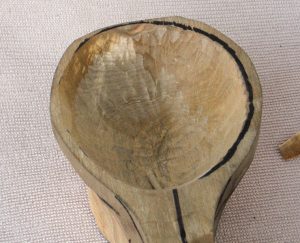
Roughing Out The ShapeStep 1 Hollow the inside of the cup. You can use a variety of tools to hollow the inside of the cup. While a pocketknife will work, a bent knife is easier. To speed up the hollowing, use a drill with a Forstner bit or use a variety of straight and bent gouges. |
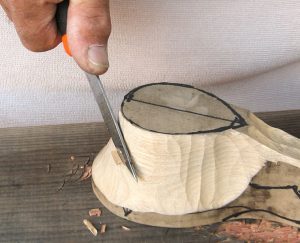 |
Step 2
Shape the outside of the cup. Sketch the shape onto the outside and remove the excess wood with a knife or gouge. I turn the cup over and carve down against a firm solid surface (not your leg). |
 |
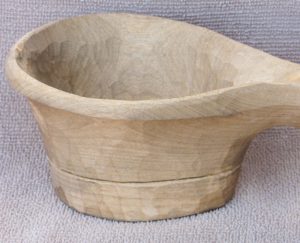
Refining the ProjectStep 3 Refine the cup. Smooth the inside of the rim with a knife to make it comfortable for your lips. Then, smooth and flatten the bottom to make sure the cup doesn’t tip when you set it down. |
 |
Step 4
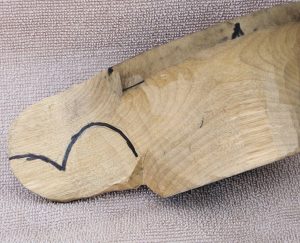
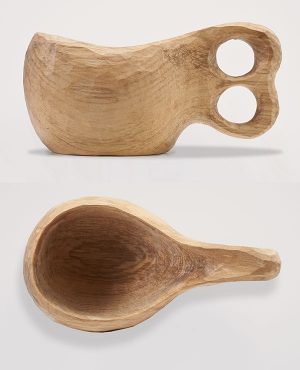
Rough out the handle. Sketch the handle shape onto the blank. Then, rough it out with a knife. |
  |
Step 5
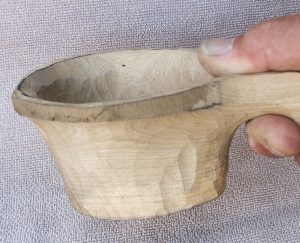
Refine the handle. Carve a small groove on the top of the handle for your thumb. Test the grip to make sure it’s comfortable as you hold it, and adjust it as needed. |
 |
Step 6
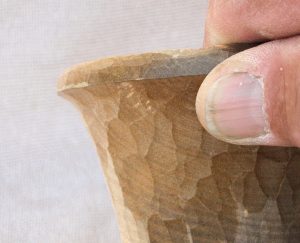
Finish carving the rim. Smooth the underside of the lip, and angle it slightly to create a comfortable surface for your lower lip. Then, round the top to make it comfortable for your top lip. |
 |
Step 7
Add the details. I carved a small groove around the bottom to dress up the cup a bit. I also drilled a hole in the handle for a hanging cord. But you could also let the wood dry thoroughly (as described above), and then make it an ongoing project to decorate the cup on the trail. Just be sure to sign and date it! |
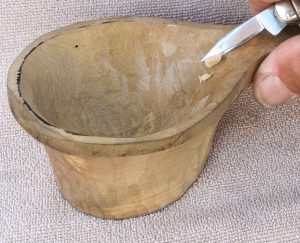
Finishing the Wooden CupI’ve finished several wooden utensils and cups by boiling them in beeswax (outside on a camp stove). None of the objects I have treated this way have ever cracked, even when used with extremely hot fluids. You could also saturate the cup with flax seed oil, mineral oil, or walnut oil, which are all food-grade oils and will not turn rancid like many vegetable oils. |
 |
 |
|
MATERIALS • Birch, 2 1/2″ (64mm) thick: 3 1/2″ x 6″ (8.9cm x 15.2cm) • Finish, such as beeswax, flax seed oil, mineral oil, or walnut oil |
TOOLS • Band saw or axe and bush saw • Drill with Forstner bit (optional) • Knives: carving, hooked • Gouges (optional): assorted deep and shallow, short bent • Camp stove (optional) |
| About the Author |
|
Rick Wiebe lives in Westbank, B.C., Canada, with his wife of 45 years. He spends the colder months in the warmer parts of the U.S. He has been carving for 60 years and has spread his enthusiasm to children and adults in classes and demonstrations in many venues. He is the author of Adventures in Fan Carving and Whittling Flutes and Whistles, as well as several magazine articles. |
 |
Get the Summer 2023 Issue Purchase the IssueFor more articles like this, subscribe to Woodcarving Illustrated magazine. Magazine SubscriptionPlus! Get digital mini magazines in your e-mail between printed issues.
|