Learn about uncommon tools, ideal woods, and a game-changing technique
By Joseph A. Savarese
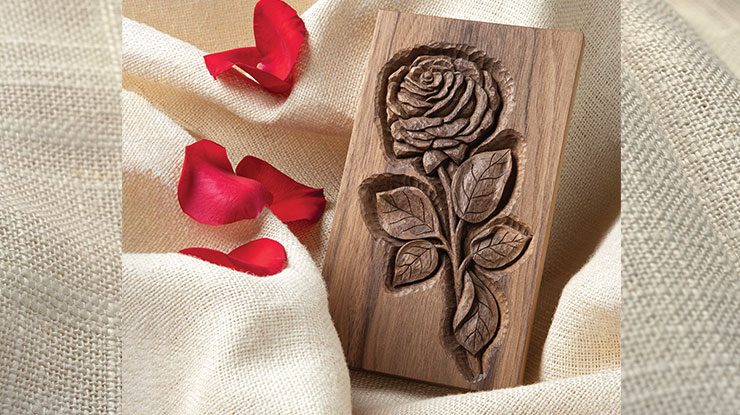
If you’re just getting started with relief carving, there’s a lot to take in. My goal in this article is to introduce approaches to design, woods you can try other than common basswood, useful techniques, and non-traditional carving tools on the market. As you pick up new tricks and techniques, be sure to stuff them into your pockets and carry them with you throughout your carving journey. You can even merge them with your own creations to form a unique carving style! I chose a rose as the subject, as it’s a popular flower and was my mother’s favorite. However, you can apply these techniques to any subject.
Safety NoteA carving safety glove was not used for this project because the project was clamped to my workbench and my hands were holding the tool in use. If your hand(s) will be in harm’s way, please wear a safety glove. |
Getting StartedWhen designing any pattern, I use the following supplies: graph paper, a ruler, mechanical pencil (to keep the lines consistent), a drawing kneaded eraser (it’s easy to shape to get into tight spots), tracing paper, a light box, calipers (perfect for transferring measurements), and lots of photos of the subject. Nature is one of the best sources for ideas; barring that, search the internet for photos you can use as inspiration. Once you land on a subject, sketch it out and refine it until you are happy with the shape and level of detail. |
Wood SelectionWhen designing a new carving, ask yourself if you plan on painting the piece or taking advantage of the wood’s natural appearance. If I decide I will paint it, then basswood is my top choice. If I’m keeping it natural, mahogany and walnut are great options. BasswoodMost woodcarvers in the United States enjoy using this wood. Its real name is linden or lime wood (which it’s regularly called in Europe). With its straight, fine, and even-textured grain, this lumber holds detail extremely well, making it a pleasure to carve and paint, but not stain. Due to the wood’s properties, if staining is not done carefully, the piece that you spent so much time and dedication on will come across as uneven and blotchy. If you decide to use a traditional stain, apply a wood conditioner first. Mahogany Mahogany has excellent carving properties and accepts finishes well. It’s strong, stable, and a pleasure to carve because it holds detail nicely. Due to overharvesting and high demand, it’s pricey compared to other woods on the market. Black Walnut Widely available and classified as a hardwood, black walnut has an extremely high resistance to denting, and it’s hard, strong, and stable. It is a pleasure to carve with hand and power tools provided the woodgrain is straight. It holds detail well and looks beautiful when finished. |
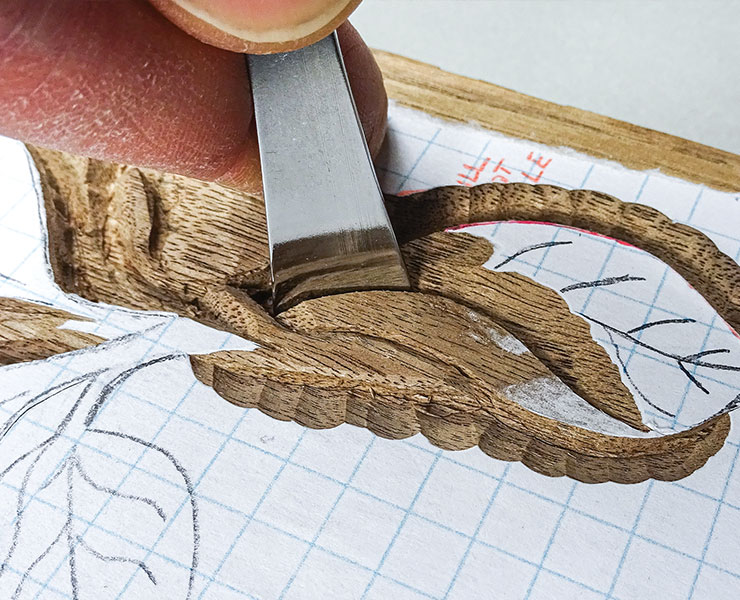
Pattern TransferWhen it comes to transferring the pattern to the wood, I recommend one of three techniques: (1) Using a craft glue stick, apply the pattern directly to the wood. With this technique, you need to sand off the excess paper and glue before applying the finish. (2) Place a sheet of graphite transfer paper between the wood and the pattern, using blue painter’s tape to hold into place. Then, using a stylus tool or ballpoint pen (a pencil may tear the pattern), trace the pattern, transferring the image onto the wood. (3) Use a pounce wheel tool to carefully trace over the pattern. This tool will leave tiny indentations in the wood. Then, using a pencil, connect these tiny indentations to reveal the blueprint image. |
TIP: Ebony and IvoryGraphite transfer paper comes in black and white. Use white to transfer images to darker woods so you can easily see the image. |
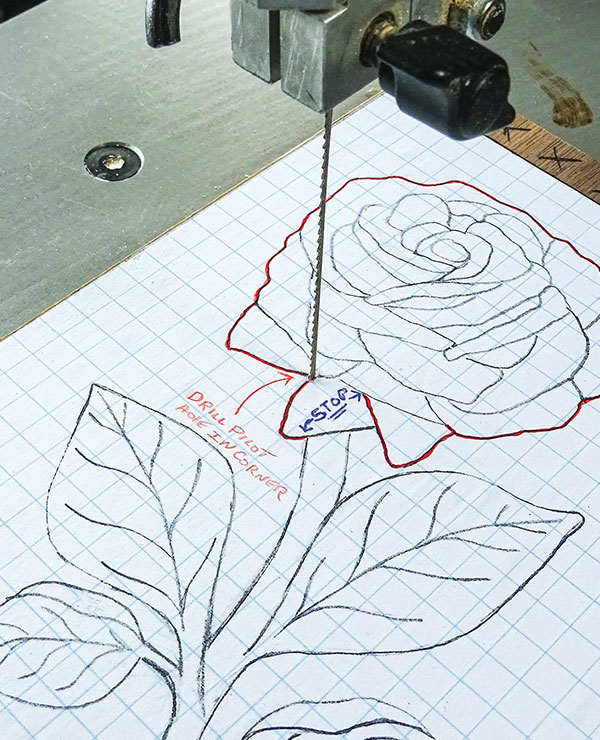
Developing a Unique Deep Relief EffectWhen it comes to carving wood that is harder than basswood, I use a unique approach to assist me in making deep, steep angled cuts. Using a saw with a thin, small blade, I generate a stop cut all the way through the wood’s thickness. You can add more or less piercing in your work; just make sure you’re leaving enough wood to maintain stability around the edges of the carving (for example, piercing too much around the perimeter of the leaves will weaken them). To start this process, drill a pilot hole directly down (90°) into the wood, feed the blade through the hole, and clamp into the tool that you plan on using. Note: Coping saws and some scroll saws use blades with a pin on both ends (known as pin-end blades). Match your pilot hole to the size of the blade you are using. There are three ways to accomplish this technique: |
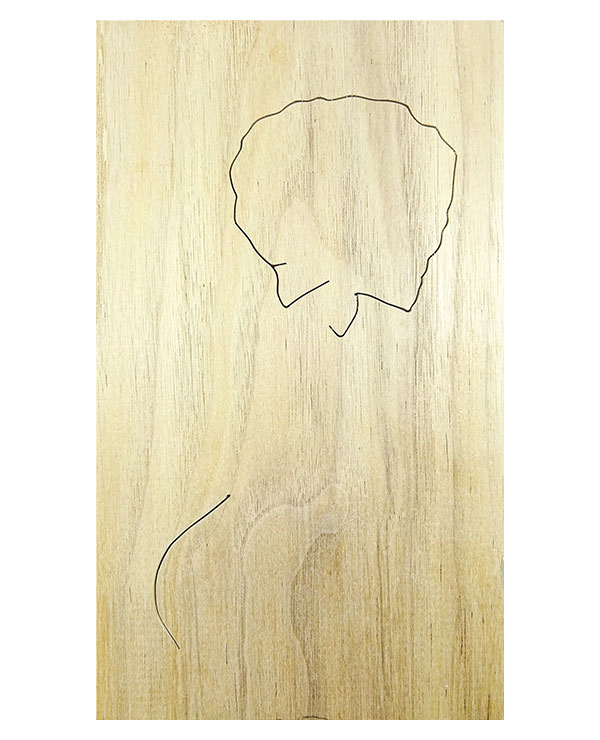
Scroll piercing lines through the blank to serve as stop cuts. |
Scroll SawThe scroll saw allows you to cut quickly and easily. Compared to coping and fret saws the scroll saw has a larger throat size. That’s the distance between the blade and the frame of the tool. Having a deep throat size on the saw will allow you to maneuver the project freely while you cut. However, it costs more than the fret or coping saw, and requires space and electricity to operate. |
 |
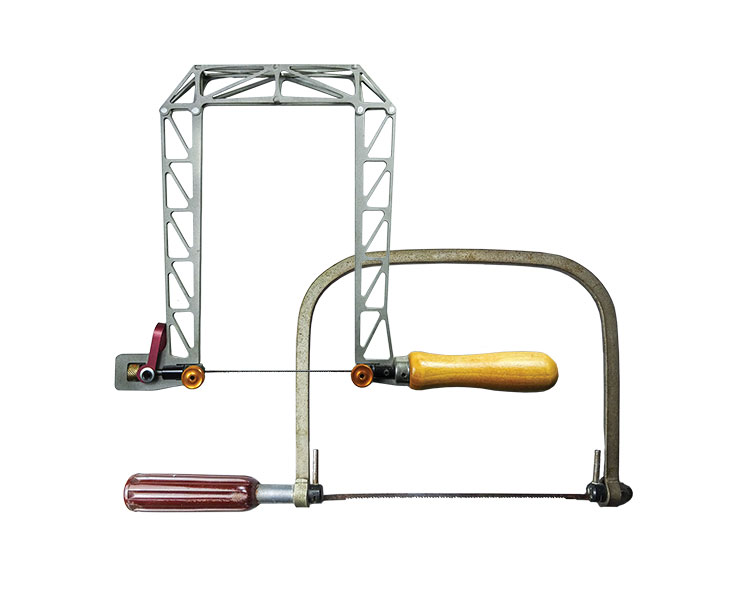
Fret SawFret saws accept pinless blades, allowing for small pilot holes. They’re capable of performing the same detailed, tight curve cuts that a scroll saw can make because the blades are thinner compared to coping blades. When using this tool, be aware of the throat size. Coping SawThe coping saw is an inexpensive tool. Compared to the scroll saw and fret saw, the coping saw is also better when working with thicker wood because the pin-end blades are more rigid. However, it does not accept pinless blades. The pin-end blades require you to make a larger pilot hole in your project to feed the blade through your work. When using this tool, be aware of the throat size. |
 |
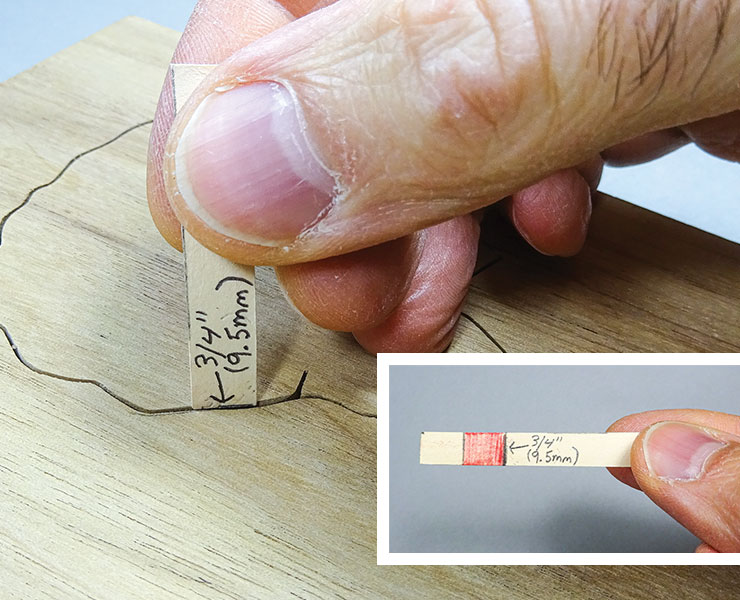
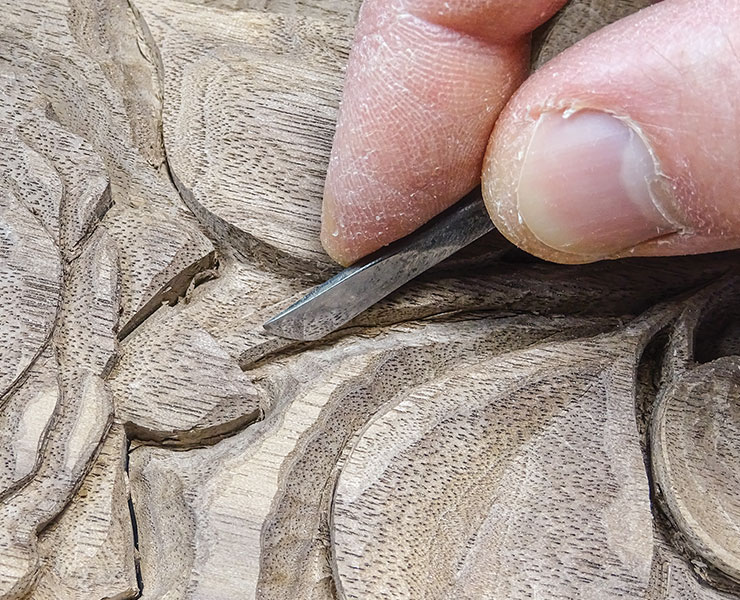
Carving the PerimeterWhen carving deep relief projects, it’s important to know how deep you are carving into the project, because wood expands and contracts based on temperature and humidity changes. If you remove too much wood from the background, your project can cup or warp, creating small cracks in the delicate portions of your carving. To minimize this process, just leave more wood than you take away and don’t carve lower than half the thickness of the wood. To help stick to these guidelines, I measure the depth as I carve by making a depth gauge from paper stock and making two marks on my gauge. One marks the thickness of the wood (in this case it’s 3/4″ [19mm]) and the other marks a little over half that height (3/8″ [10mm]). I then shade the upper portion red. Then, from the back of the plaque, I slide the gauge into the saw kerf with the 3/4″ (19mm) mark flush with the plaque. Then I view the gauge from the front of the plaque; if I don’t see red, that tells me I didn’t go past the halfway mark. Now, use #7-4, 1/4″ and 5/16″ (6mm and 8mm) sweep gouges to make the deep steep cuts around the rose (or equivalent sweep gouges). These cuts will generate nice shadows. To outline the rose leaves, make a stop cut using a knife or a gouge. I used various gouge sweeps throughout the carving, but used a #3 sweep gouge as the tool had the same curve as parts of the leaves. |
|
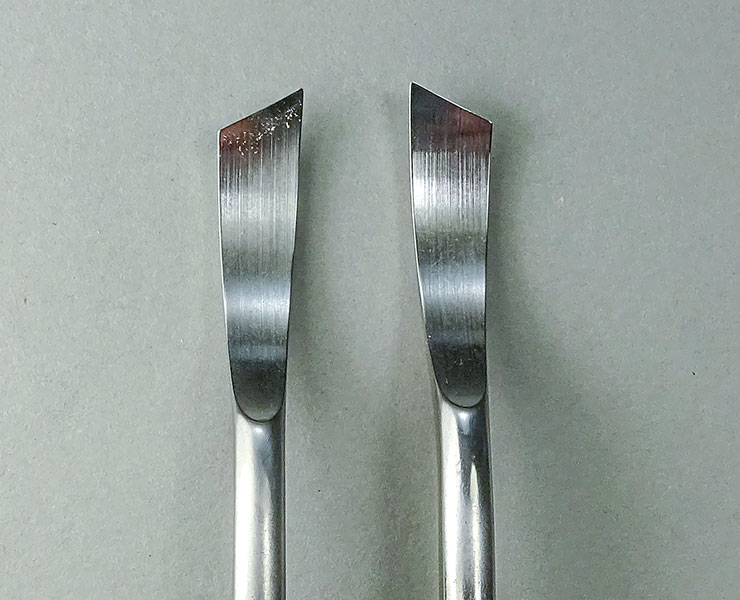
All About That BevelNew carving tools are usually shaped with a cutting angle of 19° to 25°. From experience, I find this angle range fine to carve the three woods previously discussed. If you face difficulty, it may be because the cutting-edge angle is too low, making it too weak to carve this wood. In this case, grind a steeper cutting angle on your tool, such as 25° to 30° or even higher. This will give you a more durable edge. Always test the tool on scrap wood to determine if the tool is cutting the way you would like it to. |
Specialized Carving ToolsDetail the rose. For this part, you can source specialized carving tools that can be used for relief carving from a range of specialty woodcarving tool manufacturers. Here are a few you may not have tried: |
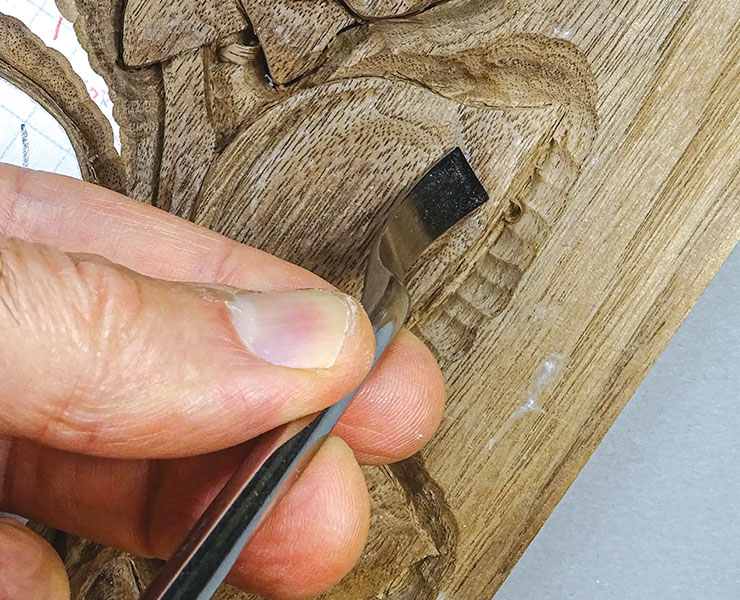
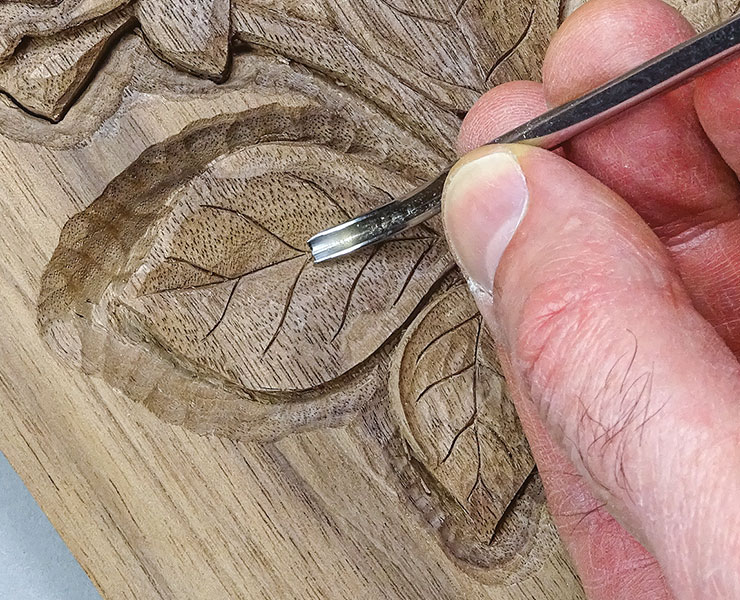
Skew ChiselIt’s such a versatile tool. An angled blade makes it easy to cut with and against the grain. The size of this 5/16″ (8mm) palm skew chisel allows me to get into tight areas, such as between the leaves. |
 |
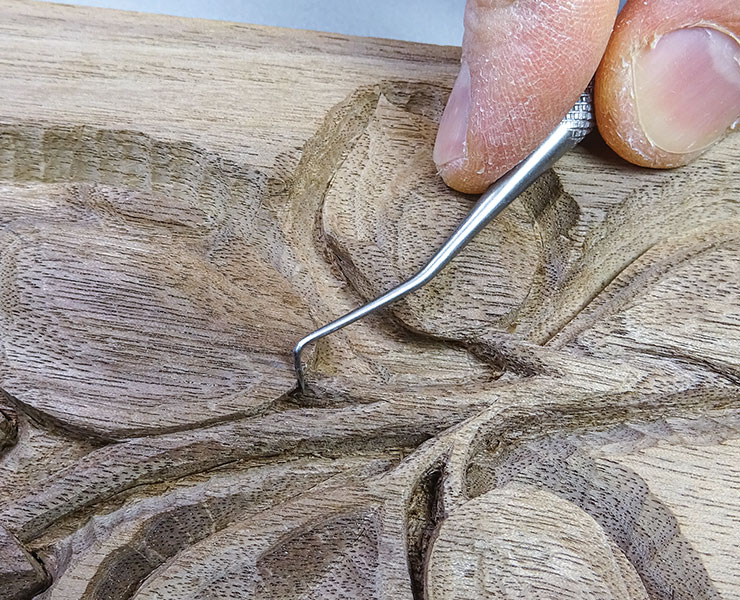
Dental PickThis is a great tool for reaching into all the nooks and crannies of your carving. |
 |
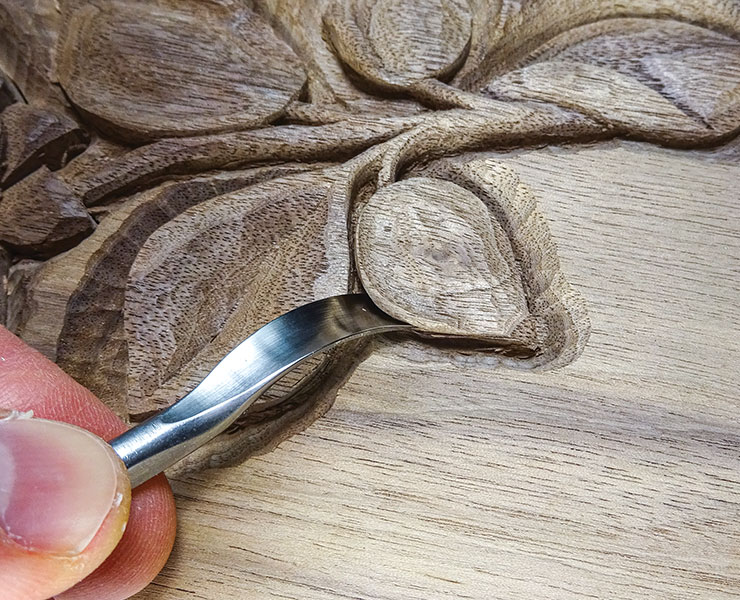
Spoon GougeWhen carving deep relief projects, I rely heavily on spoon gouges. The tool’s spoon-shaped design allows you to carve concave areas where traditional straight gouges won’t fit. The gouge’s design gives you less resistance, allowing you to glide easily through cuts. Since you are scooping into the wood, it’s better to make small, shallow cuts, slicing your way down to the depth, rather than making one aggressive cut. |
 |
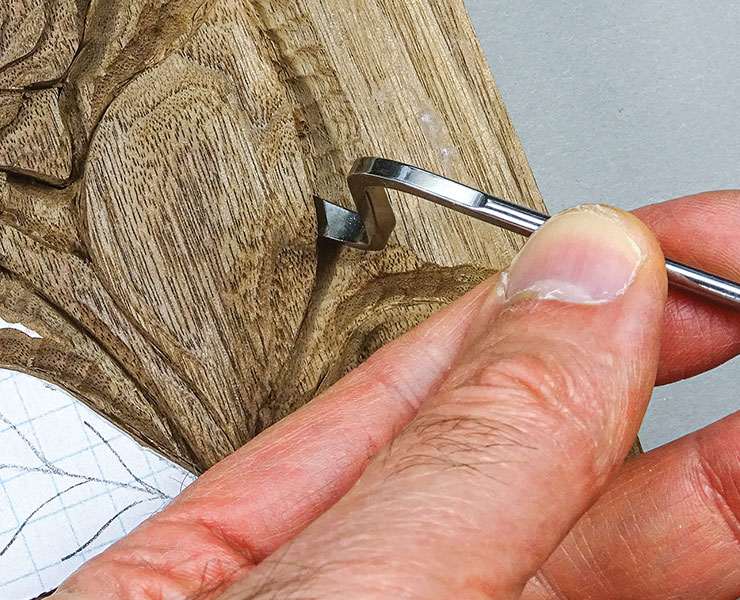
Back-Bent GougeThe back-bent gouge looks similar to the spoon gouge, except the cutting edge is reversed (convex instead of concave). This tool is excellent at removing wood on the underside of your piece. For example, when using it on the leaves, you can create deep undercuts, creating shadows and depth. |
 |
Skewed Spoon GougeLike the name suggests, it’s a skew chisel with a spoon’s shape—a fantastic tool for reaching deep into your carving to clean up those hard-to-reach angled corners with ease. If your budget allows it, I suggest purchasing these tools as |
 |
Dogleg Skew ChiselThis 90° bent skew chisel is perfect for leveling out the background of your relief carving or to reach into deep nooks and crannies. |
 |
Bent V-Parting ToolThis is like the traditional V-parting tool, except it has a spoon shape bent toward the cutting edge. This allows you to get into areas of the carving that a straight V-parting tool would not be able |
 |
TIP: Custom ToolsIf there is a tool you don’t see on the market that would help you with a specific project you’re working on, contact a blacksmith to get it specially made. You may even come across a blacksmith at a local carving show. For example, I needed a fishtail gouge with a deeper curve than any I could find online, so I had one custom-made by carving legend Harold Enlow. |
Sanding the CarvingPlace a sheet of 120-grit sandpaper on a flat surface and, while holding the plaque on its edges, carefully sand the entire front and back of the plaque, going in the direction of the grain. Depending on the pattern transfer technique you used, repeat this process (and vacuum the sawdust from the project frequently) until you remove all the residual pattern, glue, and/or pencil markings. Move to 150-grit sandpaper and repeat. During this process, you might unintentionally sand some of your carving. Look it over and fine-tune those areas. Then sign your work with a woodburner. |
Applying a FinishApply all finishes in a well-ventilated area, wearing disposable rubber gloves and appropriate eyewear. Always practice on scrap wood first to make sure you like the look. Here are a few that work well for the rose, as well as any relief carved in hardwood: Wipe-On PolyurethaneUsing a disposable paintbrush, apply a liberal amount of wipe-on polyurethane (satin or gloss, depending on your preference) and immediately wipe it off using a cotton rag. Use an additional disposable brush and/or rag to remove any excess puddling in the nooks and crannies. Allow the finish to dry, following the manufacturer’s instructions. Using very fine steel wool (grade #0000), carefully buff the finish and remove (with a vacuum or soft brush) any debris. Apply a second coat of wipe-on polyurethane using the technique previously described. Dispose of rags and brushes carefully; as the finish cures, it generates heat and can spontaneously combust. Boiled Linseed Oil and Howard Feed-N-Wax®Apply a liberal amount of boiled linseed oil over the entire carving using a disposable brush. Let it soak into the carving for about seven minutes and remove the excess by rubbing with a clean rag. Allow the finish to dry for at least three days. Dispose of the rags and brushes carefully for combustion safety. Then, apply Howard Feed-N-Wax® with a disposable brush. Let it set for at least 20 minutes, and then rub off the excess. Use an additional disposable brush and/or rag to remove any excess puddling in the nooks and crannies. Buff using a shoe brush and set aside to dry for two days. |
| About the Author |
|
Joseph A. Savarese was inspired to carve when, at age seven, he saw his Scoutmaster, Roy K. McGinnis, Sr., carve a deer from a block of sugar pine. Joe would like to express all his love to Patricia and Christopher. Without their love, support, and patience (especially when finding an occasional wood chip throughout the house), these five articles and counting wouldn’t exist. For more of Joe’s work or to view several how-to videos on woodcarving, visit his website at whittleandchips.com, his YouTube channel, MisterSplinters, or his Instagram @mistersplinters. |
 |
Get the Spring 2024 Issue Purchase the IssueFor more articles like this, subscribe to Woodcarving Illustrated magazine. Magazine SubscriptionPlus! Get digital mini magazines in your e-mail between printed issues.
|